You can configure the parameters that will be validated on the receipts. The basic information the application looks for includes: Date, Vendor Name, Currency, and Total, but you can modify the settings to enable stricter validation. To change the configuration, follow these steps:
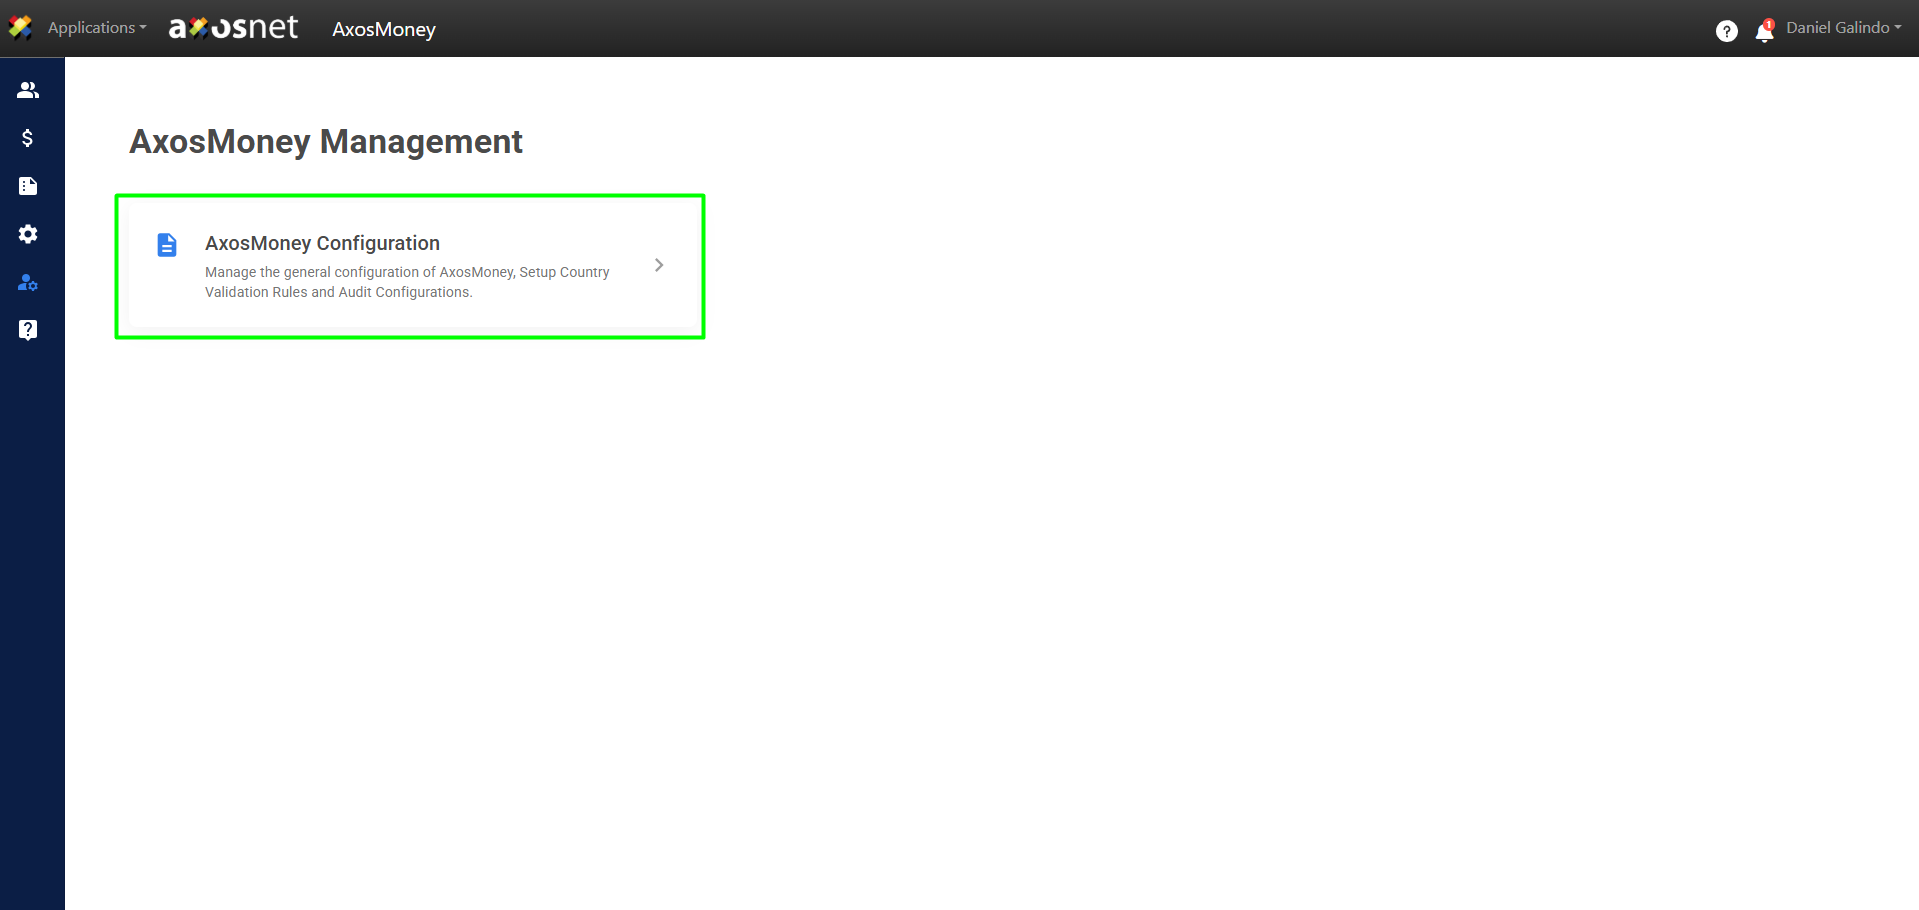
1. Go to the “Administration” section in the left-hand side menu and click on “AxosMoney Condiguration”.
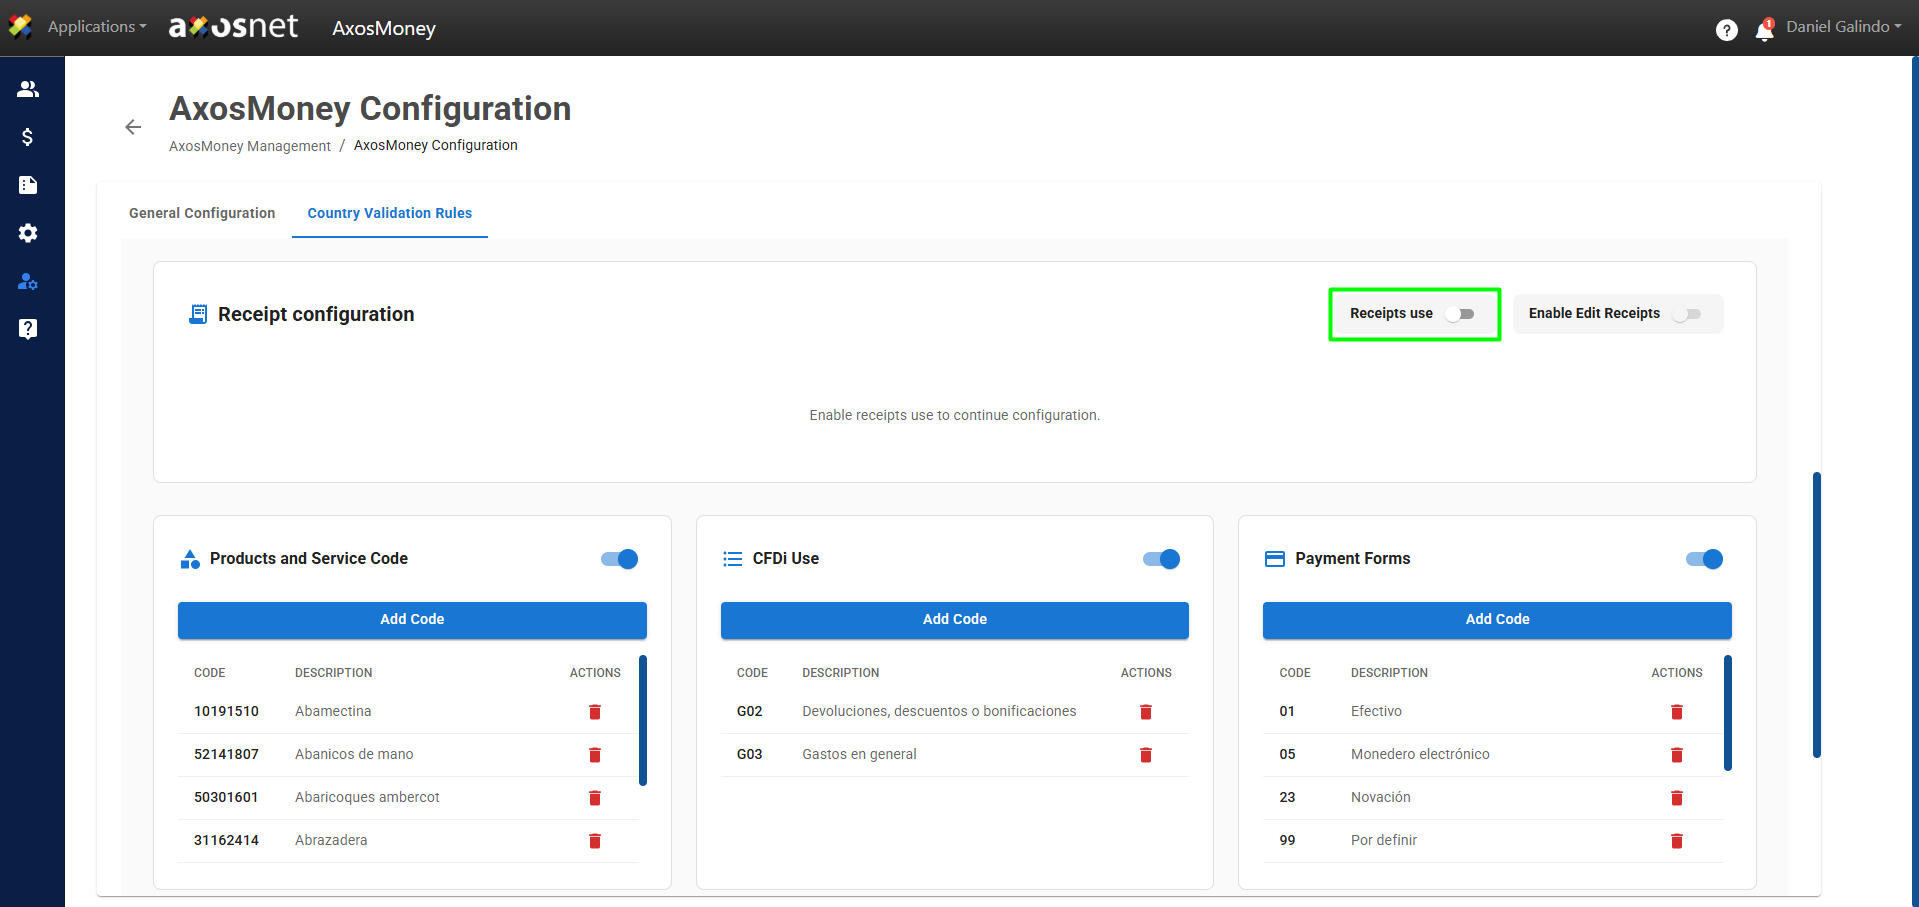
2. Select the “Country Validation Rules” tab.
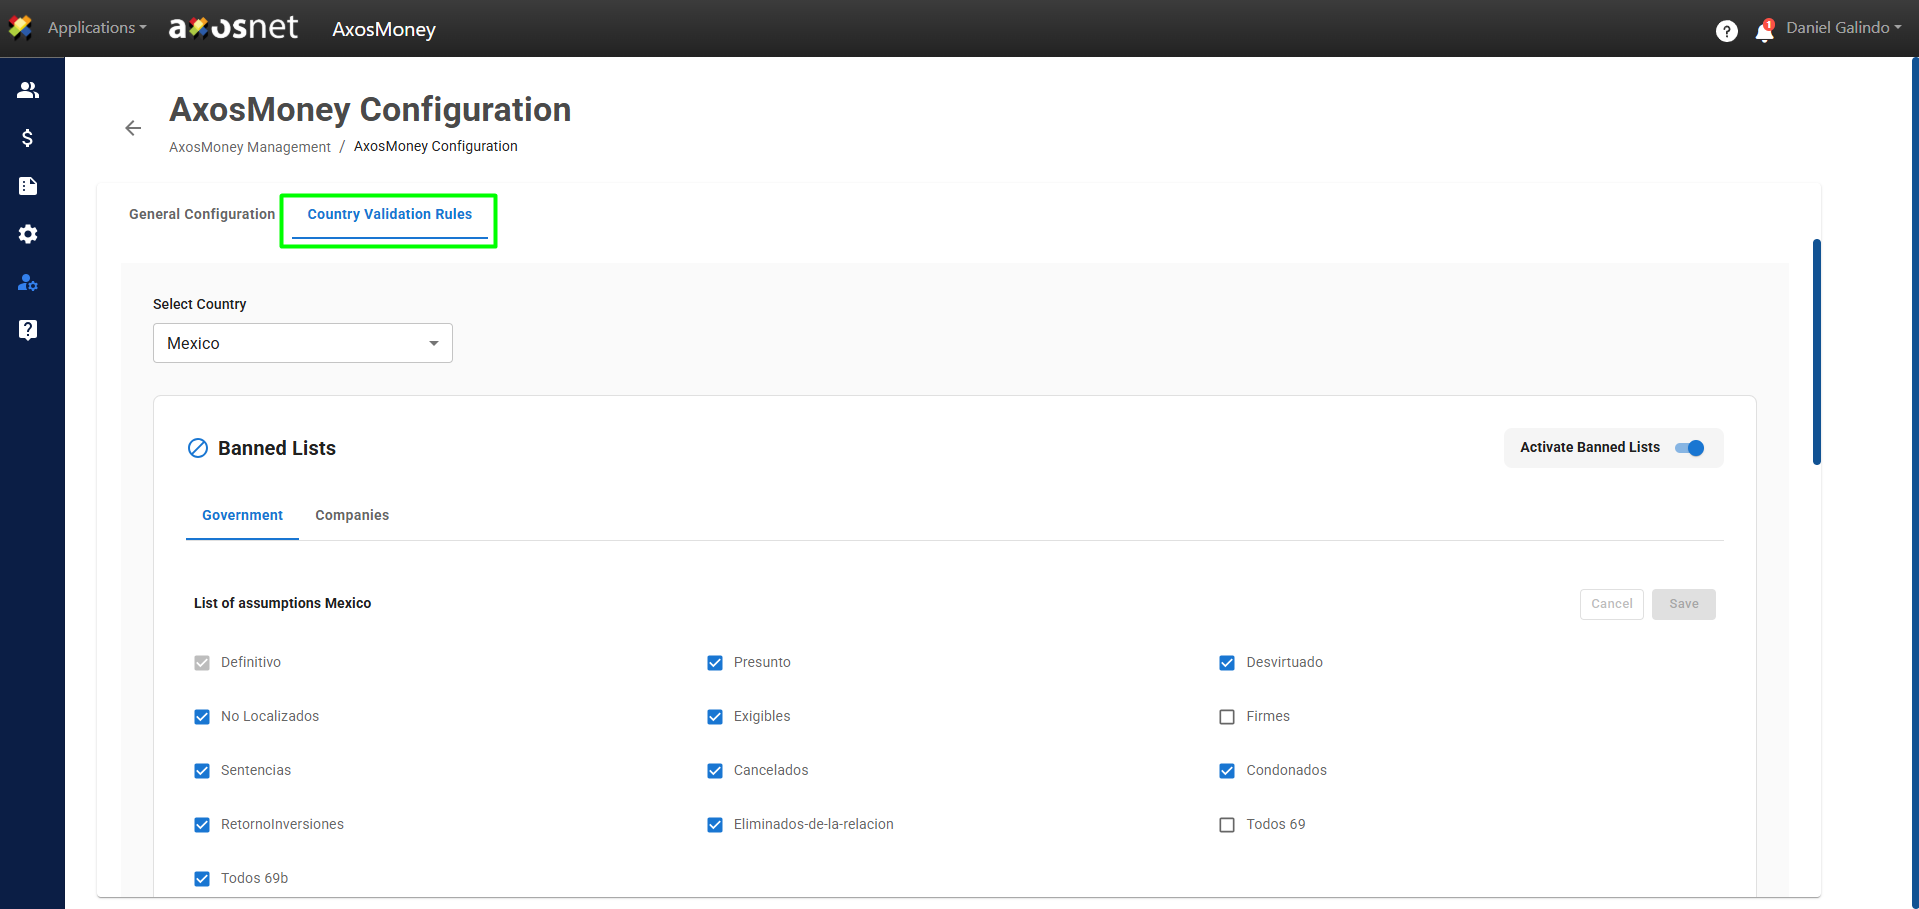
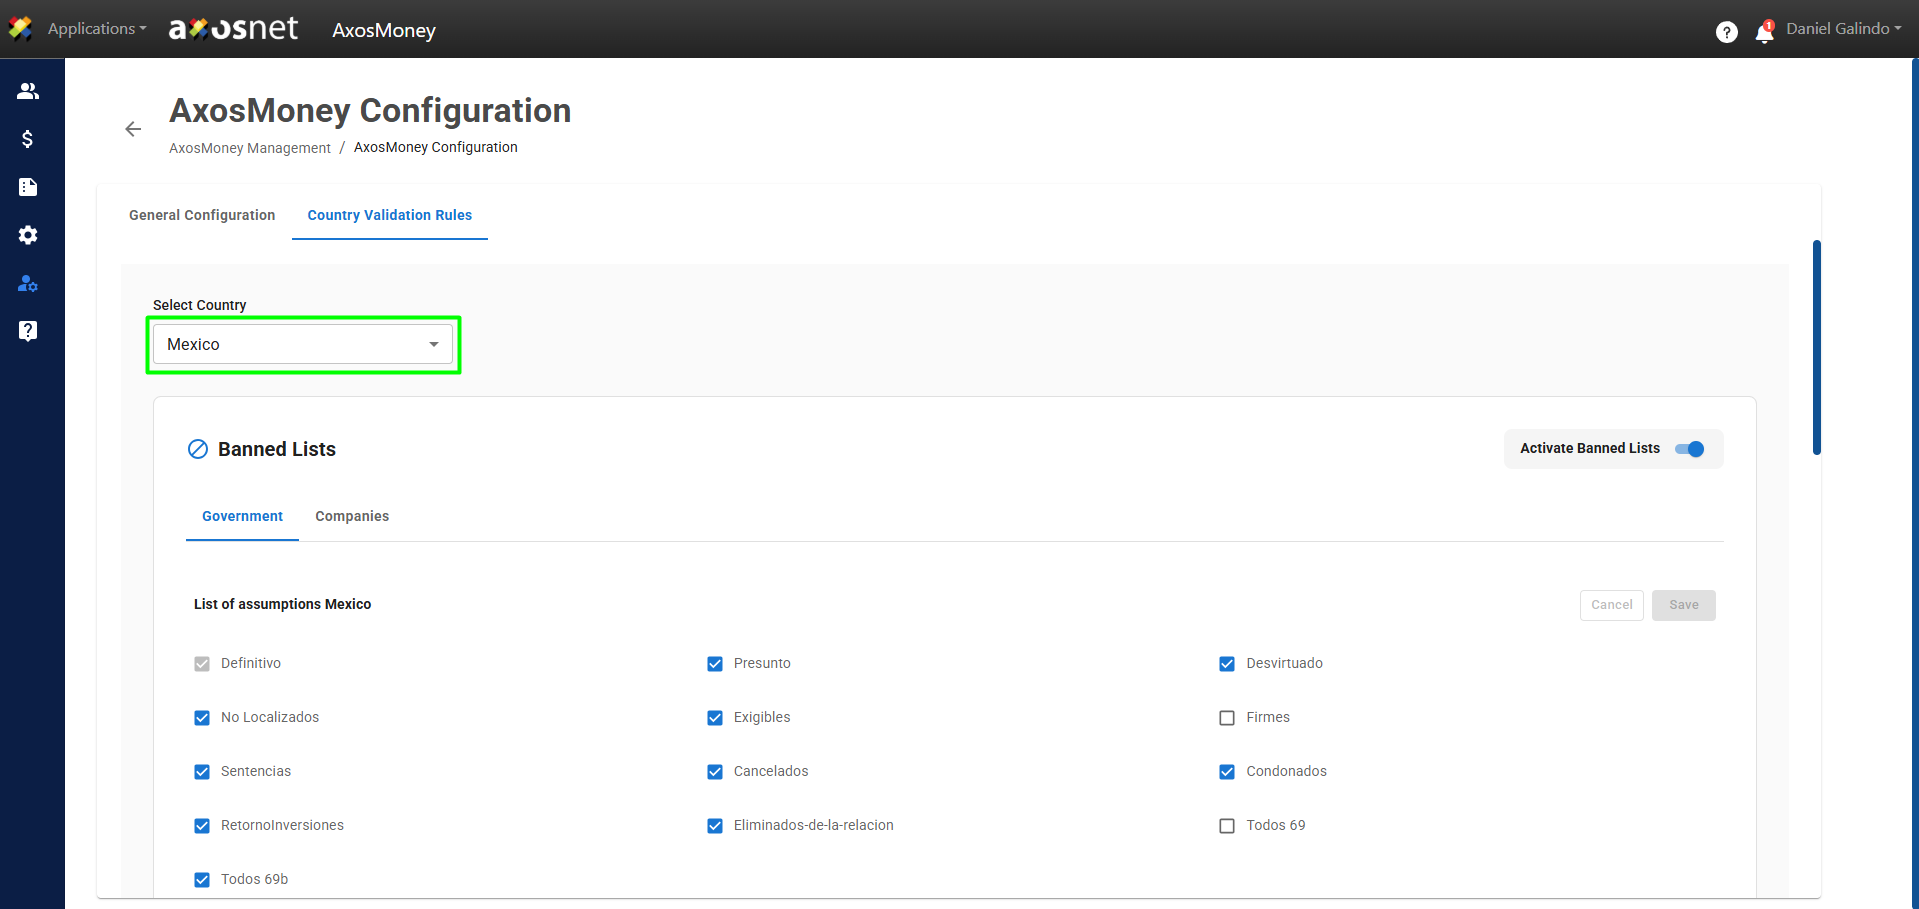
3. Select the country you want to configure.
To use this feature, your sales representative must enable the “Allow receipts” feature in ACS.
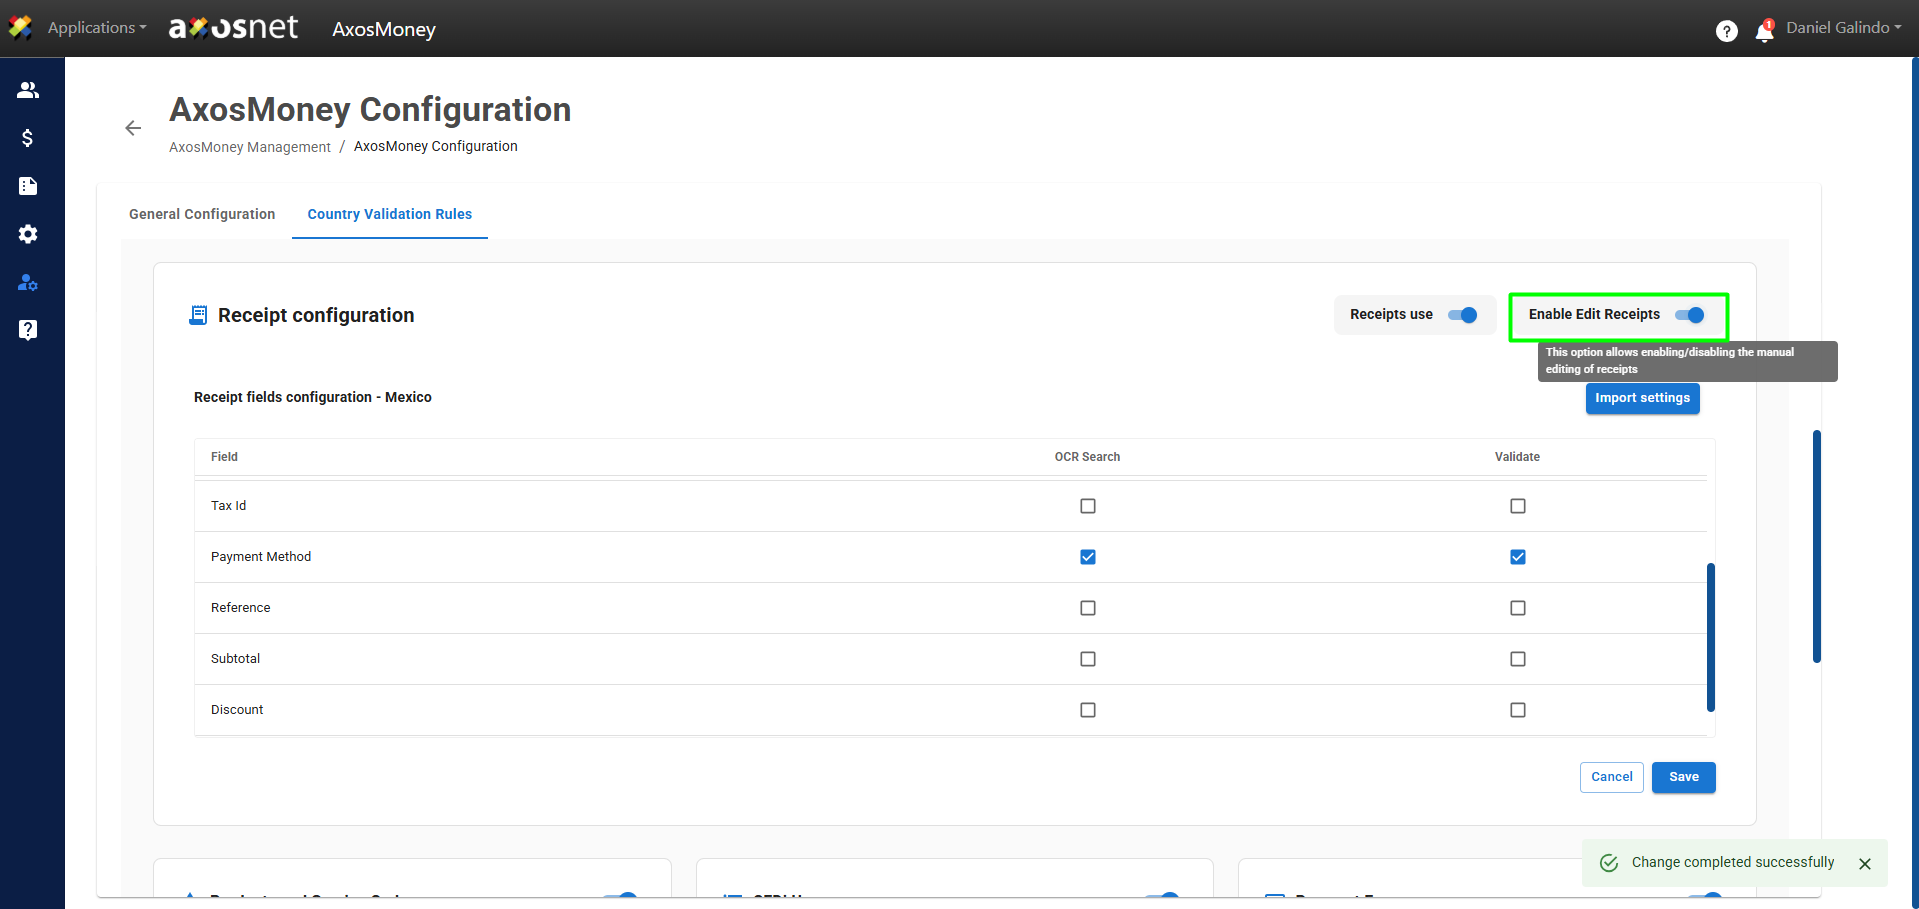
4. Scroll down to the “Receipt Configuration” section and enable the “Receipts use” option.
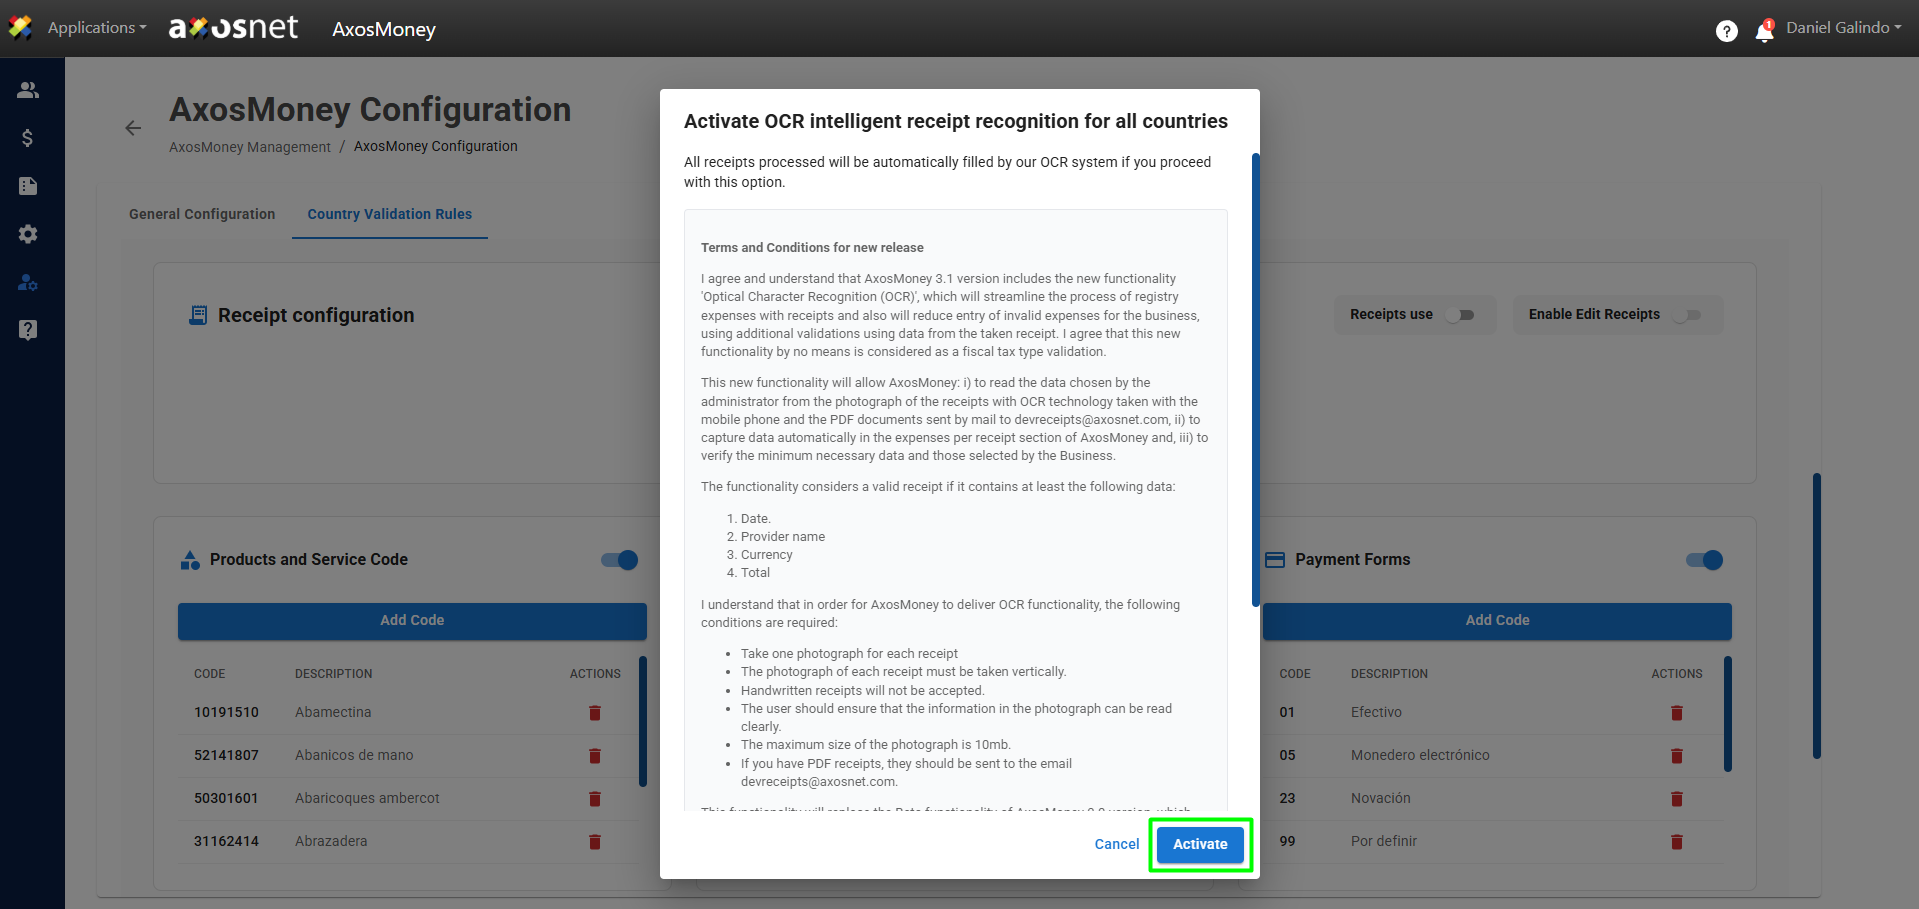
5. When you enable this feature, AxosMoney will open a window asking if you want to enable the OCR (optical character recognition) system. To continue, you must accept the terms and conditions. After checking the box, click the “Activate” button.
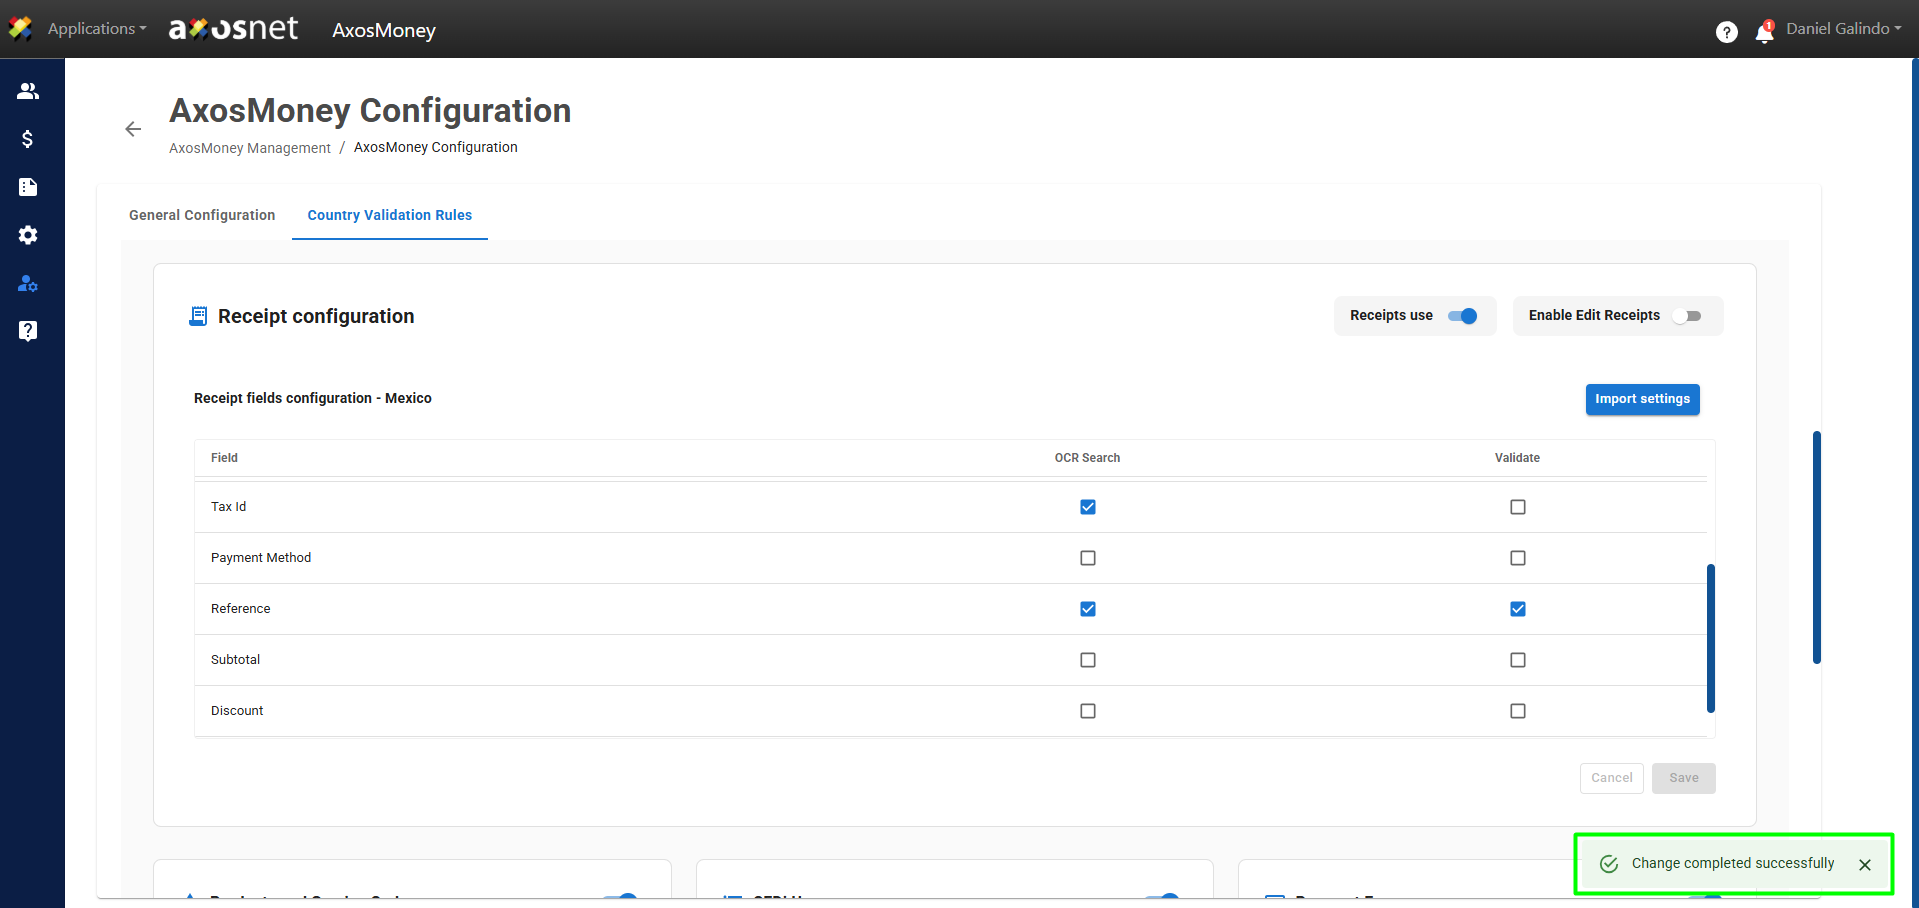
6. The “Receipts Use” option will then be enabled, and a confirmation message will appear.
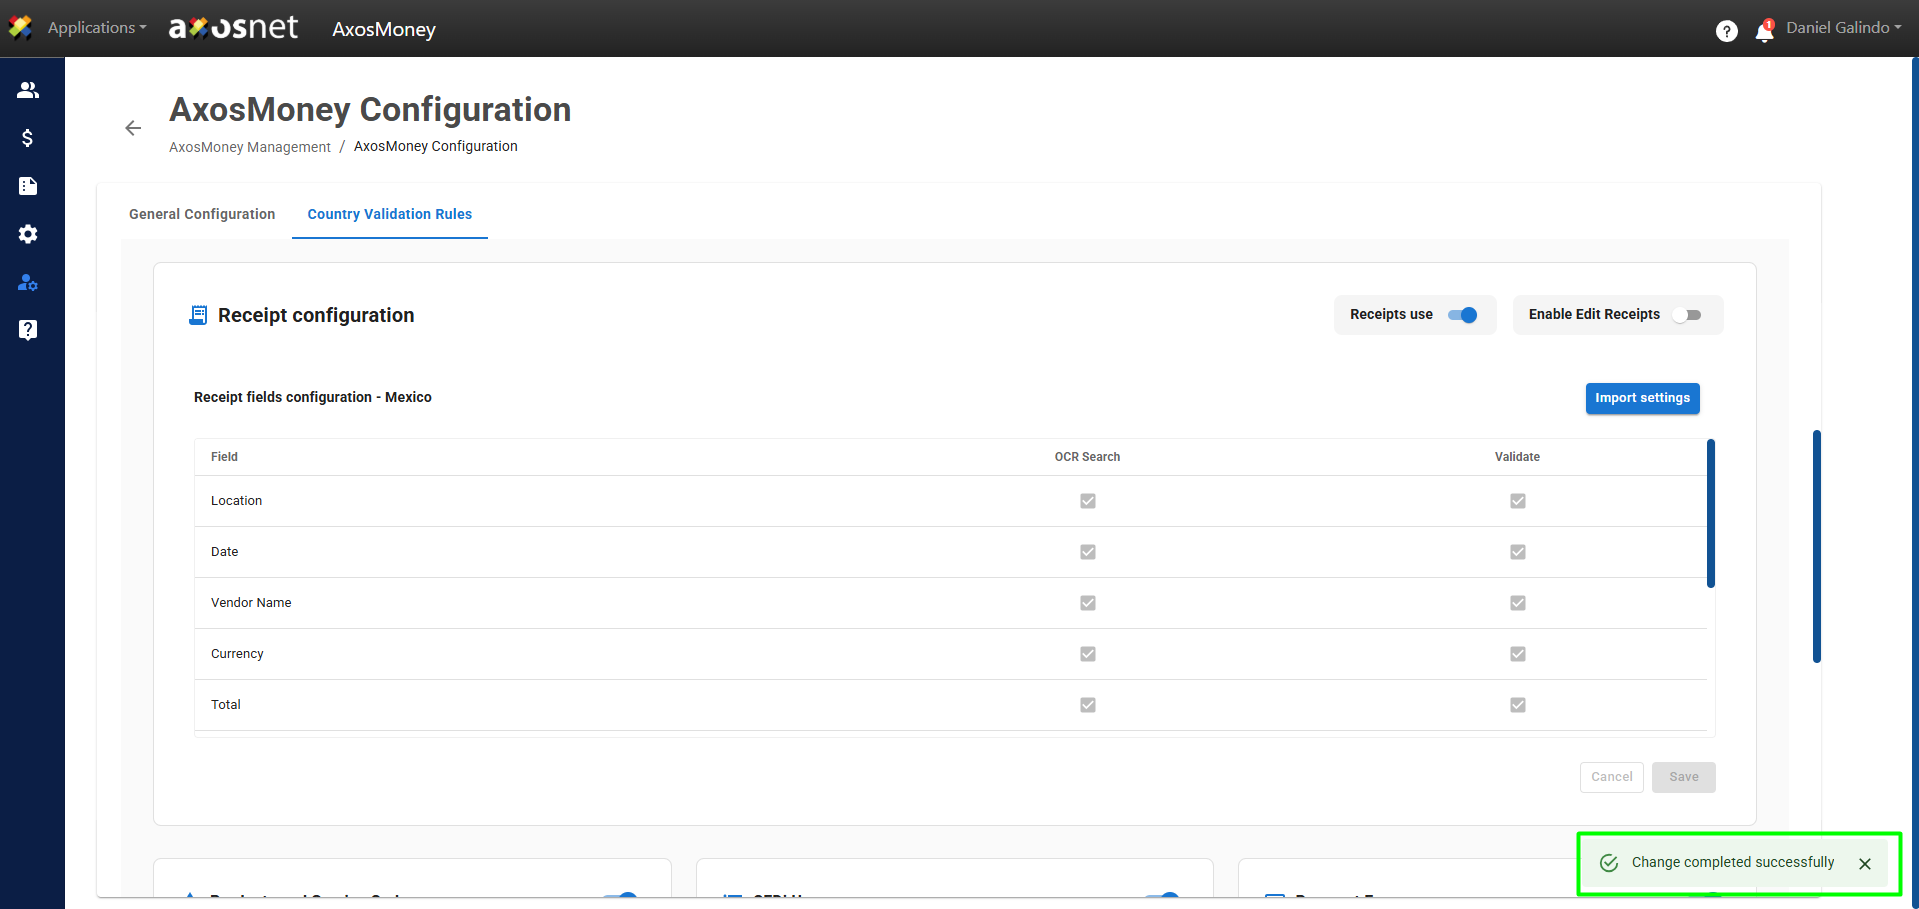
7. Depending on the country selected, a list of the standard fields typically found on a receipt will be displayed. Fields highlighted in gray cannot be modified. The remaining fields can be enabled or disabled for a specific search and/or OCR validation by selecting them and clicking Save.
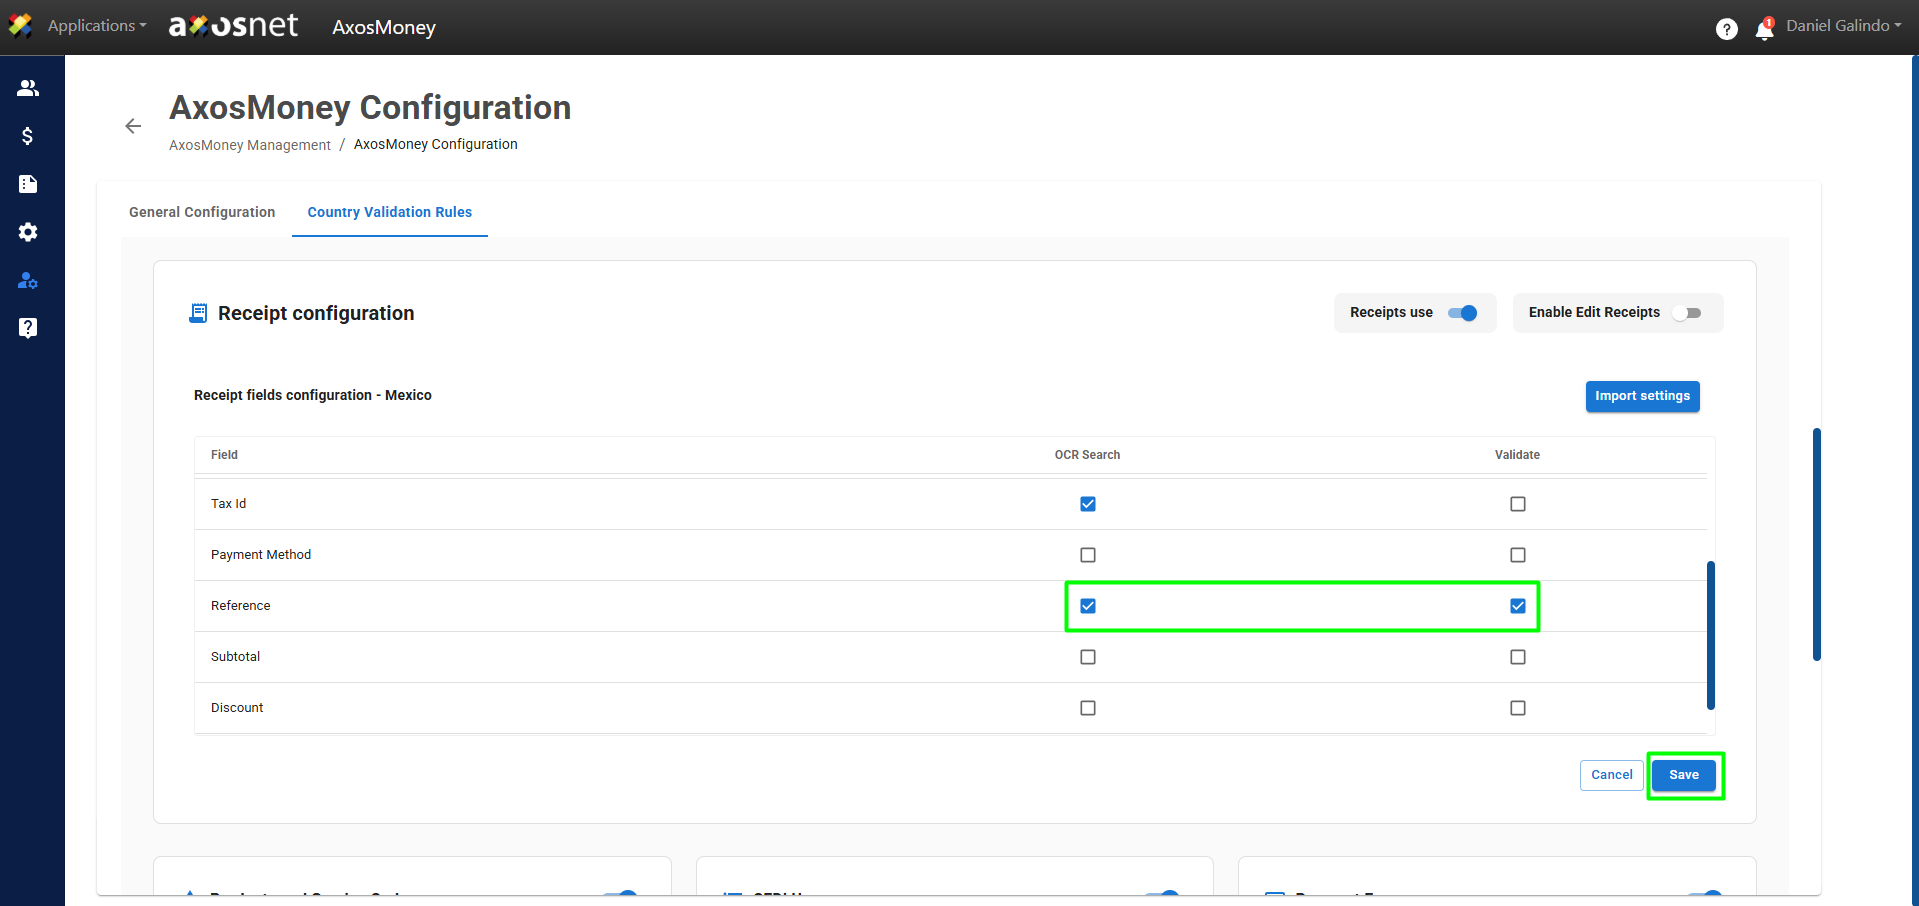
8. When you make changes and save them, a confirmation message will appear.
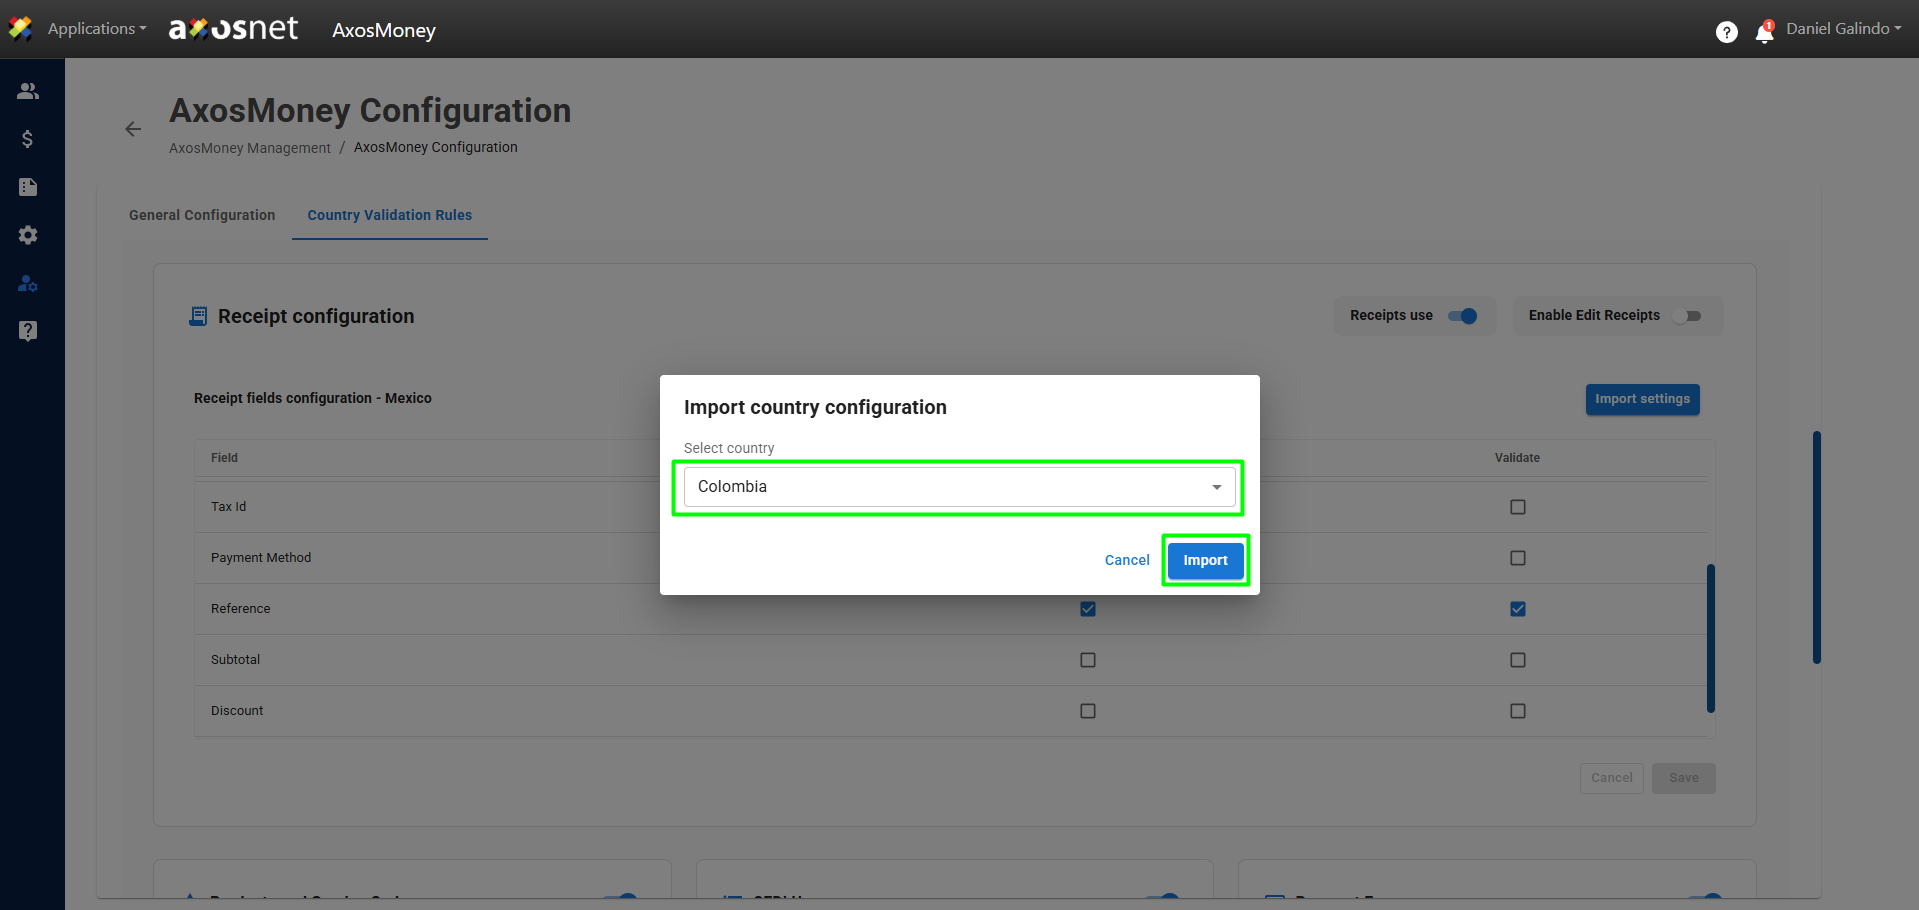
9. If you want to import settings from another country into your current country’s settings, you can click the “Import Settings” button.

10. Select the country to which the settings will be imported, and click “Save”.
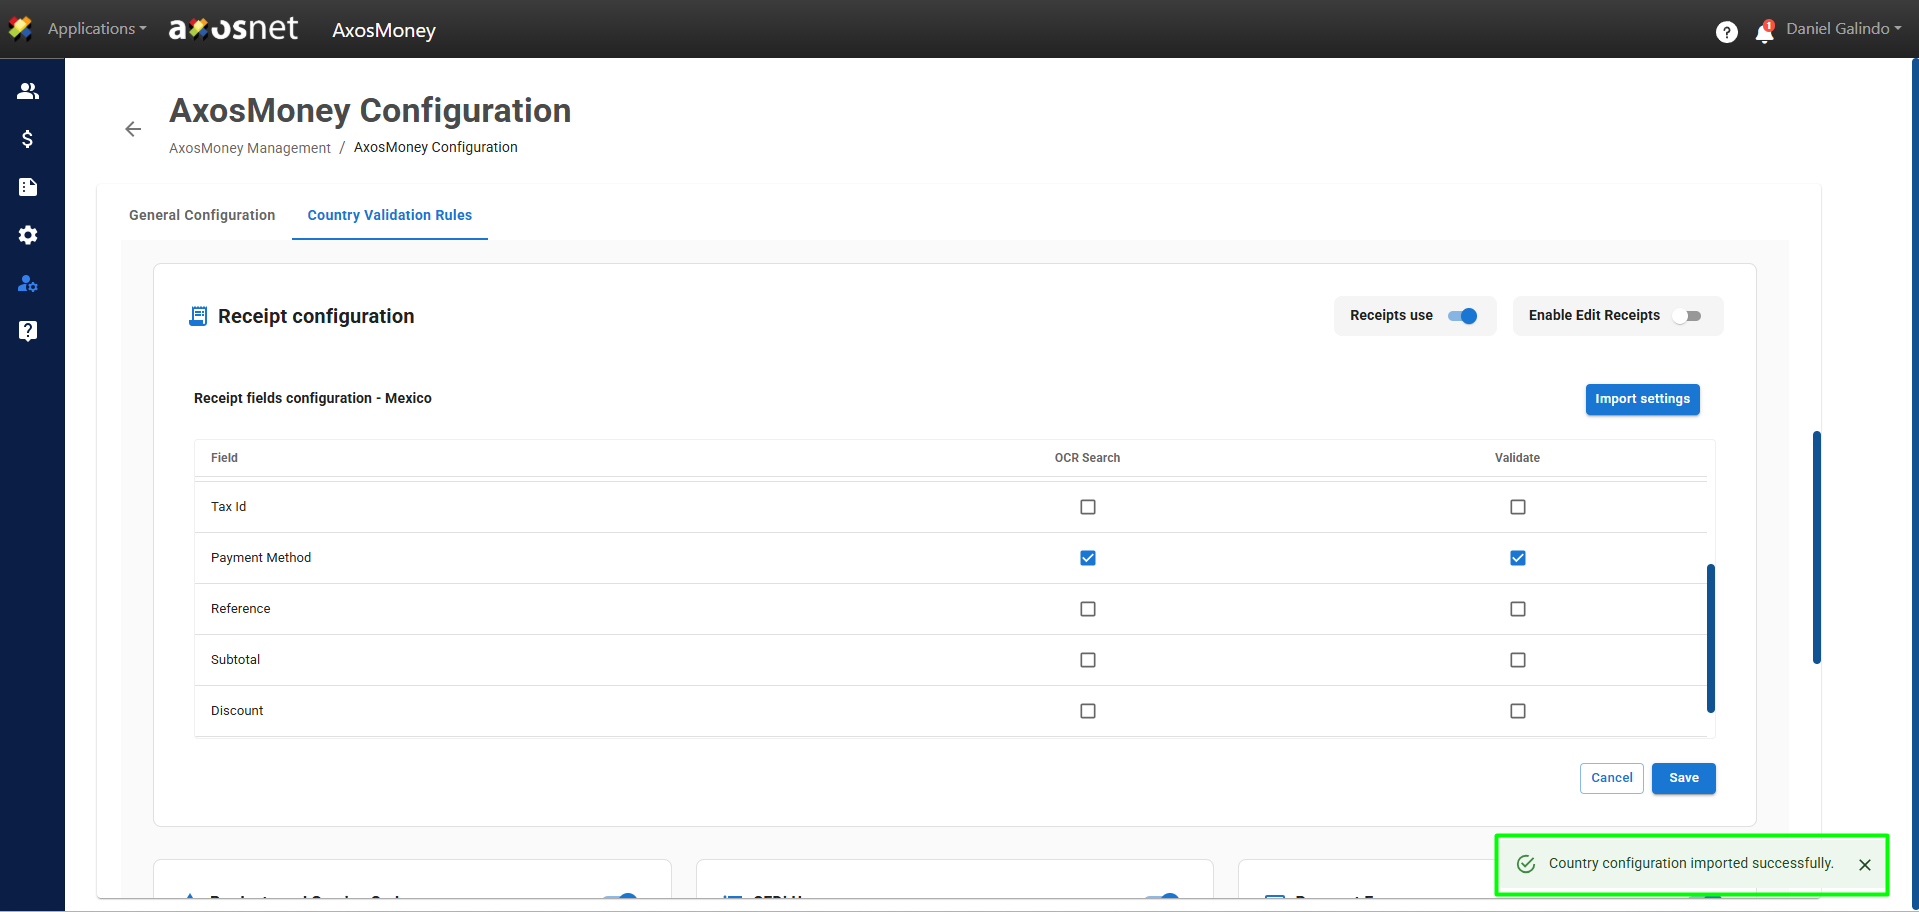
11. Once the settings have been imported from one country to another, a confirmation message will appear.
12. In this section, you can also enable Receipt Editing. This feature allows you to edit receipts if they are received as invalid.
Note: This feature can only be enabled from the AxosMoney web version, and receipt editing applies only to Android and iOS mobile platforms.