This section explains how to enable and disable Auto-Categorization Exclusions for invoices emailed to your AxosMoney app. When you enable auto-categorization for an expense type, your AxosMoney app will automatically categorize expenses if it detects that expense type. On the other hand, if you disable an expense type for auto-categorization, the AxosMoney app will categorize your expense with the “?” icon.
1. Go to the “Administration” section in the left-hand side menu and click on “AxosMoney Configuration.”
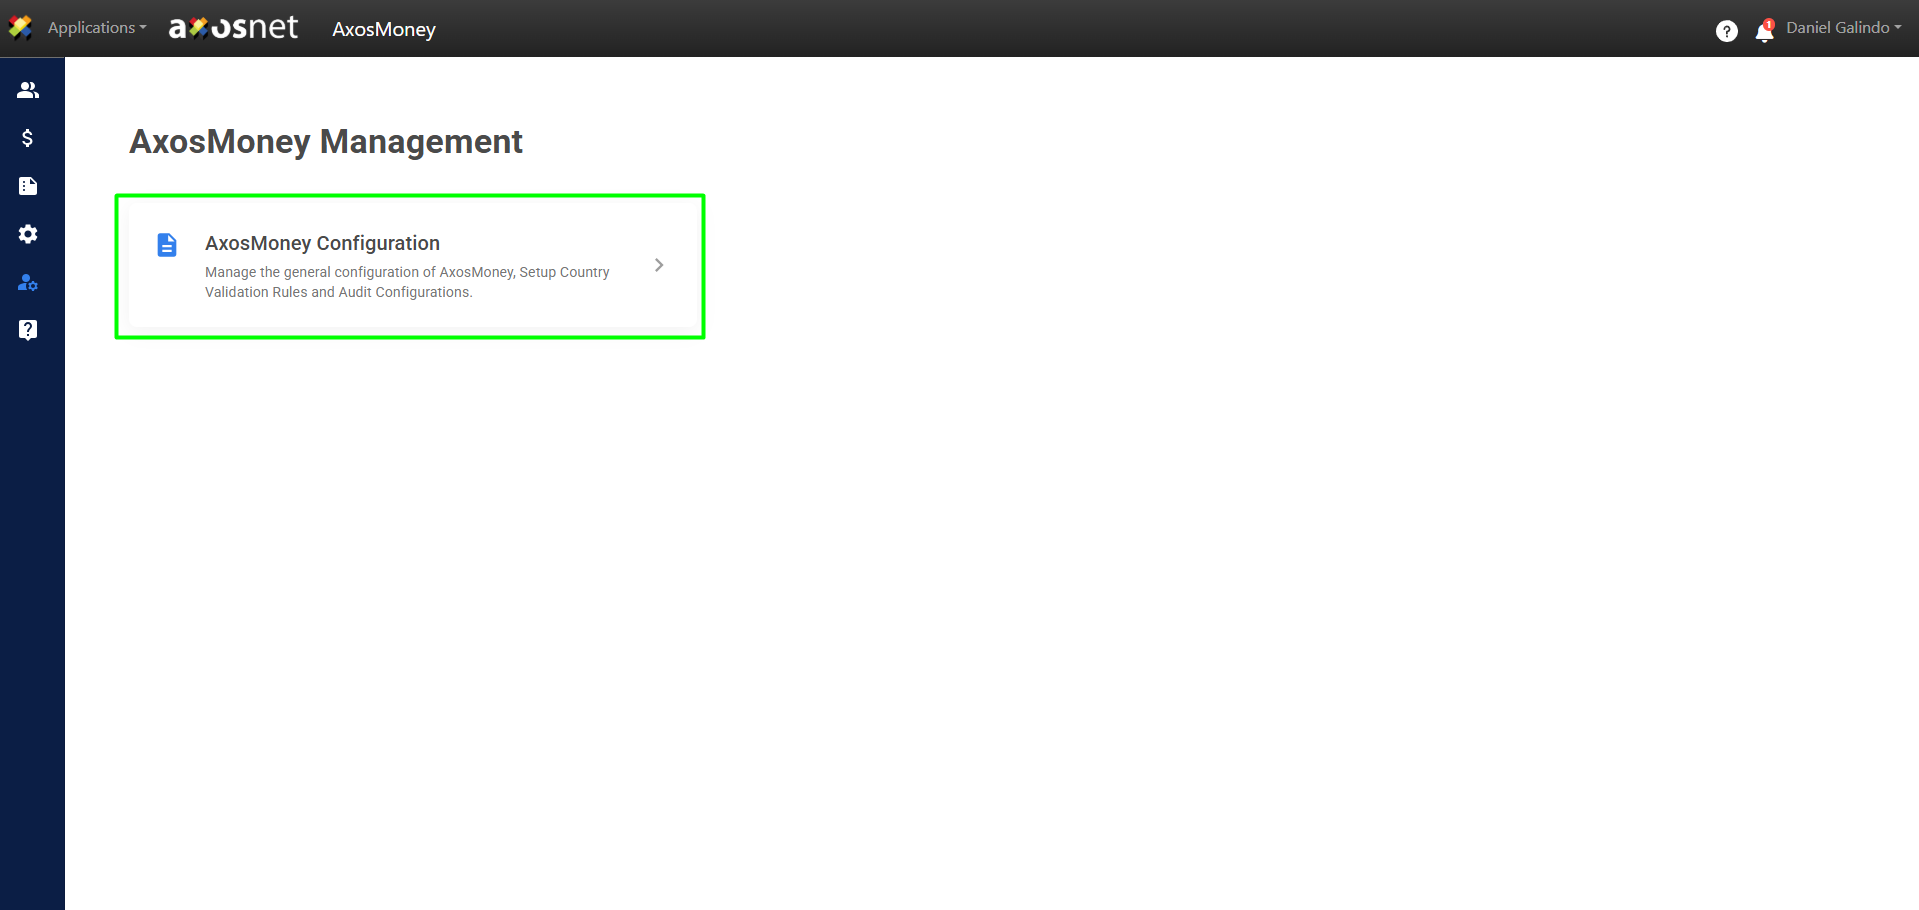
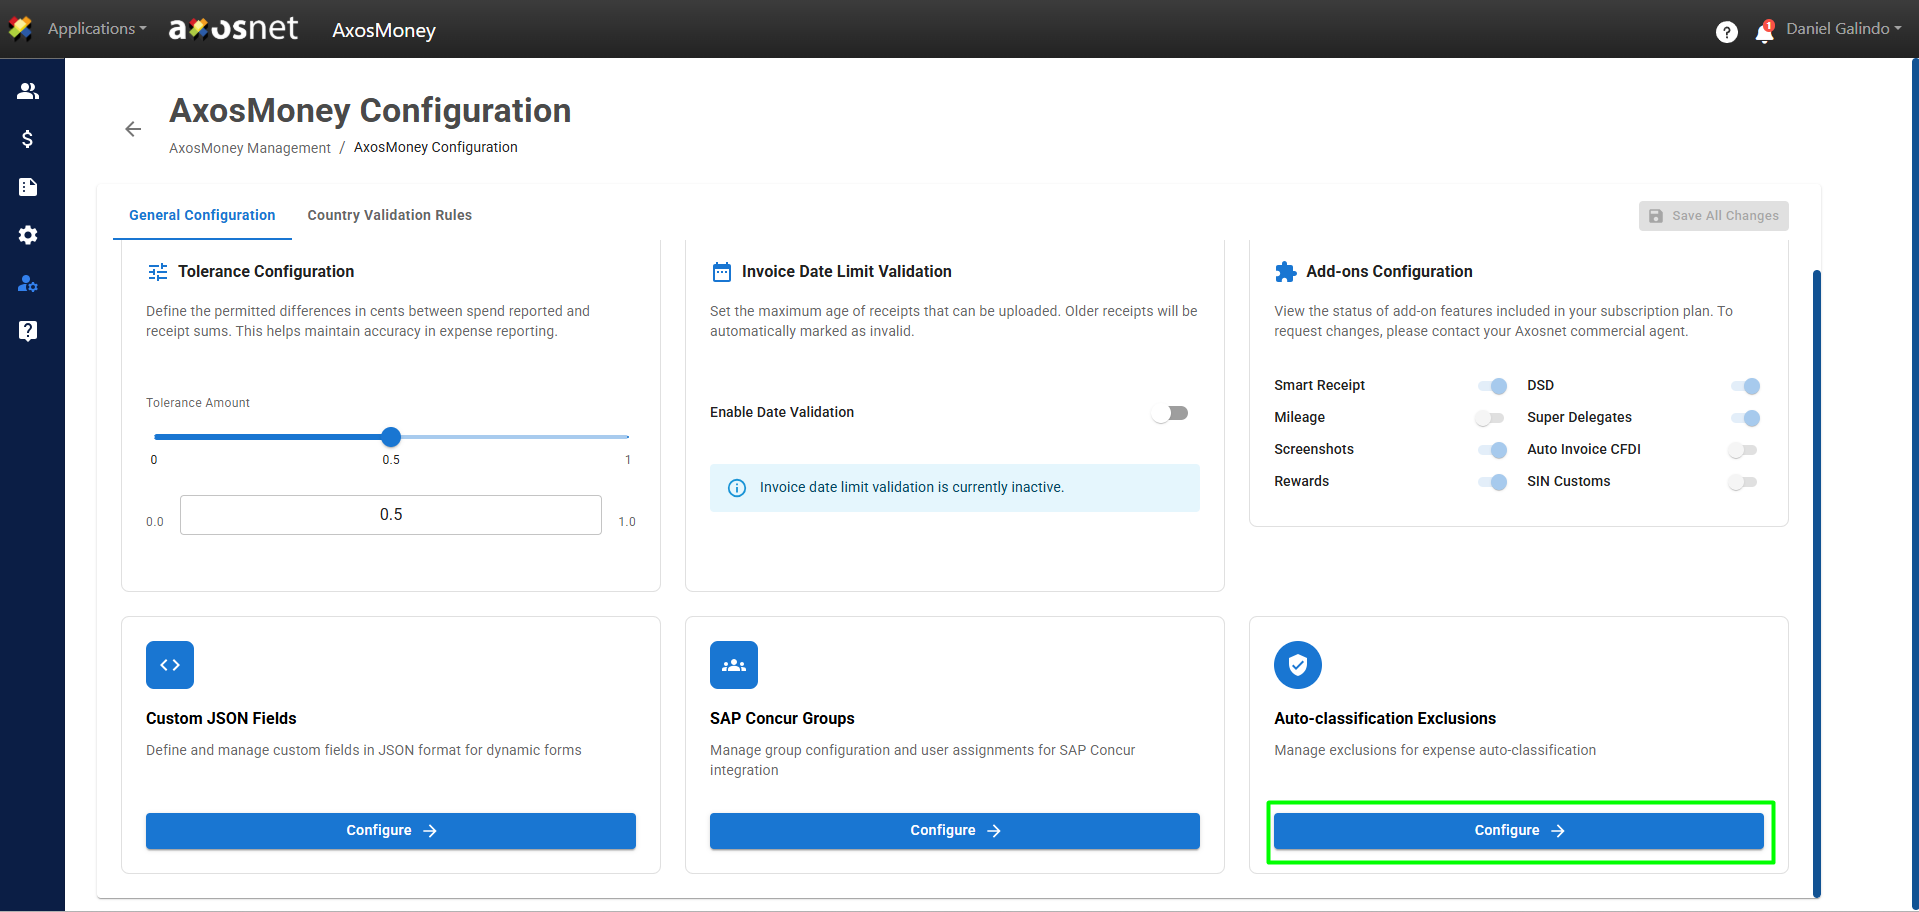
2. In the “Auto-Classification Exclusions” section, click “Configure.”
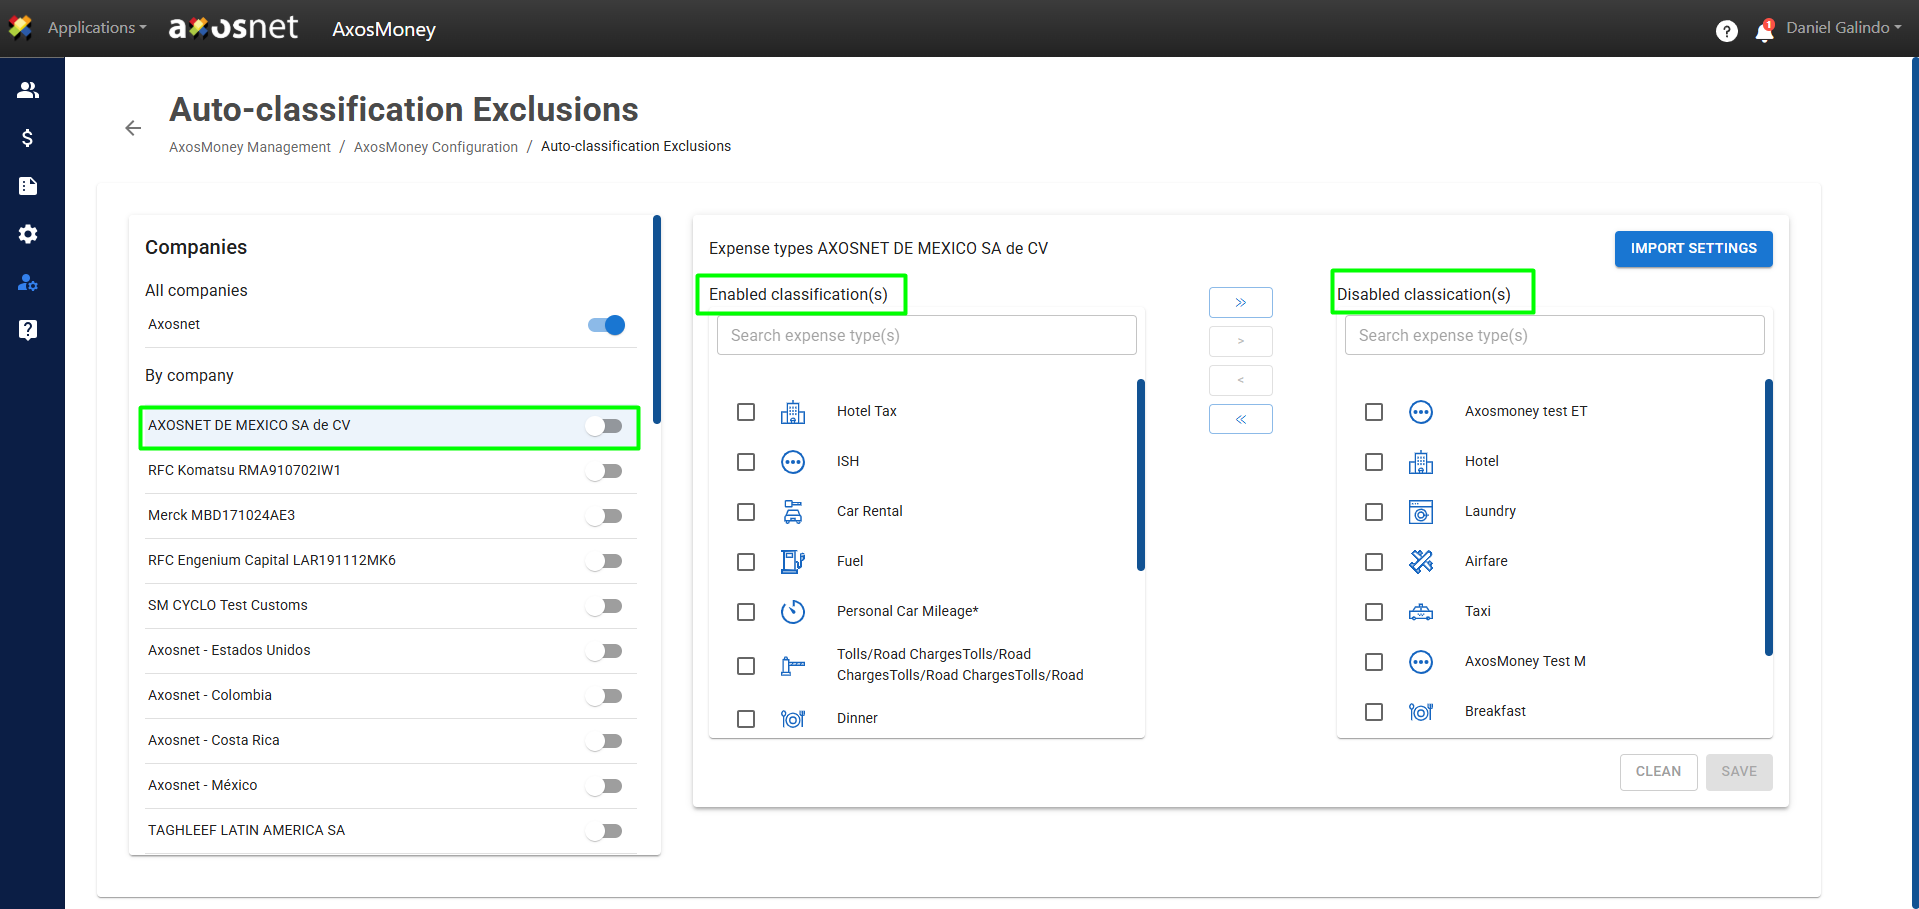
3. Under “Auto-Classification Exclusions”, you will see the available companies.
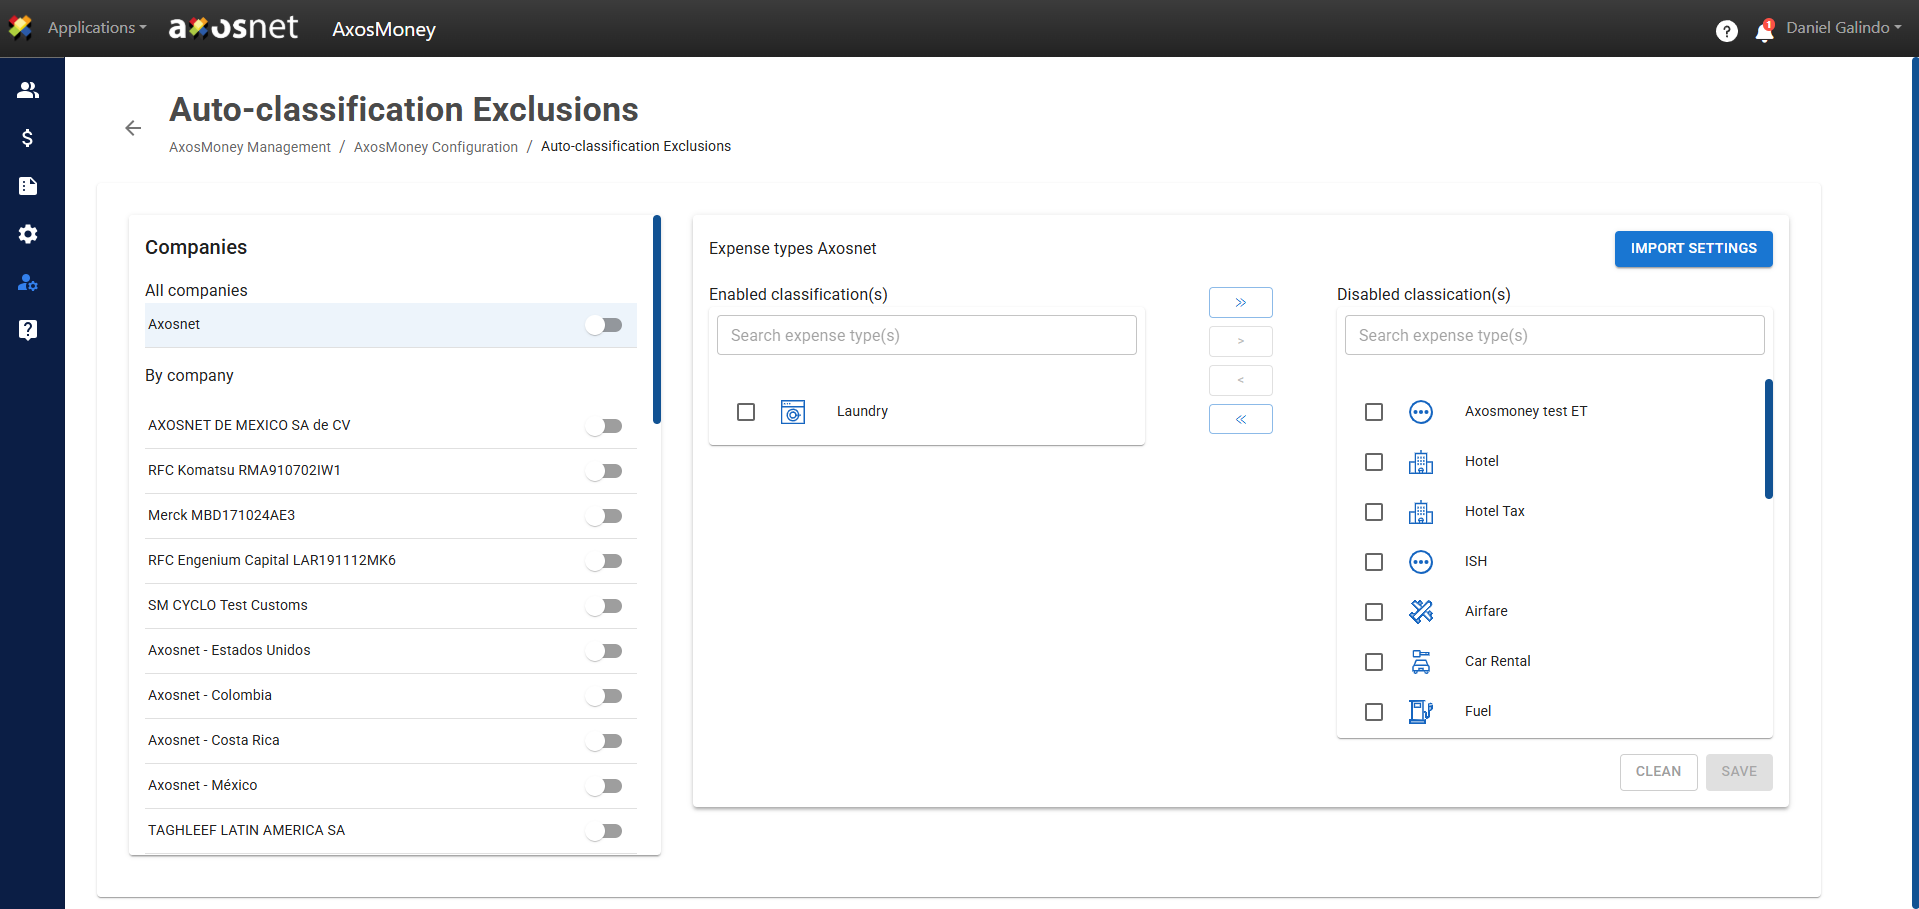
4. When you click on the company name, the “Expense Types” section will appear. It contains two subsections:
Enabled classifications: You can select the classifications that will be automatically assigned to an expense type in the selected company.
Disabled classifications: You can configure the classifications that will not be assigned to the selected company.
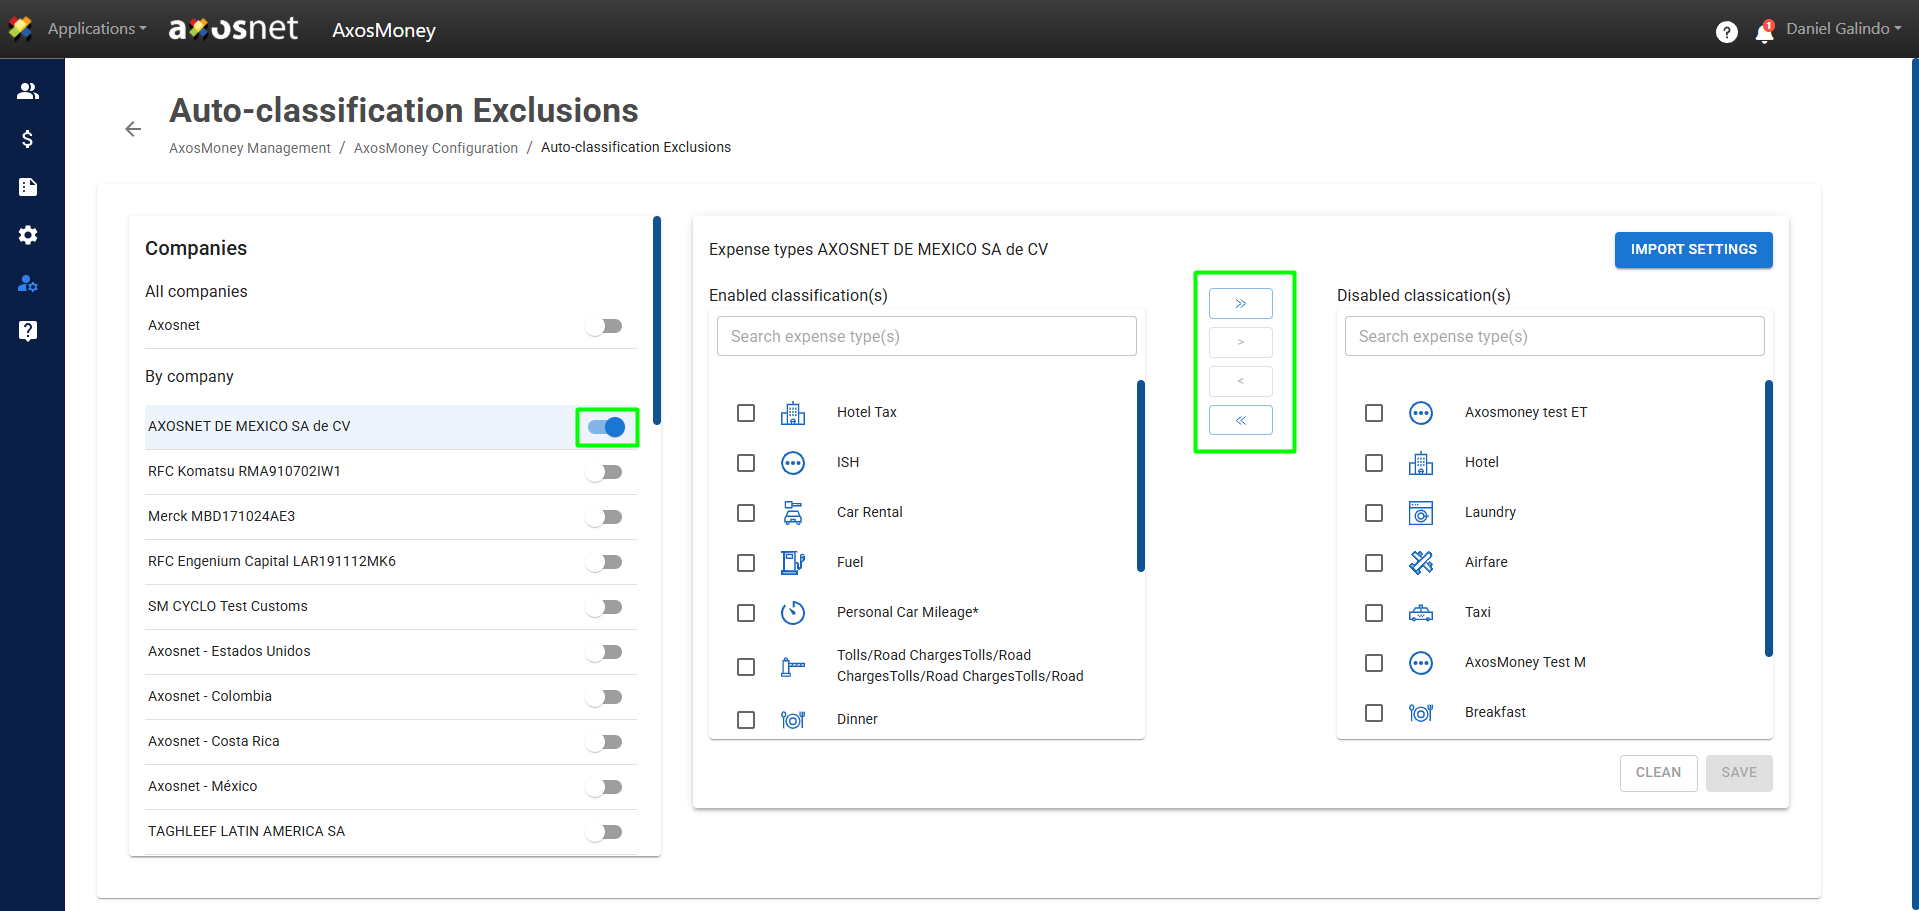
5. In the “Companies” section, you can begin the setup by toggling the switch next to the company name.
For example, if you want to configure this for all companies, click the “All Companies” switch. Check the checkbox and use the blue arrows to move the expense types from the “Enabled Classification(s)” list (left) to the “Disabled Classification(s)” list (right) for those expense types you want to exclude from auto-classification.
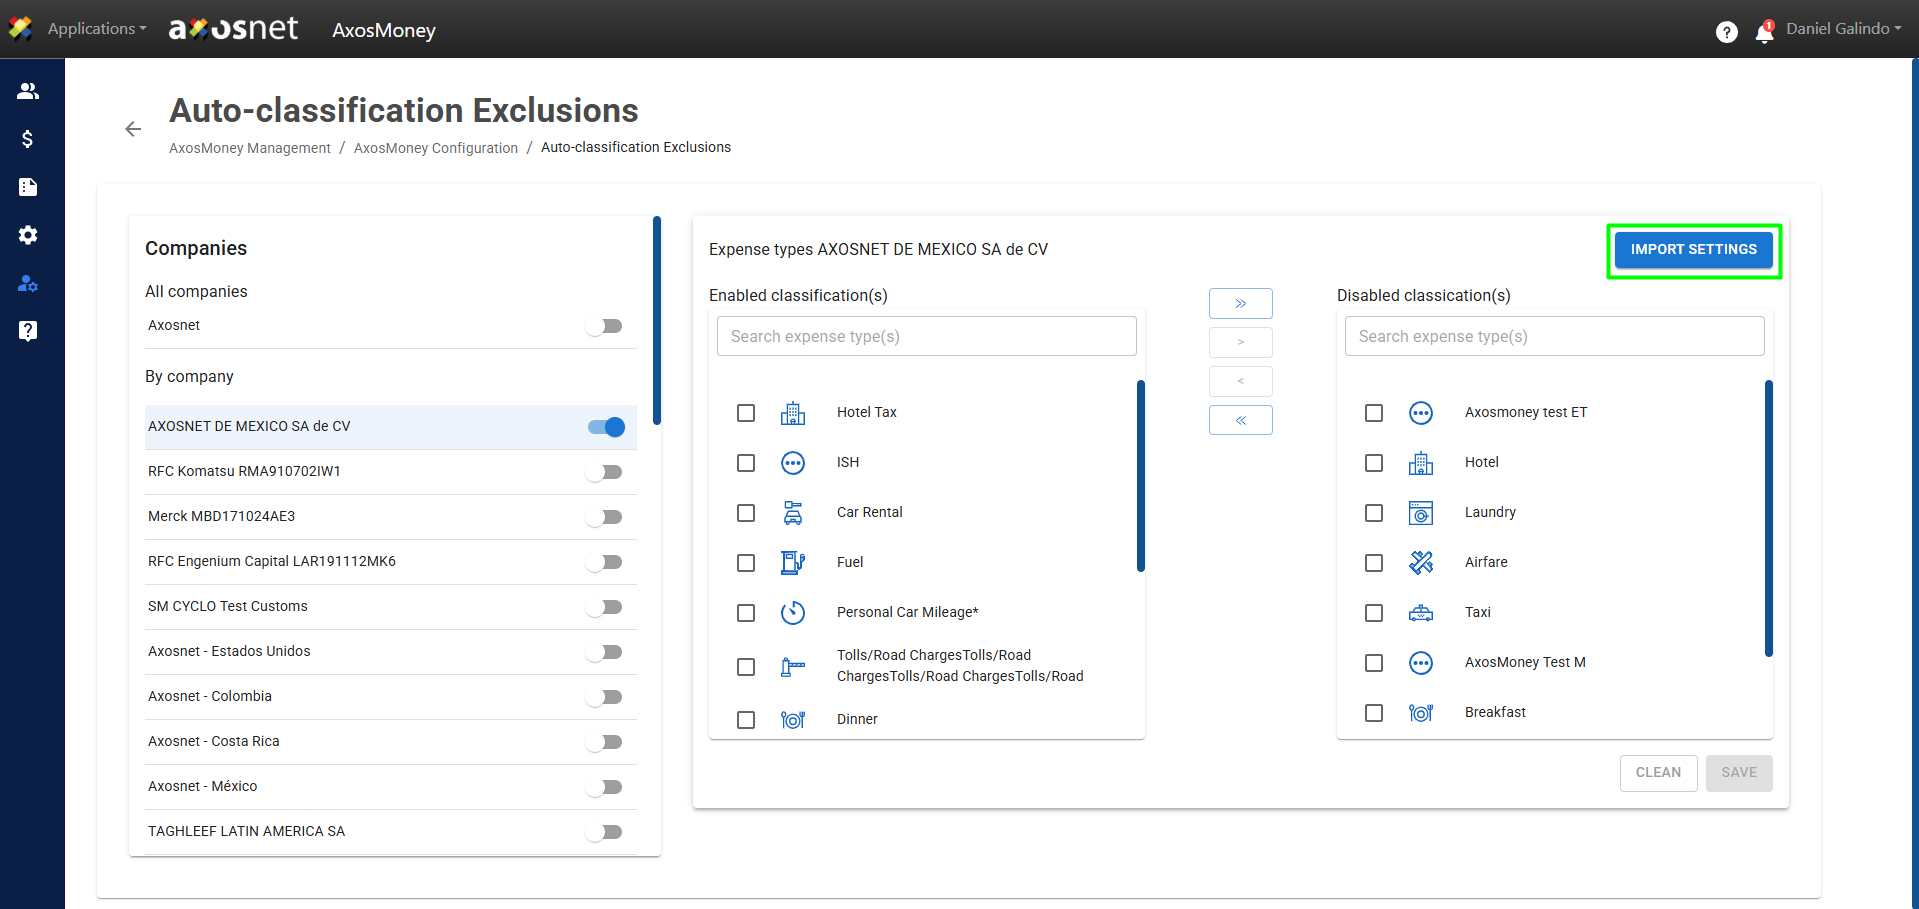
6. If you want to use another company’s settings, click the “Import Settings” button to quickly and easily import settings from multiple companies at once.
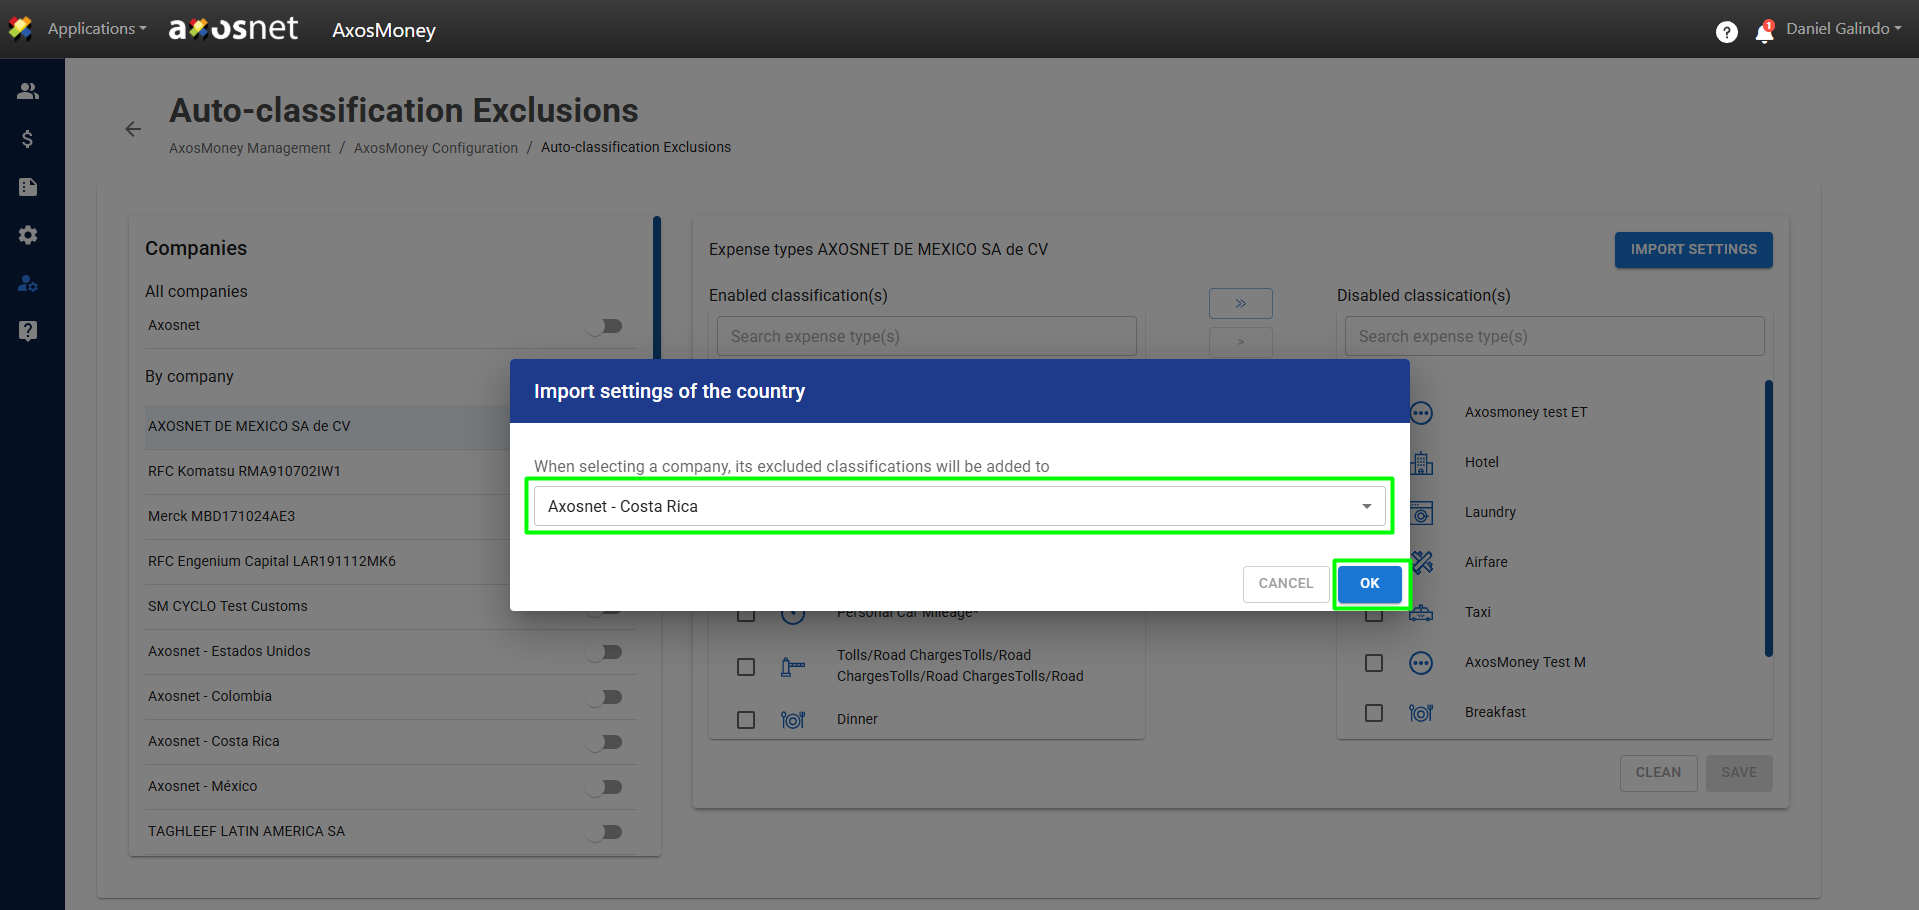
7. A window will appear where you can select a company. To retrieve the settings for a specific company, click on the list, and then click the “OK” button to confirm your selection.
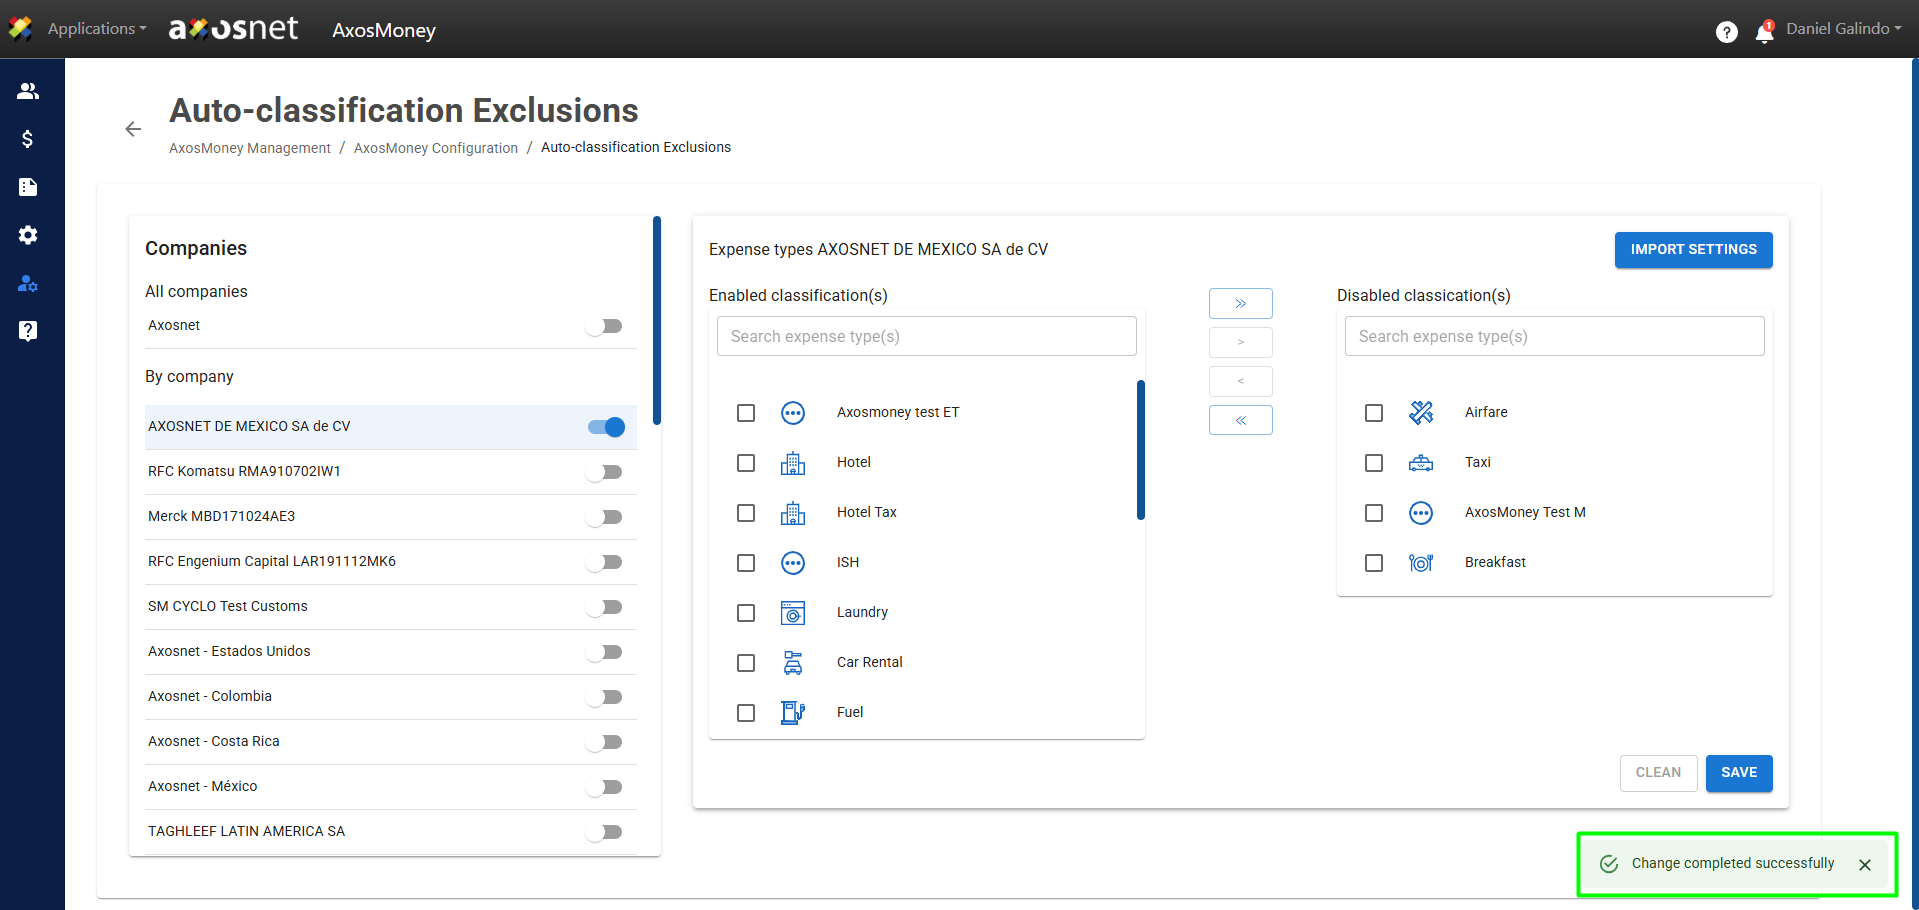
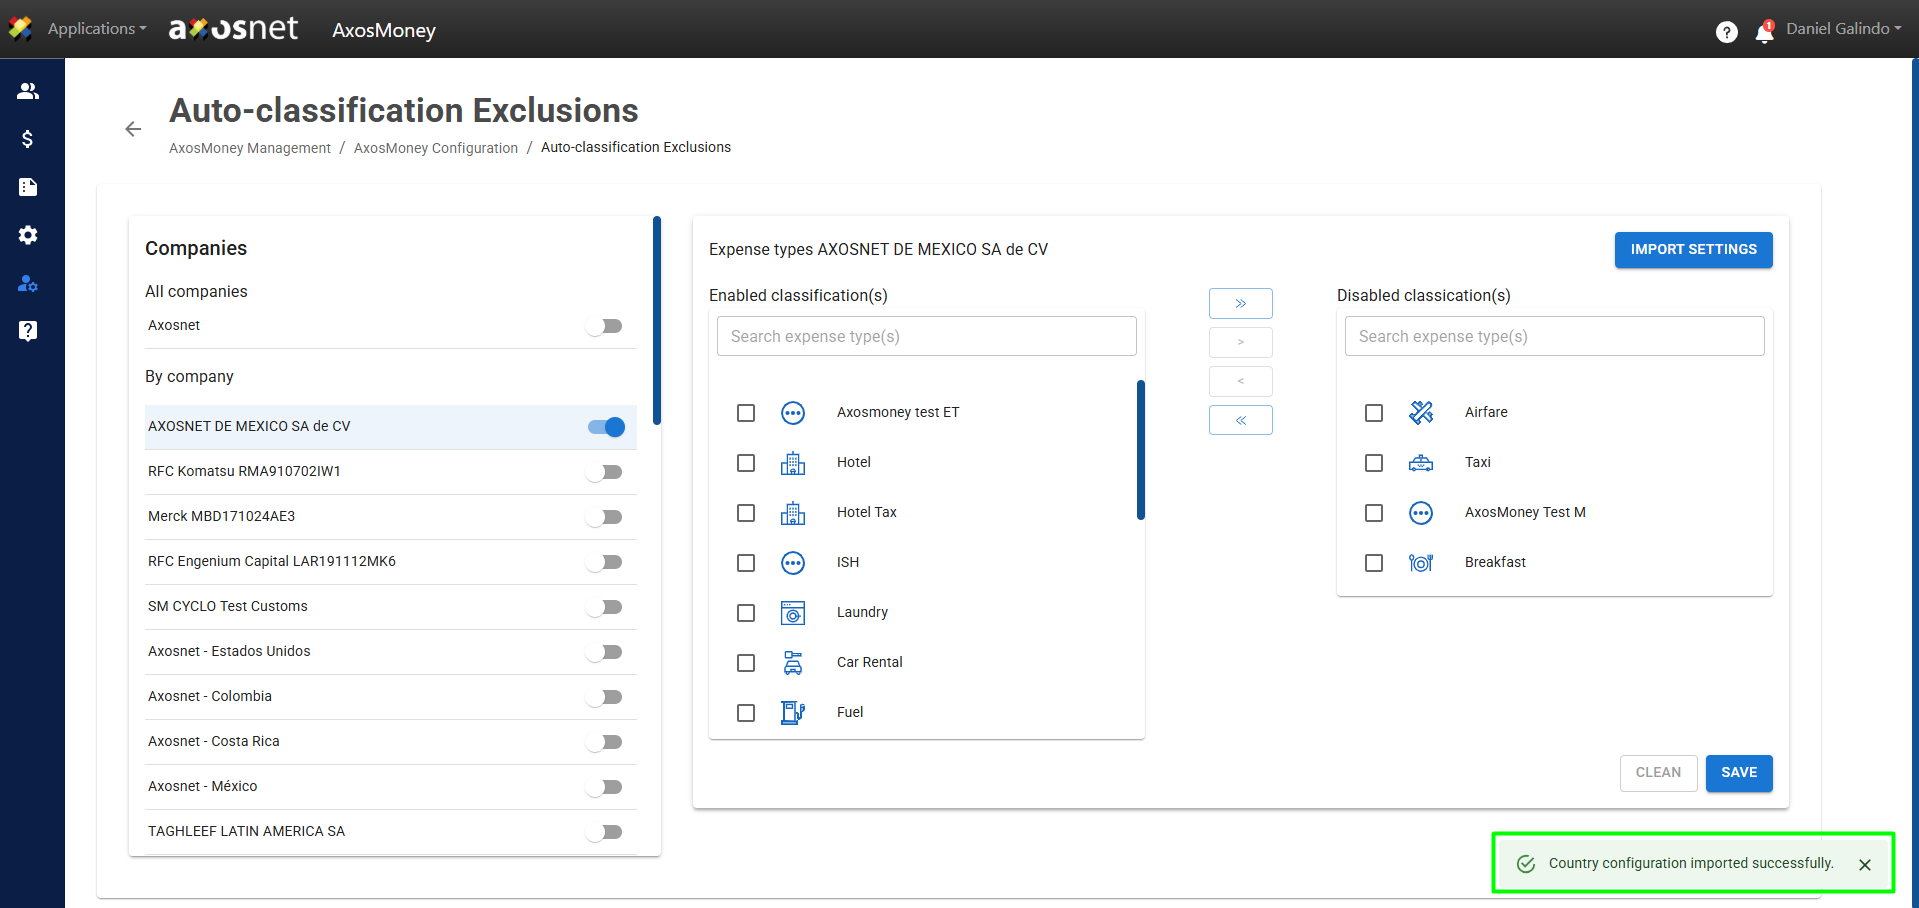
8. After saving, a message will appear confirming that your settings have been added.
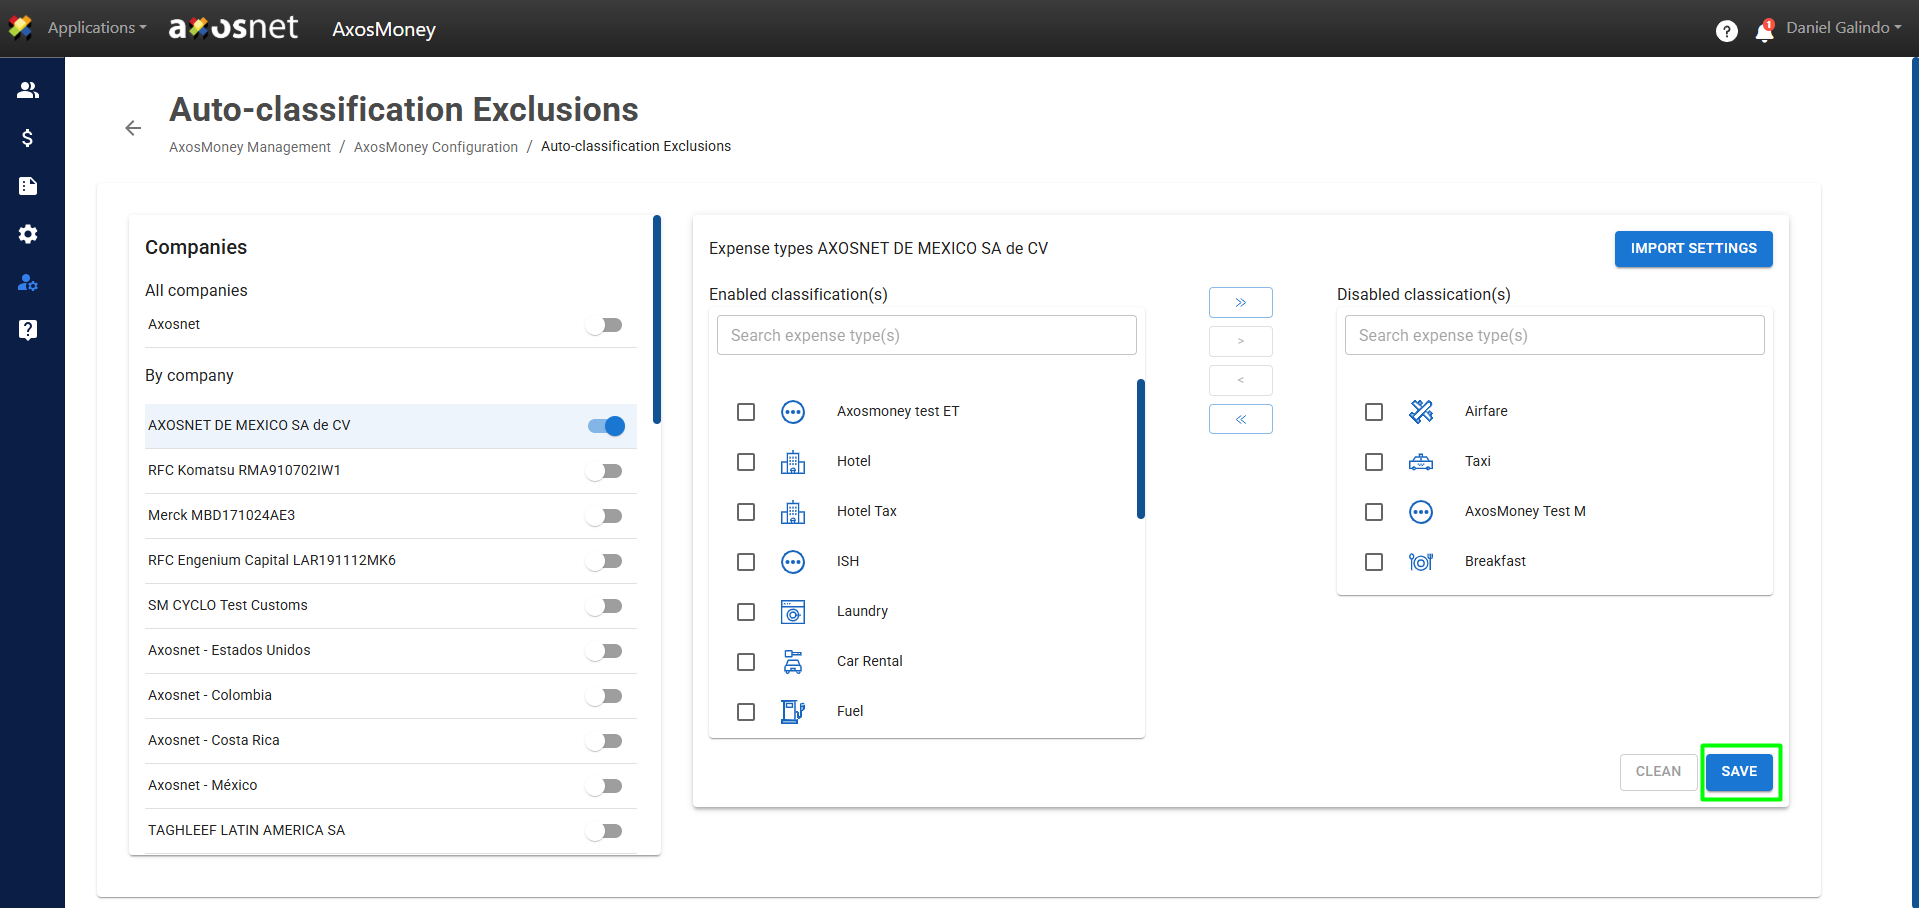
9. You must save the general changes. Click the “Save” button.
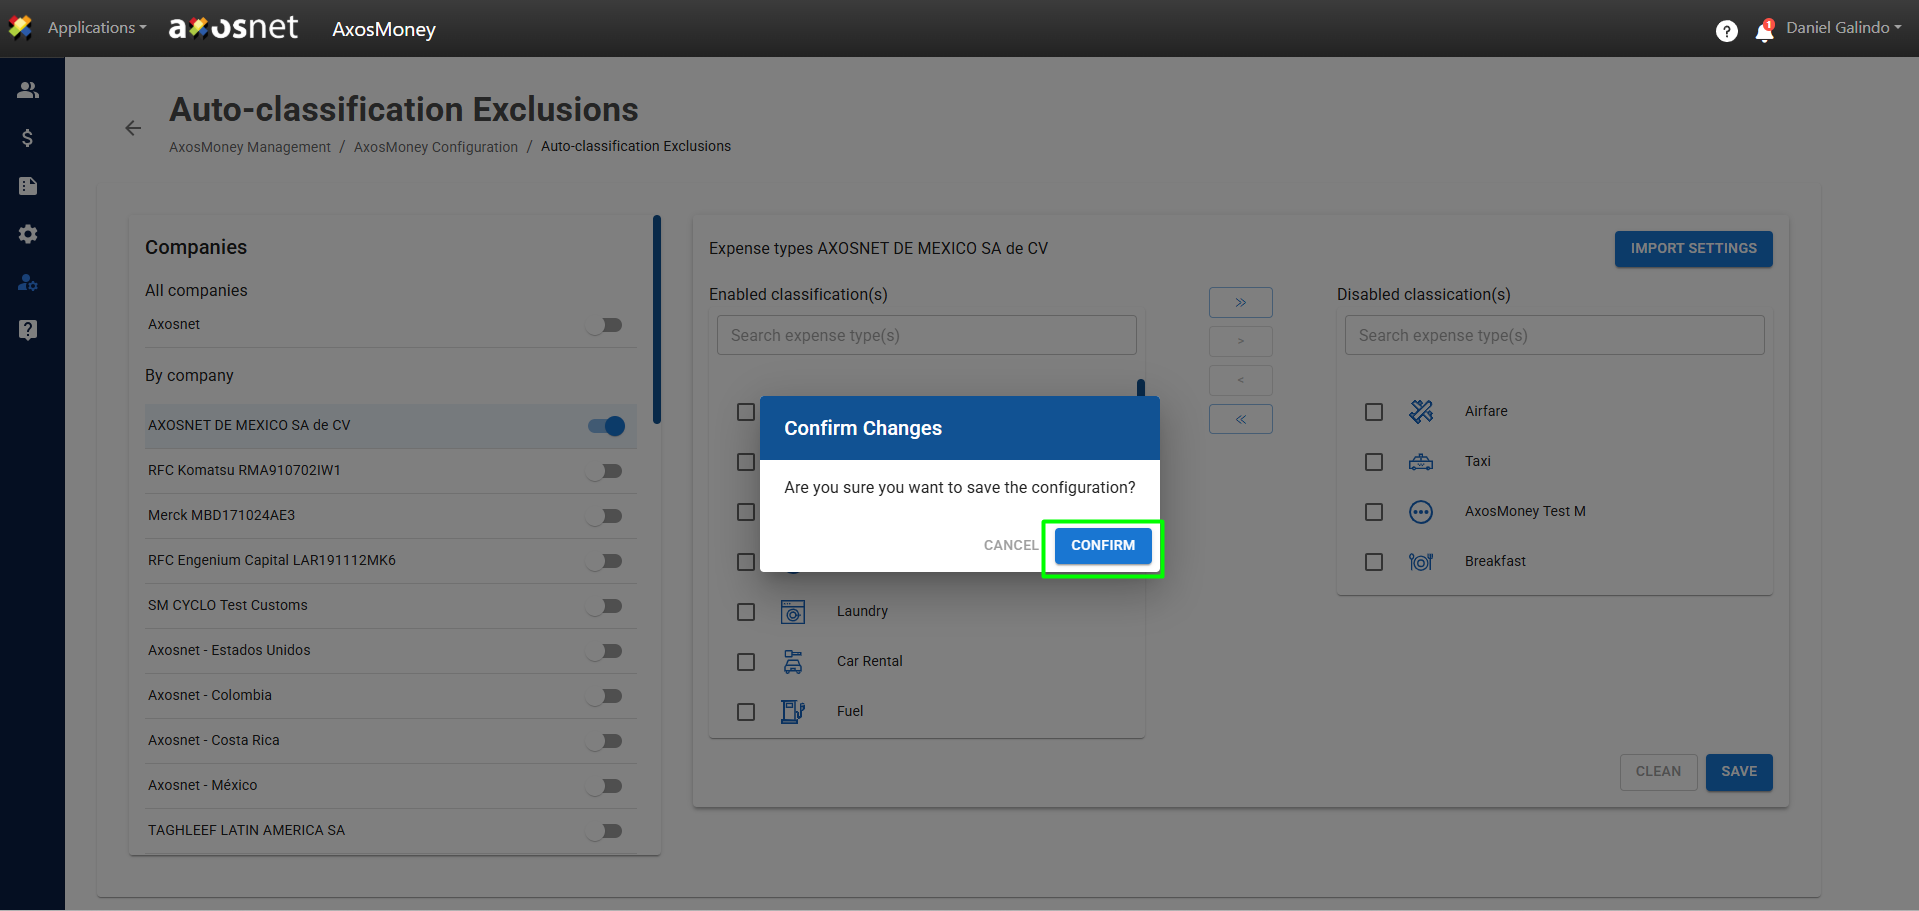
10. Confirm your decision by clicking “Confirm”.
11. Once the changes are saved, a pop-up window will confirm: “Changed completed successfully.”
Important: Only users with application administrator permissions can view the “Management” menu on the AxosMoney home page.