This section reviews how an application administrator can validate an expense using the Postman application.
Previously, follow the steps described in the “Postman-Get a Token” section, then continue with the next steps.
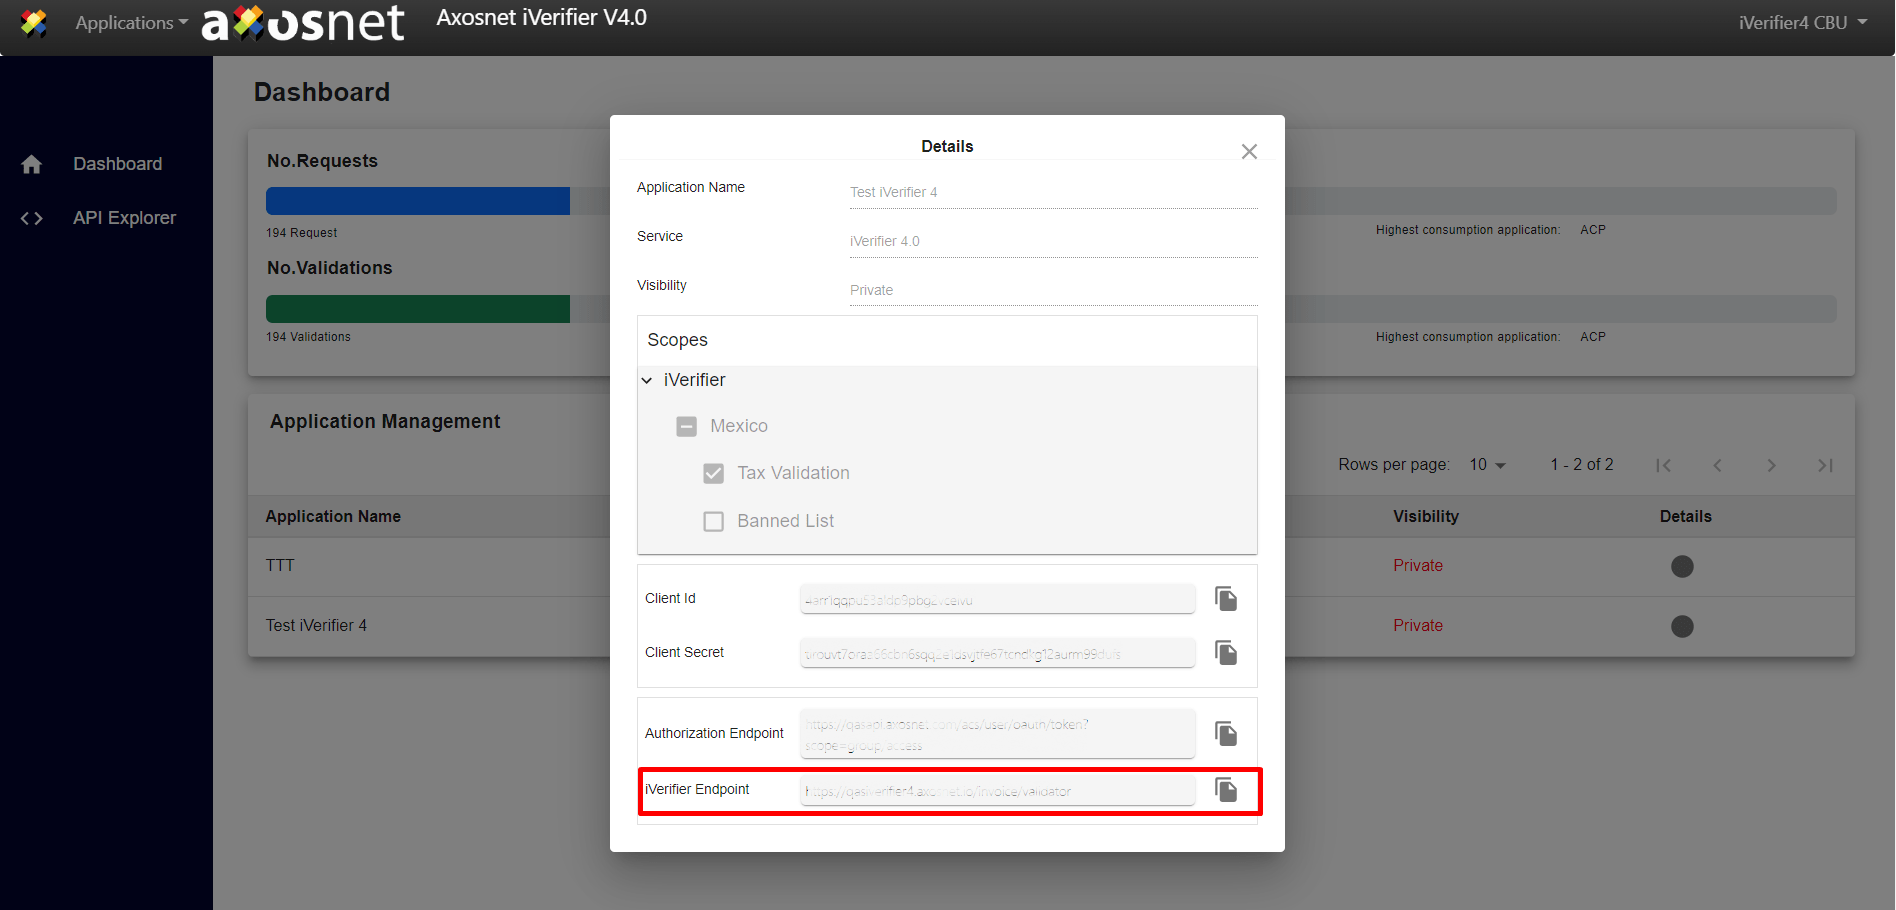
1. Copy the iVerifier Endpoint key from the “Details” window in the Application Administrator.
2. In Postman, open a new tab.
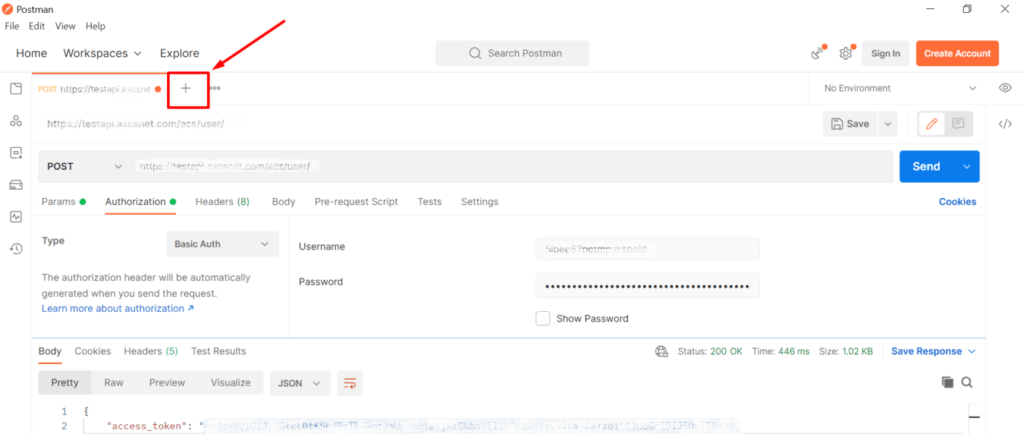
3. Paste information into the “POST” field.

4. In the dropdown list, “TYPE,” select “Bearer Token.”

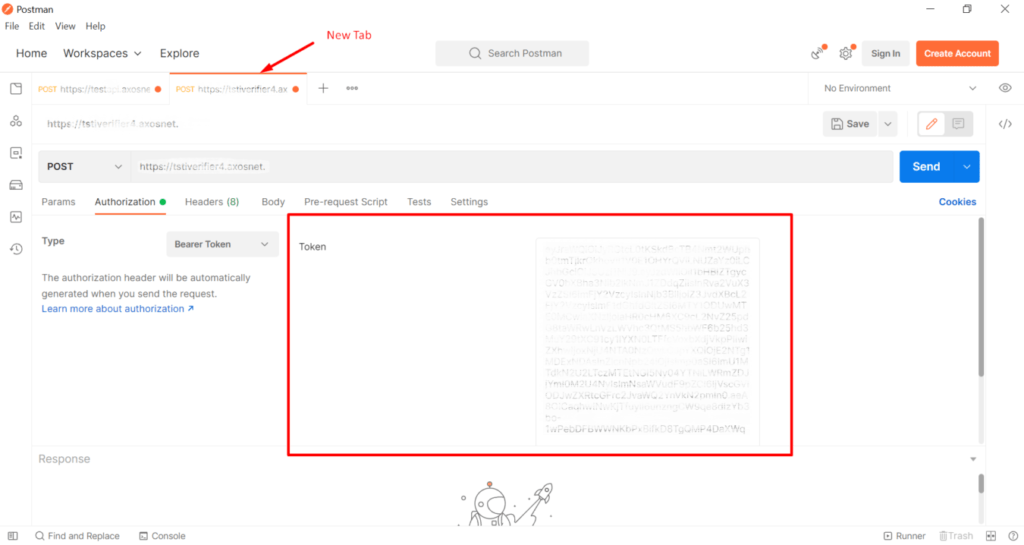
6. Go back to the previous (or original) tab and copy the token.

7. Return to the new tab and go to the “Authorization” section. Paste the token information into the field named “Token.”
8. Move to the “Body” section and select “form-data.”

9. Select the option “File” in the dropdown list “Key” under the KEY column.

10. Write XML at the left of the row (under the “Key” column), and a checkbox will appear. Note that under the column “VALUE” appears the “Select Files” button.
Note: the row can be named whatever you want, as long as you can differentiate where you upload the files.

11. Proceed the same way as the last step, but this time, write “PDF.” Note that another “Select Files” button is created.

12. Upload the corresponding files in the “VALUE” column. Then click “Send.”
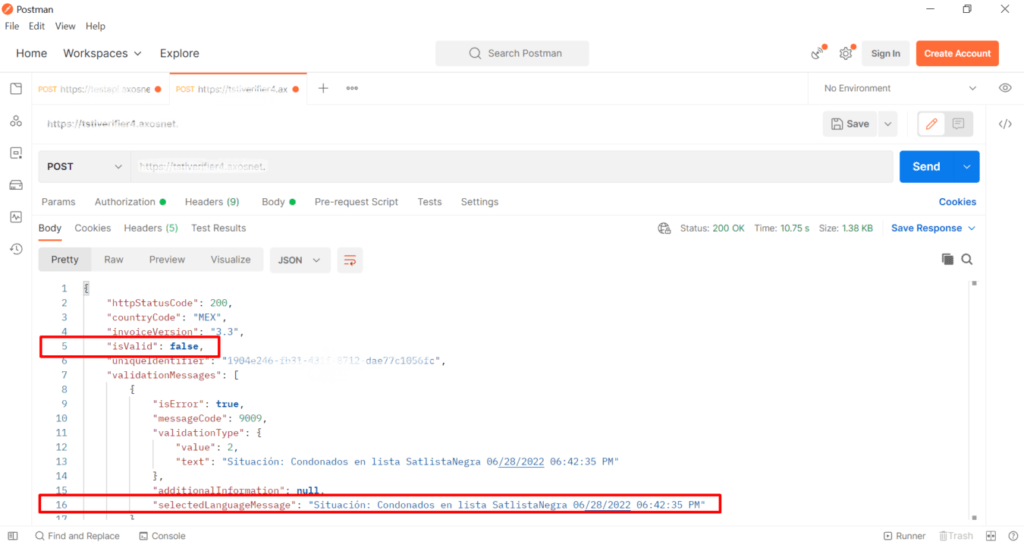
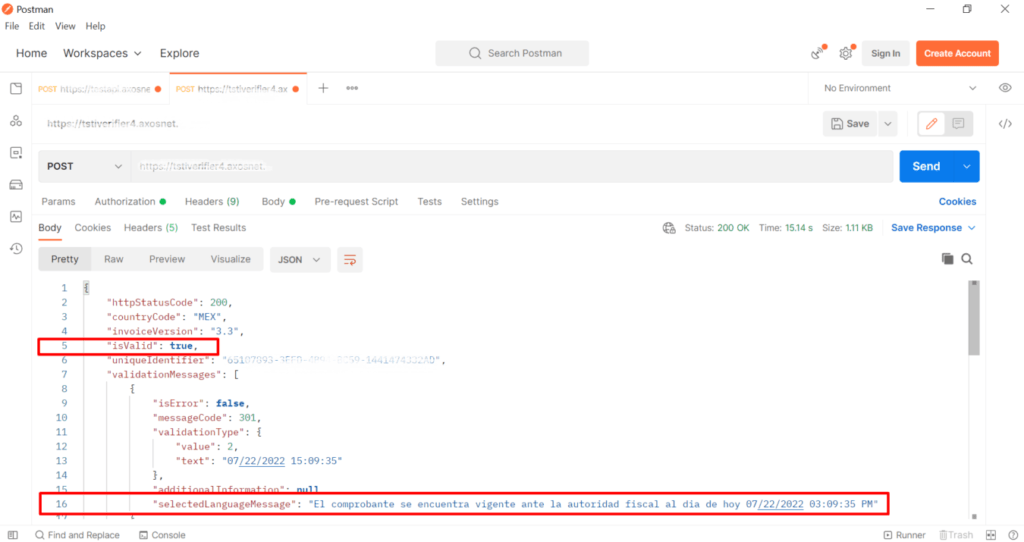
13. The invoice’s validation report will be shown. Observe line 5, “isValid”: true, and line 16, for further details on status.
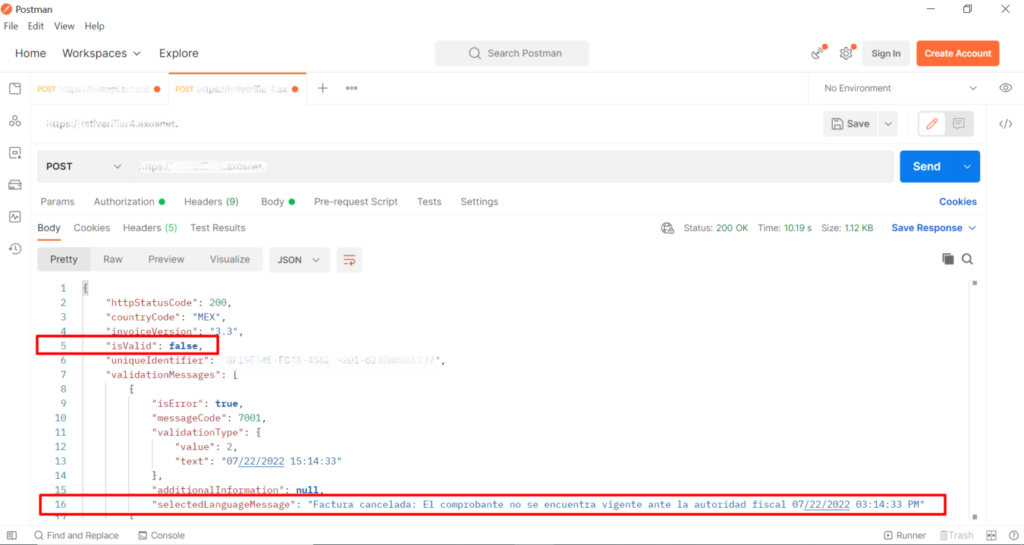
14. If the invoice uploaded is not valid, the following error could be displayed:
15. If the invoice uploaded belongs to the Banned List condition, the following error could be displayed: