DSD is a functionality that generates CFDi from purchase receipts that are digitized through the AXM application. The user steps to fiscally validate the tickets will be indicated herein.
AXM provides the capability to select the appropriate flow for the receipt that will be recorded as an expense. This capability is determined by the company associated with the user and the nationality of the receipt. In the case where the user belongs to a Mexican company and the receipt is Mexican, the DSD process is carried out for the generation of CFDI. Conversely, if the company or receipt is foreign, the process remains as a simple receipt without CFDI.
Billing Company
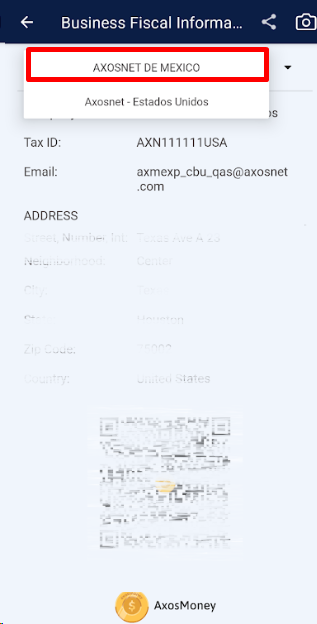
A user may be associated with more than one company, and therefore each of them may belong to different nationalities. Within the app’s settings, you will be allowed to select the corresponding company during the billing process for expense recording.
a) Go to settings, then identify the company and the data shown under “Billing Information”.

b) If you want to select a different company, click on the indicated icon.
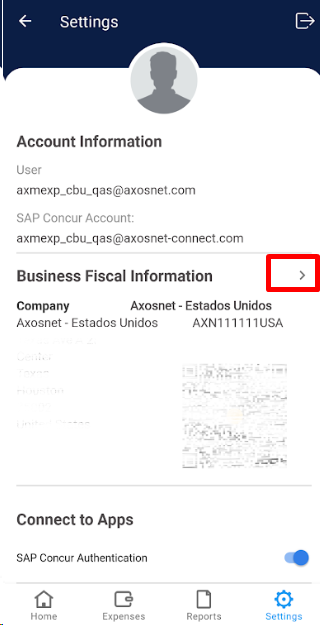
c) Click on the name, and from the list, select the required company.
d) Return to Settings, you will see the information of the previously selected company reflected.

1. Within the “Expenses” menu, tap the camera icon.

2.- The following window will appear, click on “Take Photo” to capture a photo with the camera from your device.

Note: You can also choose the option “Search receipt” to select an image from your photo gallery.
3.- When you take the photo, some recommendations will be displayed to ensure a successful capture of the receipt.

Note: If you do not wish to see this message again, check the box “Do not show this message again”.
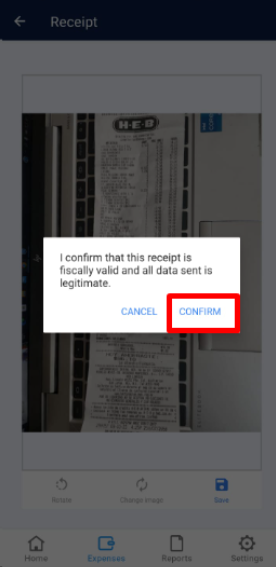
4.- Once the photo is taken, click on the “Save” button, and a message will appear confirming that the receipt is fiscally valid and all submitted data are legitimate. Click “Confirm”.
5.- A success message will appear, notifying that the receipt is being processed. Click “Understood” to return to the expenses screen.

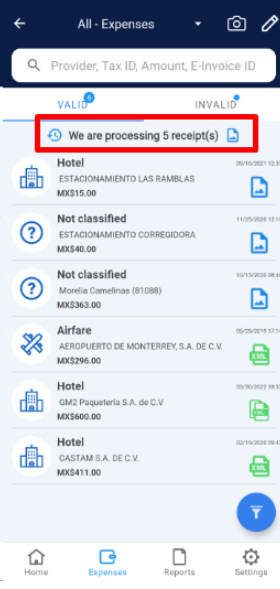
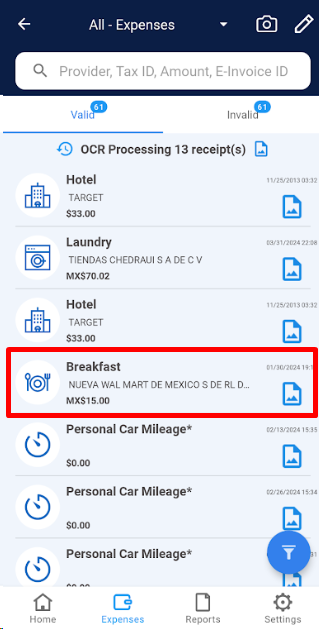
6.- A legend will appear on the “Expenses” screen mentioning how many receipts are being processed.
Note: At this point, the application performs validations to determine if the uploaded receipt is Mexican or foreign. Depending on the result of these validations, the following cases may arise: Mexican Company with Mexican Receipts, Foreign Company with Foreign Receipts, Foreign Company with Mexican Receipts, or Mexican Company with Foreign Receipts.
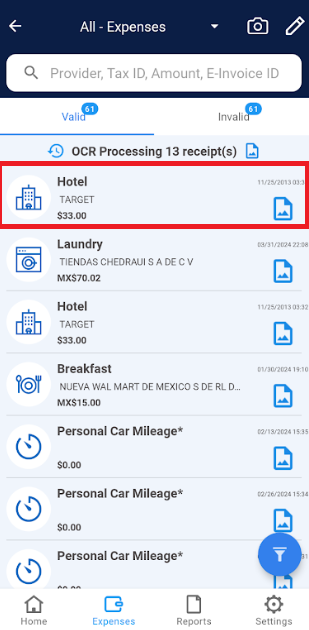
7.- Once the receipt has been processed, it will appear in the “Valid” list on the “Expenses” screen. By tapping on the expense line, you can view its details.

8.- If you wish to change the classification type, tap the “Change” button in the expense details.

9.- Click on the new classification of the expense.
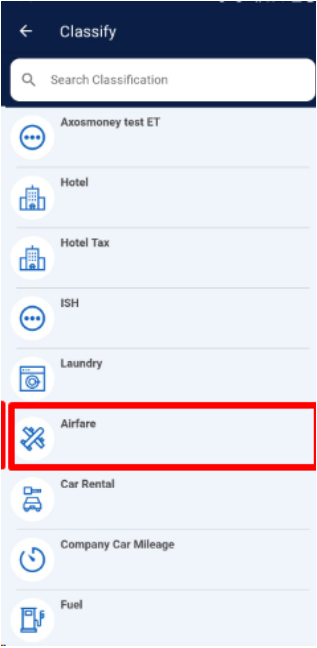
10.- You will be returned to the “Expense Details” screen with the updated classification.

DSD VALIDATIONS
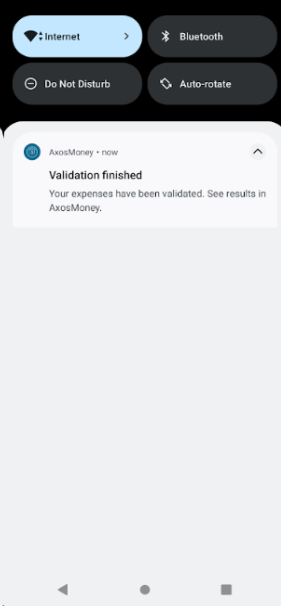
Once the receipt process is complete, you will receive a notification with details of the receipt under the “Valid” section.
Please note that sometimes the notification may require action on your part.
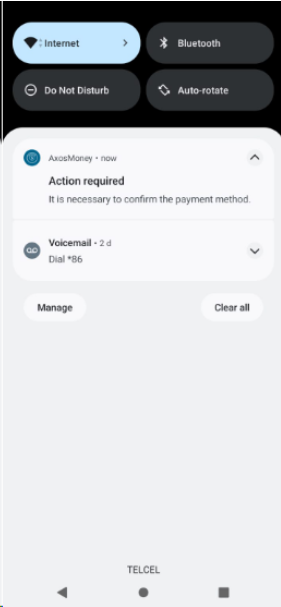
Note: The receipt may be rejected. In this case, you can retake the photo and upload it again, considering that the reason for rejection was a detail that, as a user, you can “resolve” to achieve successful validation.
Mexican Company with Mexican Receipts.
This combination refers to all expenses with Mexican receipts registered by a user who is associated with a Mexican company. In this scenario, the receipt is processed through the DSD (Digital Signed Documents) solution to obtain an invoice (CFDI).
In section e of the Expense Registration with DSD, a series of validations are performed to determine the flow to follow for the receipt. In this scenario, the CFDI is generated, and the following validations are displayed.
Foreign Company with Foreign Receipts.
This combination allows the user to record their expenses when associated with a foreign company and the receipts are also foreign. In this scenario, the receipt is processed as a flow without generating a CFDI.
a) Expense registration is conducted through the process outlined in Expense Registration with DSD.
b) This function detects that both the receipt and the company are foreign, hence, no CFDI is generated. Therefore, the receipt is processed, and validation is displayed as follows.

Note: You can identify that the receipt is not linked to an XML (CFDI) with the icon to the right of the registered expense.
Foreign Company with Mexican Receipts.

Mexican Company with Foreign Receipts.
Users associated with a Mexican company can register expenses generated abroad. Similarly, processing through CFDI is not required.
a) Expense registration in this scenario can be replicated through the steps previously described in Expense Registration with DSD.
b) This function detects that the company is Mexican and the receipt is foreign, and no CFDI is generated. Therefore, the receipt is processed, and validation is displayed as follows.