In this section, the Super Administrator can identify statistical information within a specific period (Q) for a particular team, or alternatively, compare it with others within the same company.
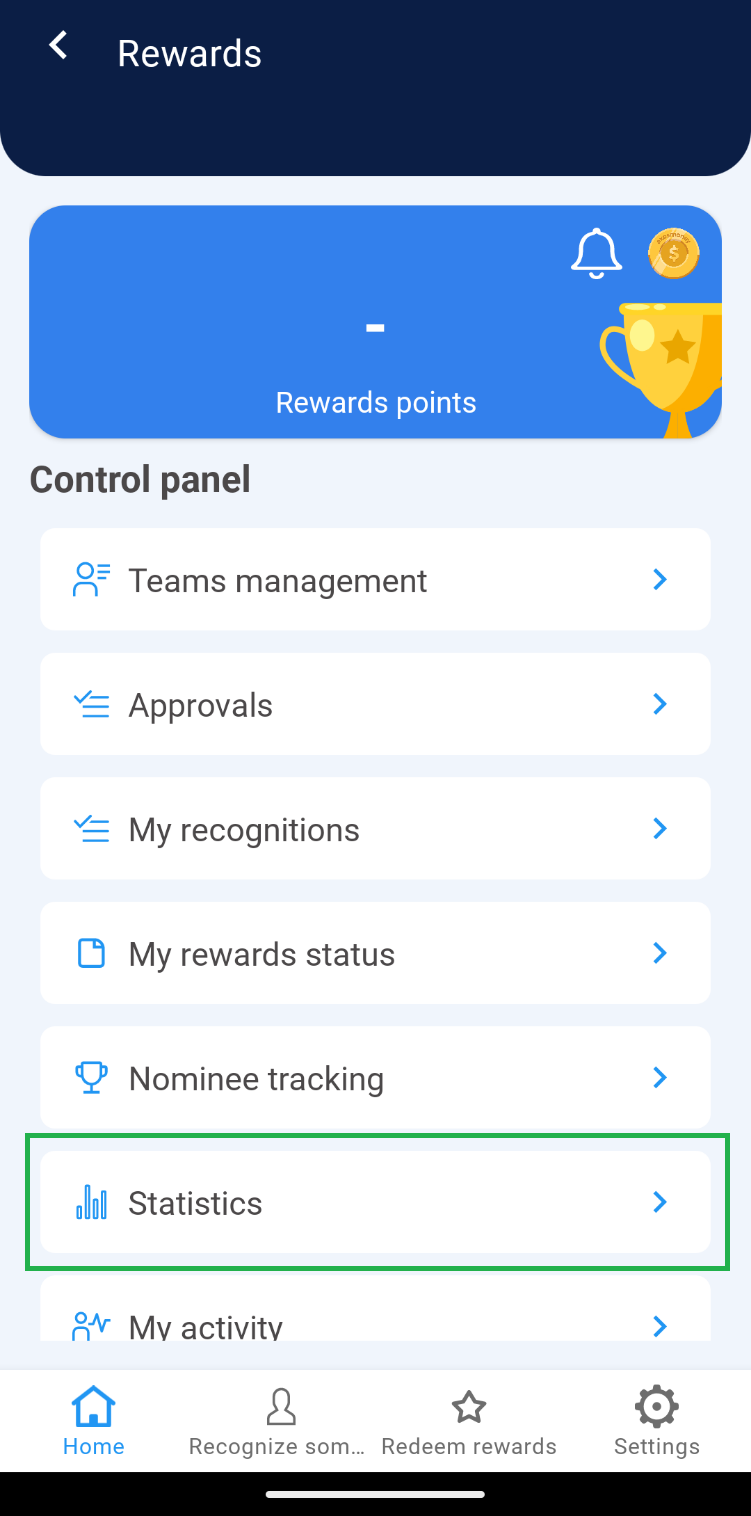
1. Within the Rewards control panel, select the “Statistics” option.
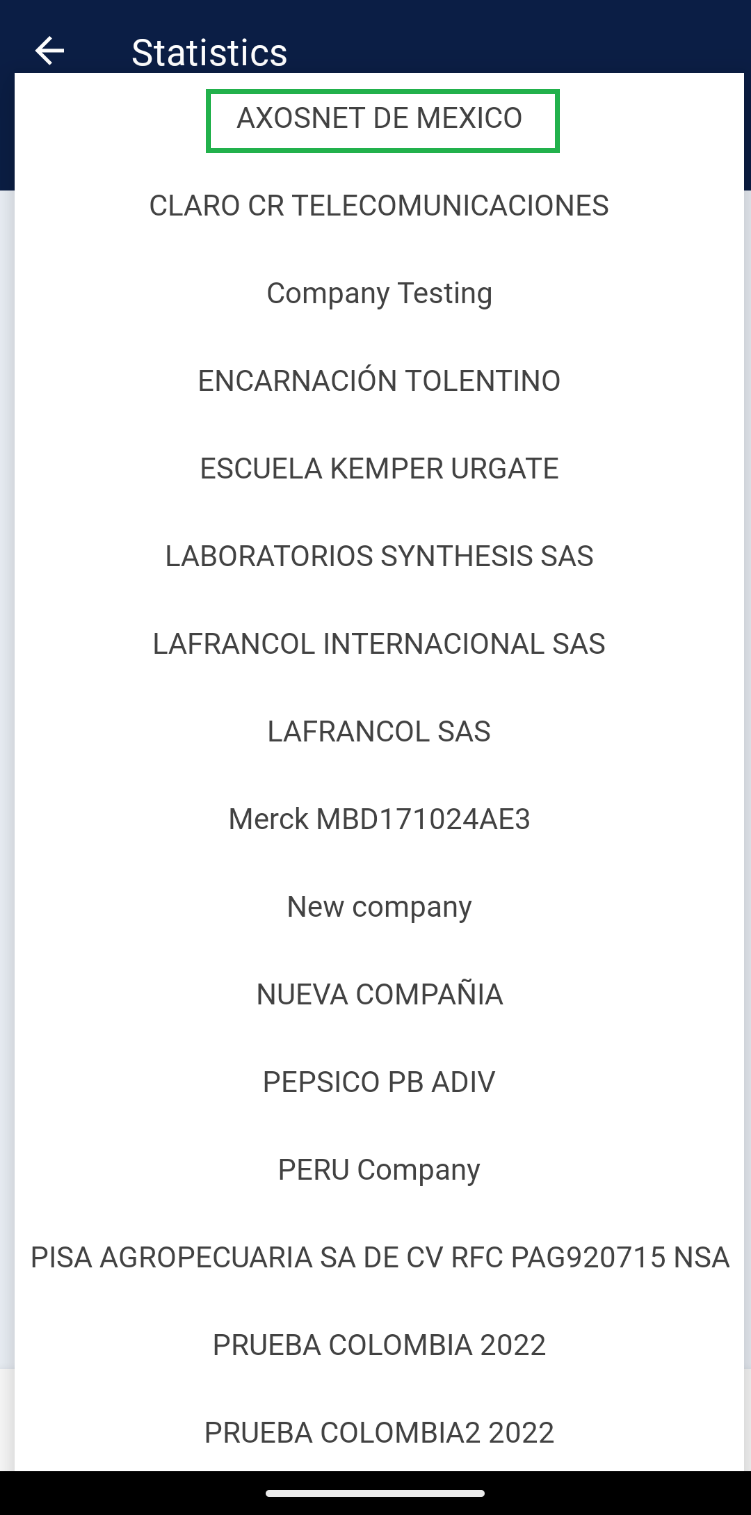
 2. Ensure the company to which the teams needing management are integrated is selected.
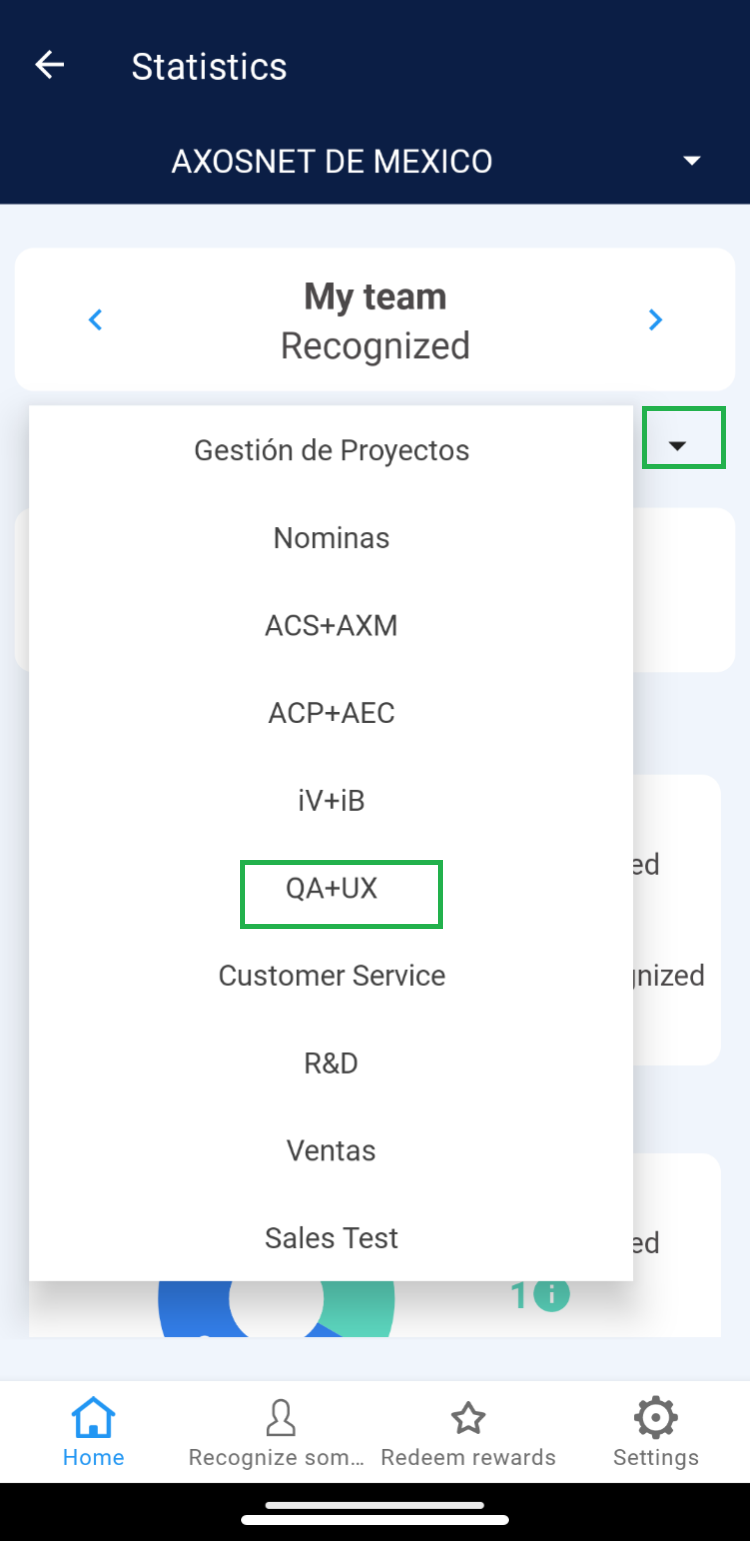
 3. In the Statistics section, you can select the team you wish to review. Click on the dropdown menu and choose the team.
 2. Select any user’s avatar to view detailed information for each.
 3. You can visualize team members who have been recognized compared to those who have not, represented graphically and categorized by periods.
 4. Click on the number of “Recognized” or “Not Recognized” to view team members who meet that criterion within the specified period.
 2. You will identify the names of the top-performing team members who have given recognitions.
 3. The application displays the name of the team member who “Recognized the Most” and the one who “Recognized the Least” during the selected period.
 4. Click on the number of “Recognized Individuals” to see details of the users.
 2. Click on the “Received Recognitions” tab.
 3. You can identify the teams that have given recognition to the displayed team in the list.
 4. Select the “Given Recognitions” tab.
 5. It shows the number of recognitions given to other teams. These are represented graphically.
 2. Select the company to enable the horizontal menu on the screen.
 3. Team Activity
In this section, the Super Admin can view tasks performed and approval statuses for either all teams or a specific team.
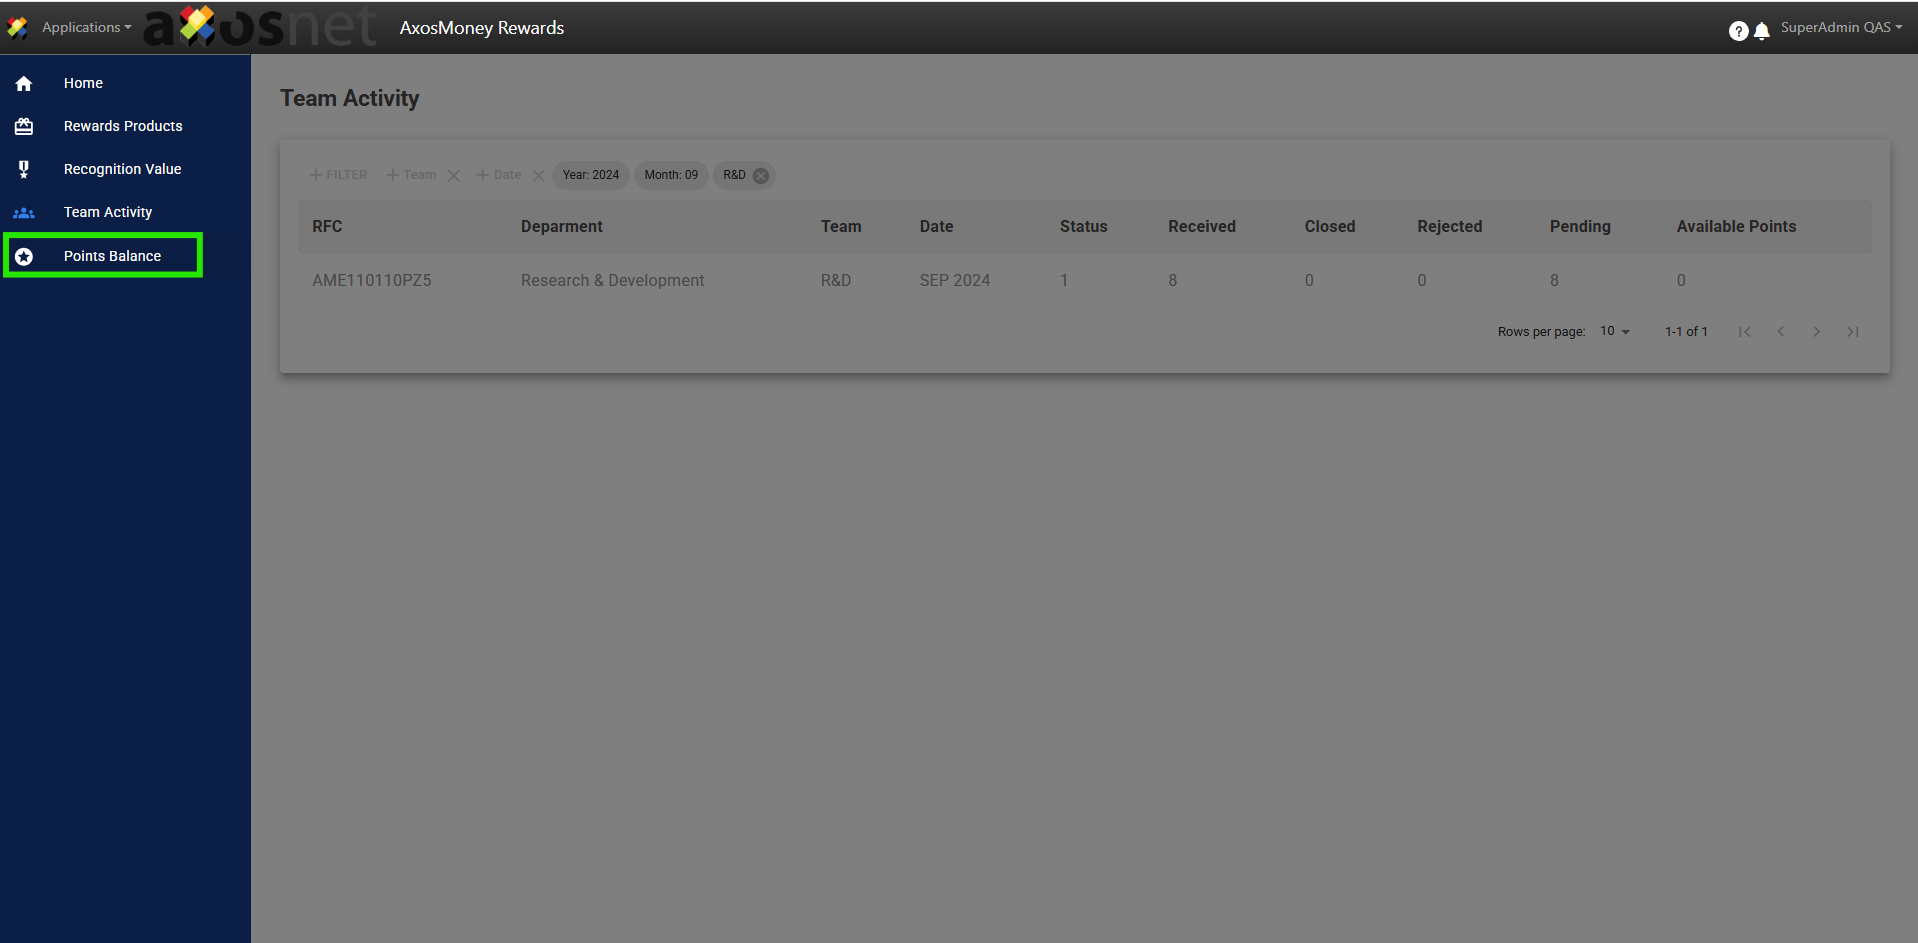
3.1 Select “Team Activity” from the menu.
3. Team Activity
In this section, the Super Admin can view tasks performed and approval statuses for either all teams or a specific team.
3.1 Select “Team Activity” from the menu.
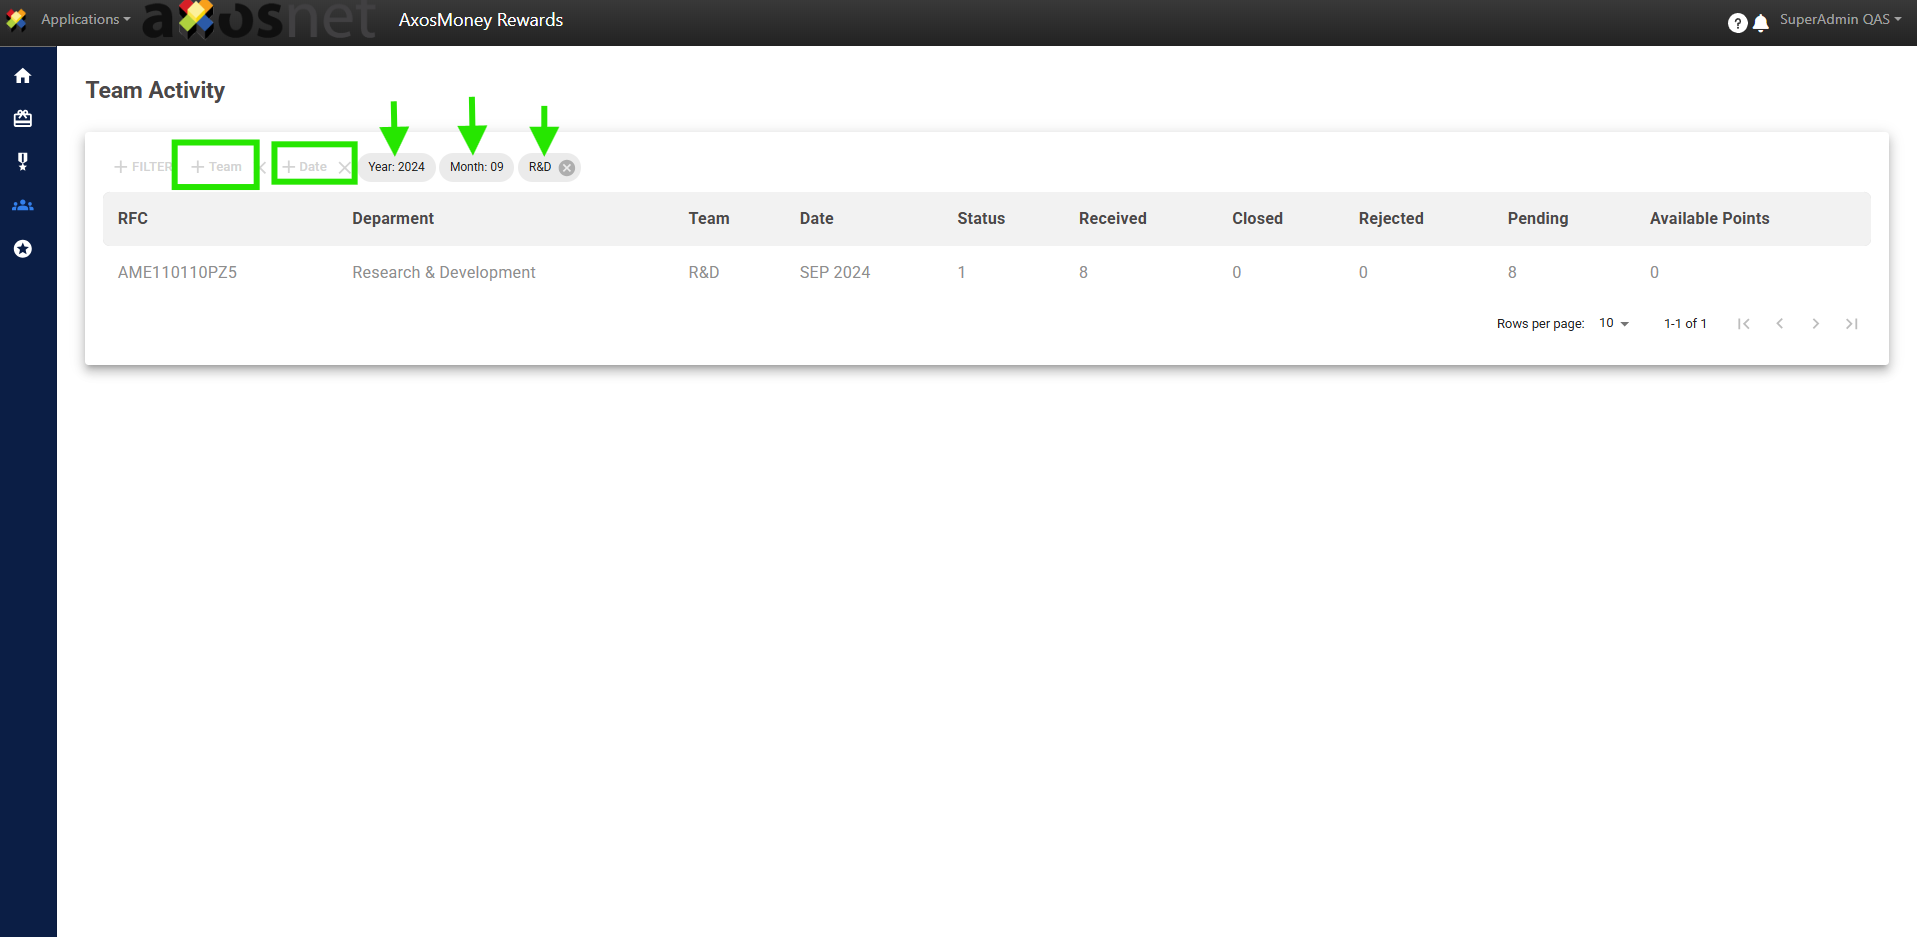
 3.2 You can identify team information including: RFC, DEPARTMENT, TEAM, and DATE.
 3.3 At the database level, the following is displayed:
 3.4 Click on “Filter” and select the option you need.
 3.5 Click on the chosen filter option and specify by selecting the desired result. For example, if you choose the “Date” filter, click on that option and enter the date you wish to specify.
Note: If necessary, select multiple filters for a more specific and quicker search.
3.5 Click on the chosen filter option and specify by selecting the desired result. For example, if you choose the “Date” filter, click on that option and enter the date you wish to specify.
Note: If necessary, select multiple filters for a more specific and quicker search.
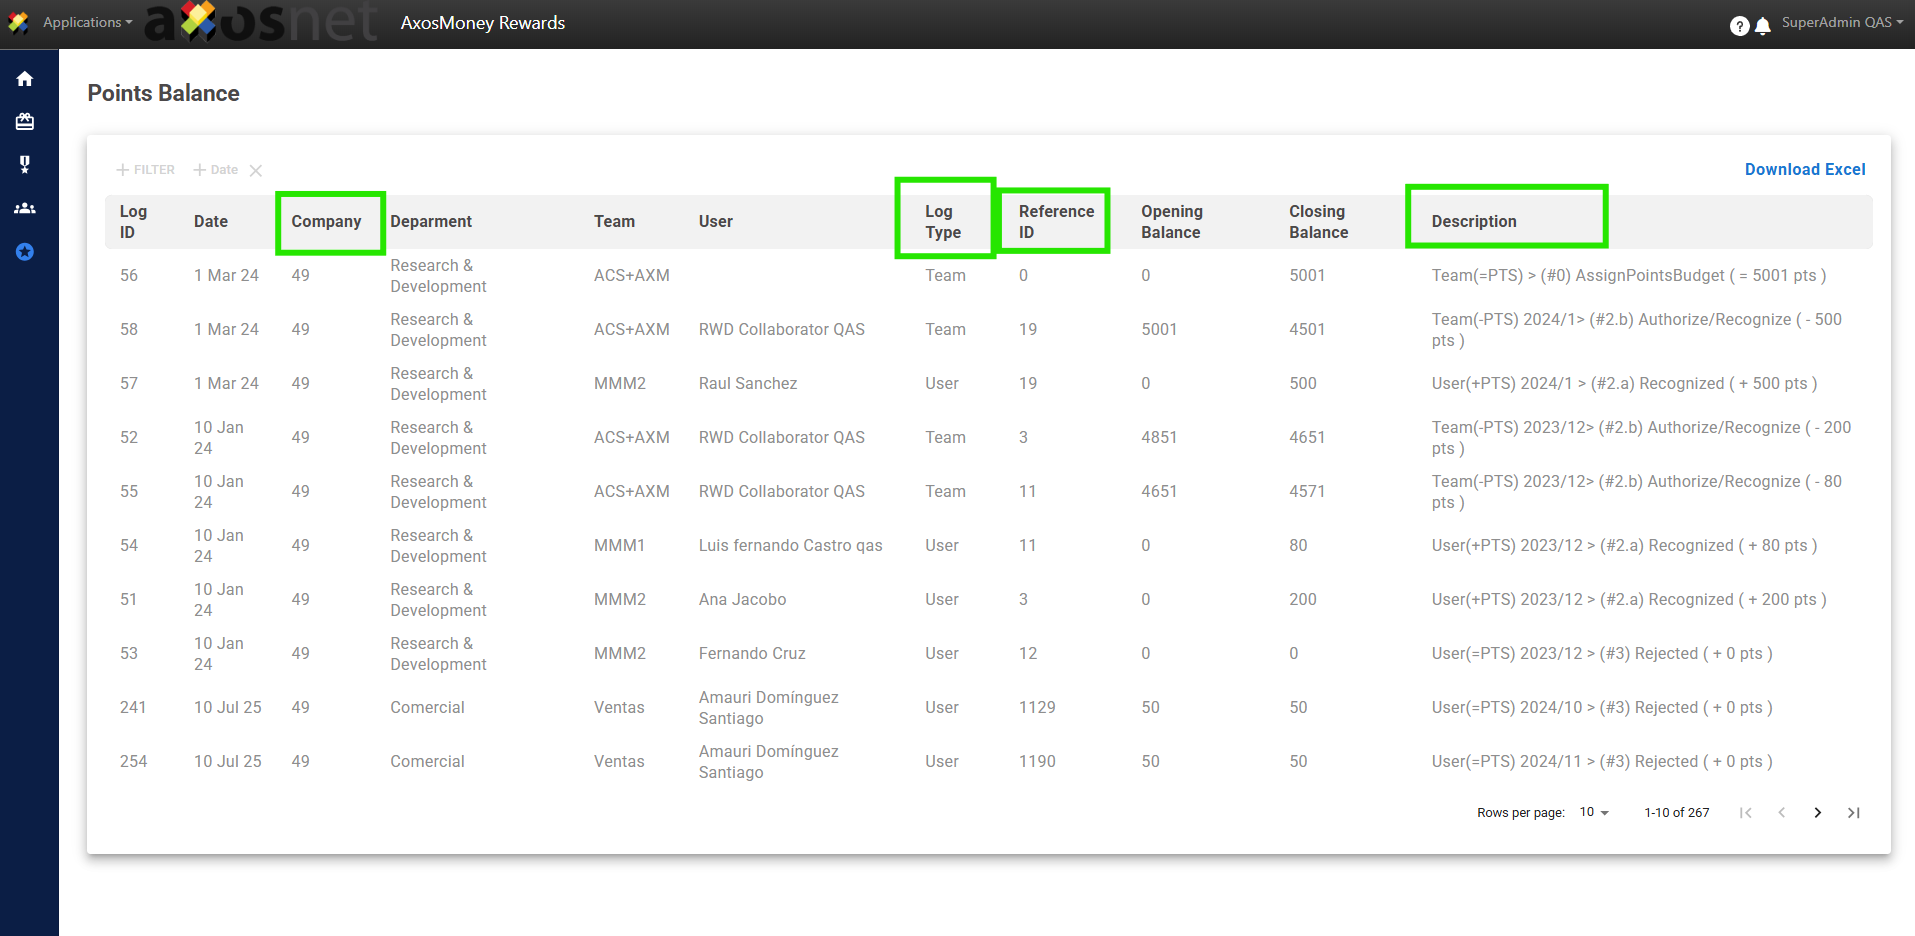
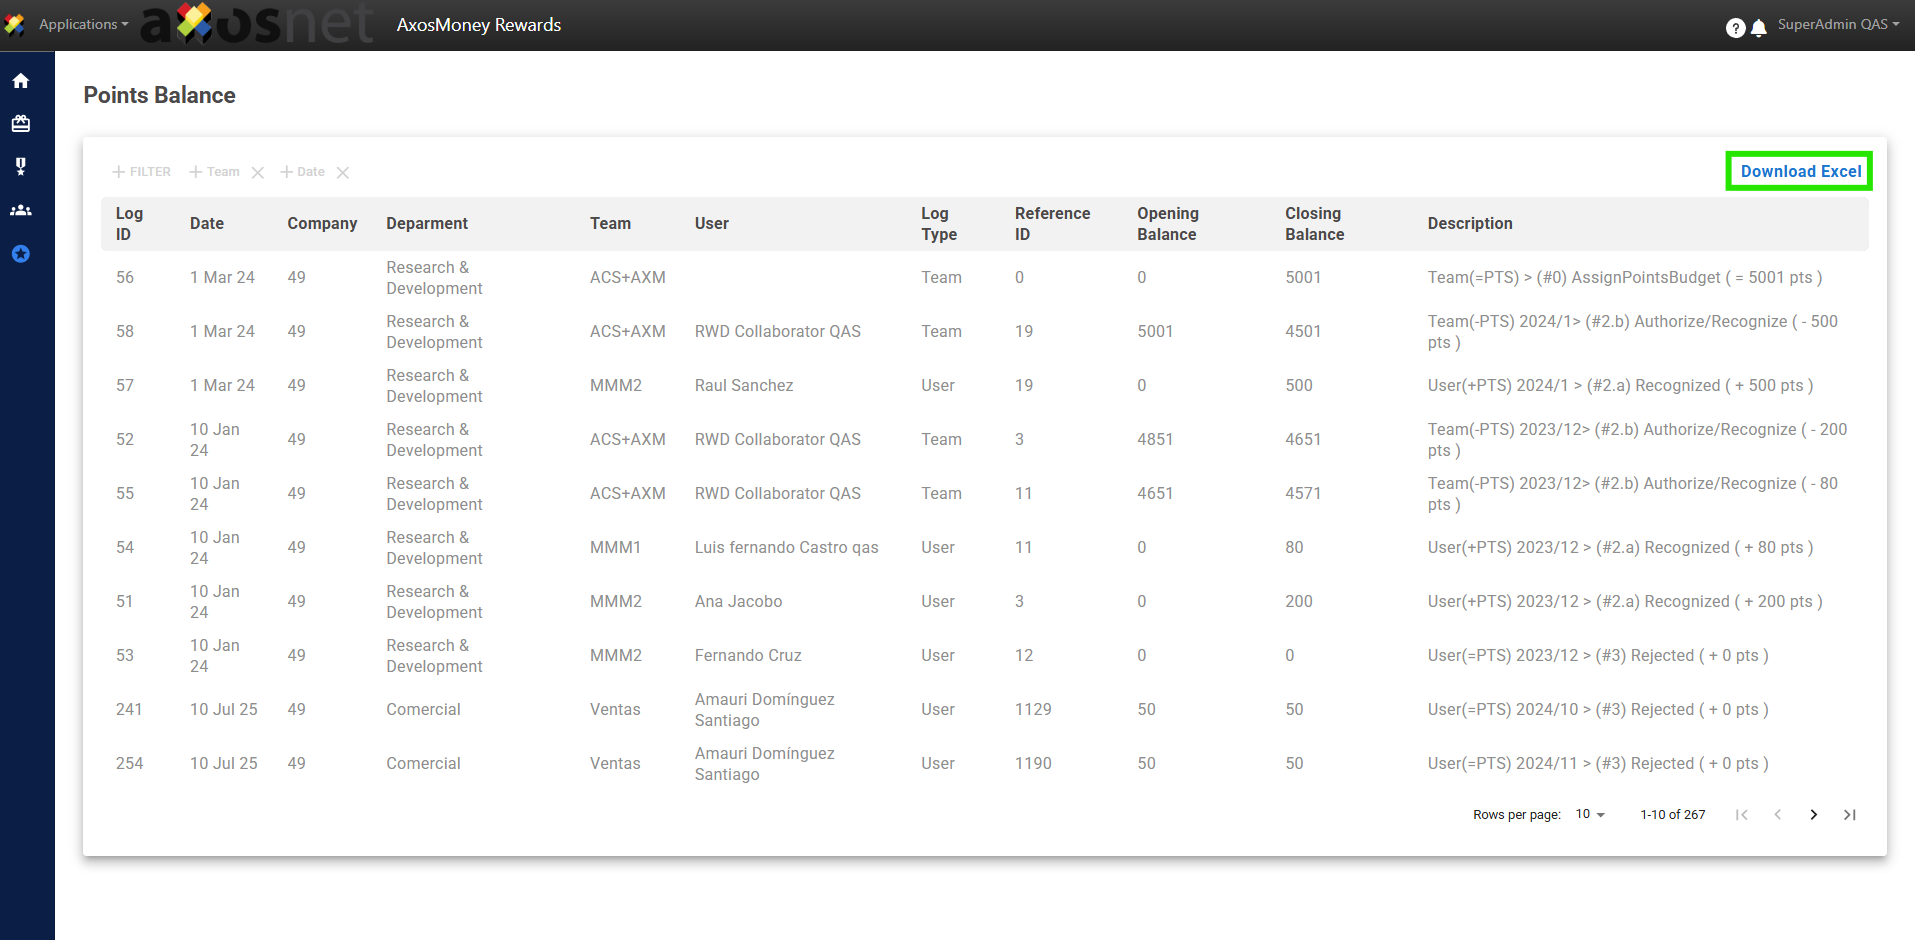
 4. Balance Points
This option allows the Super Administrator to view the points initially allocated to a team and the remaining balance at the end of the monthly period. If needed, you can download the Points Balance report in an Excel file.
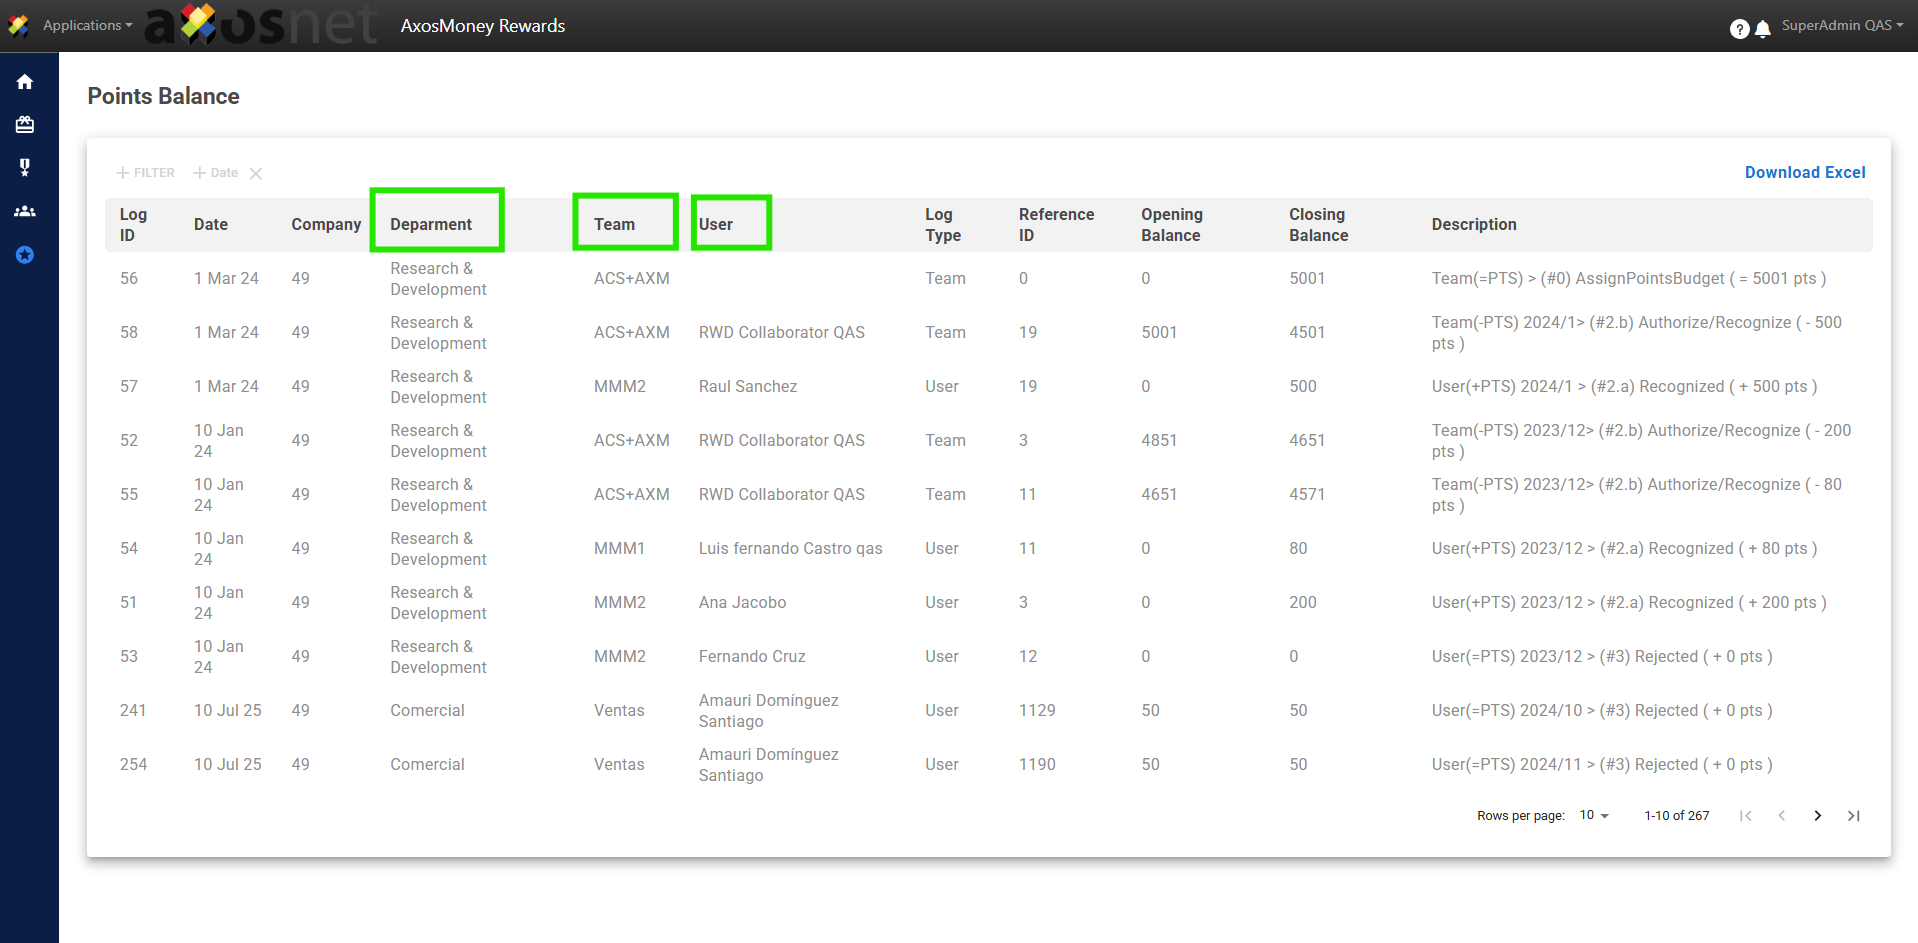
4.1 Click on the “Balance Points” option from the menu.
4. Balance Points
This option allows the Super Administrator to view the points initially allocated to a team and the remaining balance at the end of the monthly period. If needed, you can download the Points Balance report in an Excel file.
4.1 Click on the “Balance Points” option from the menu.
 4.2 View the list of information categorized by Department, Team, and User.
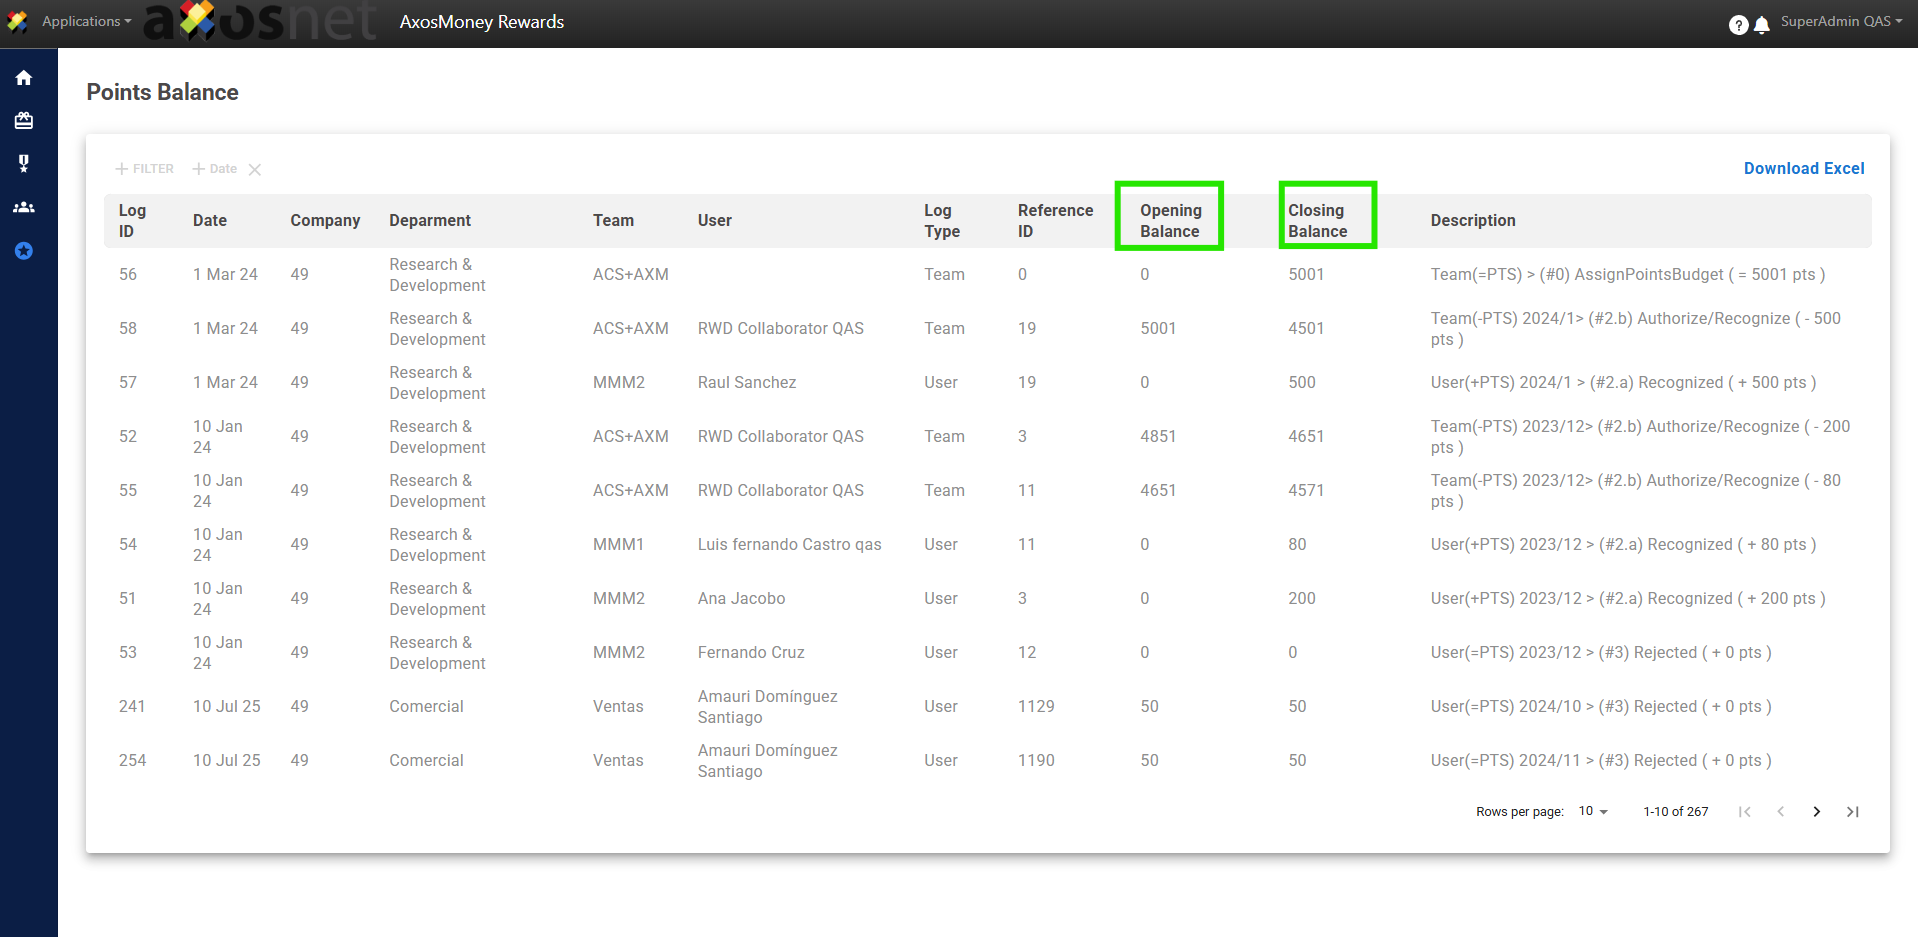
 4.3 You can identify the Initial and Final points balance once the corresponding month has ended.
 4.4 At the database level, it displays the Company Identifier, Record Type, Reference ID, and Description.
 4.5 Click on “Filter” and select the option you need.
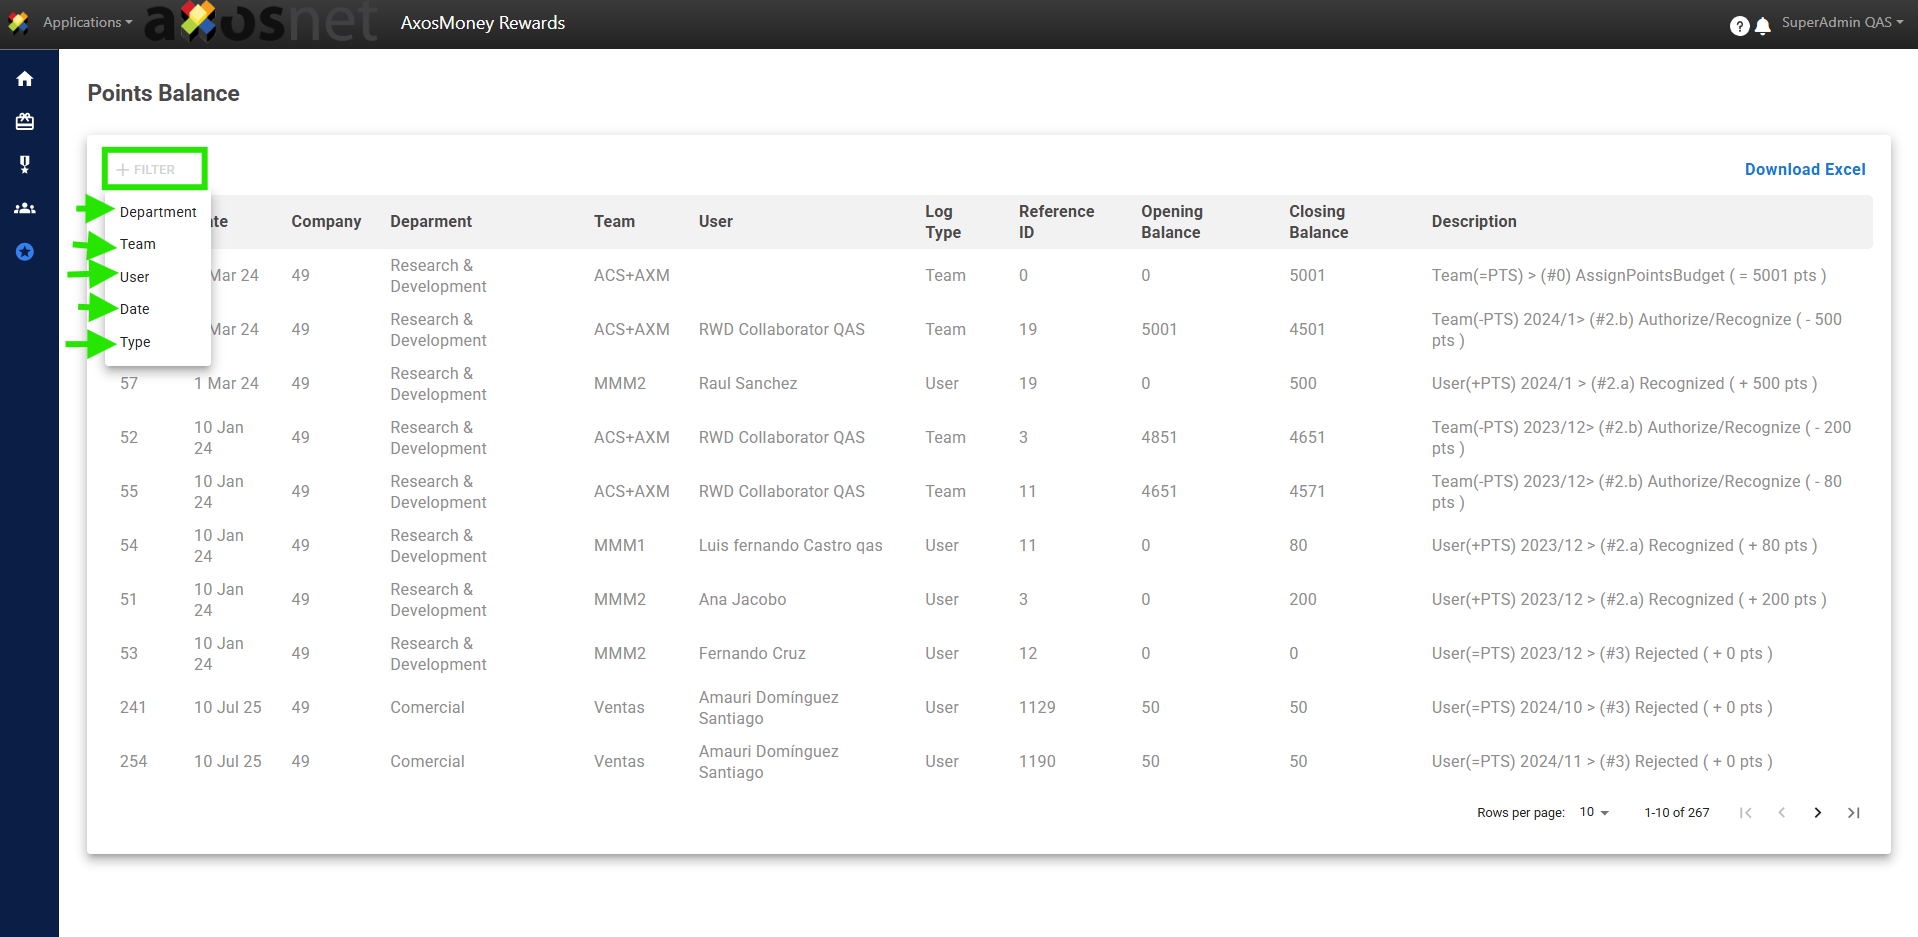 4.6 Click on the chosen filter option and specify by selecting the desired result. For example, if you choose the “Date” filter, click on that option and enter the date you wish to specify.
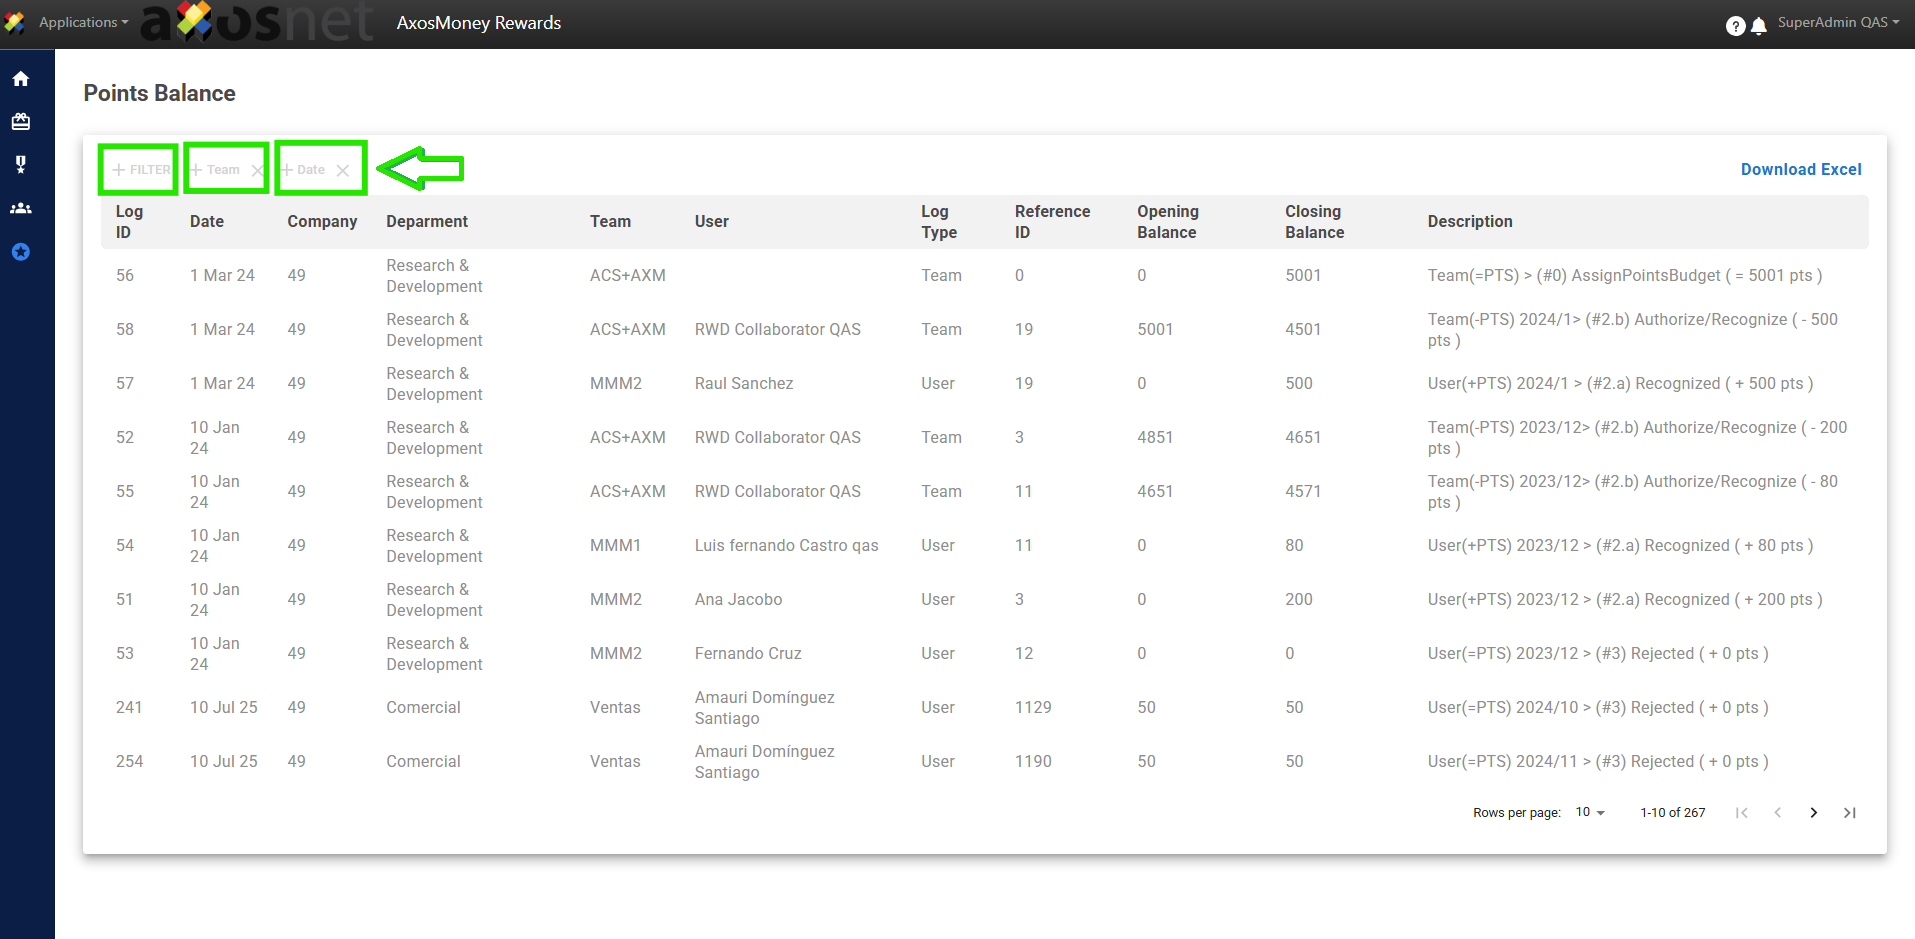 Note: If necessary, select multiple filters for a more specific and quicker search.
 4.7 Select the “Download Excel” option to obtain the Points Balance report in a .xlsx document.
2. Ensure the company to which the teams needing management are integrated is selected.
3. In the Statistics section, you can select the team you wish to review. Click on the dropdown menu and choose the team.
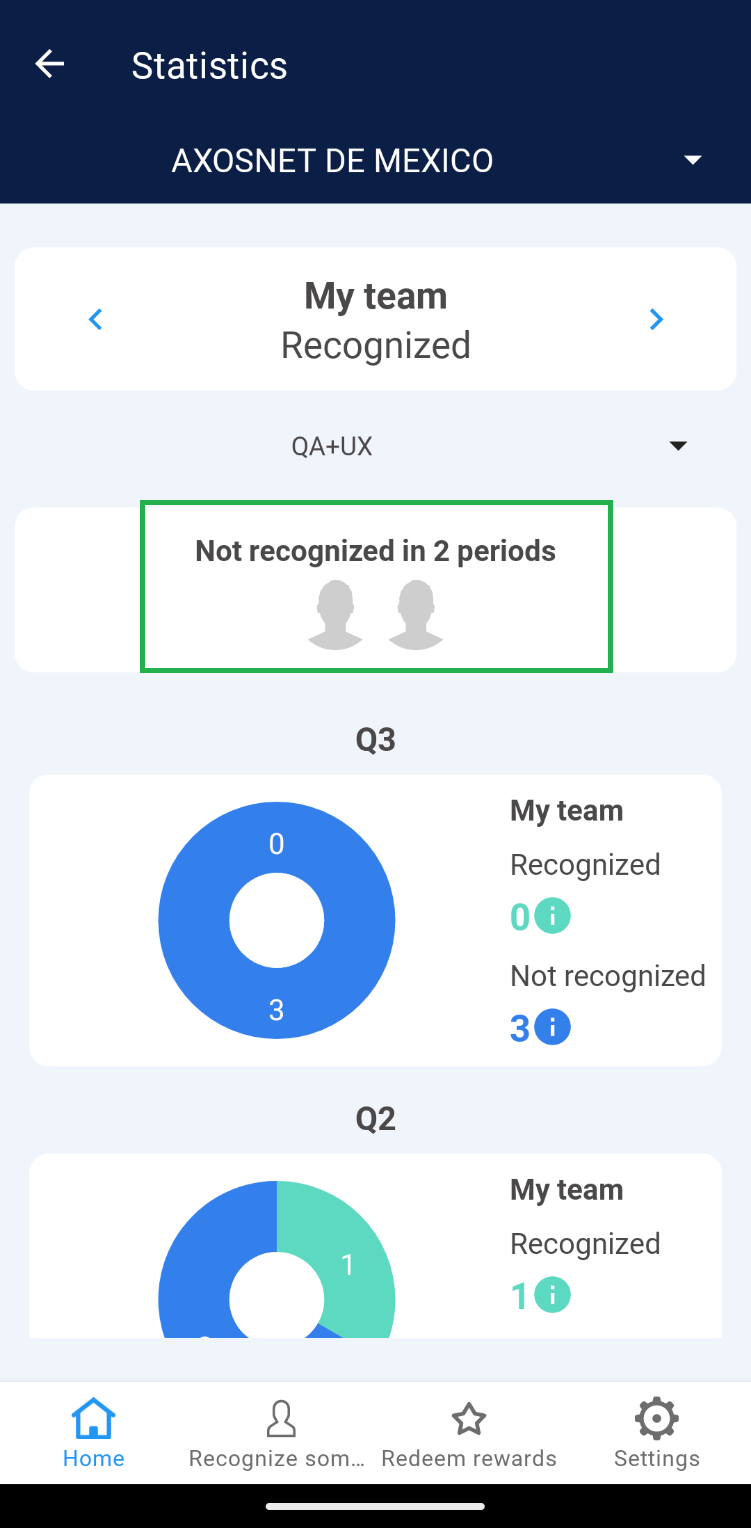
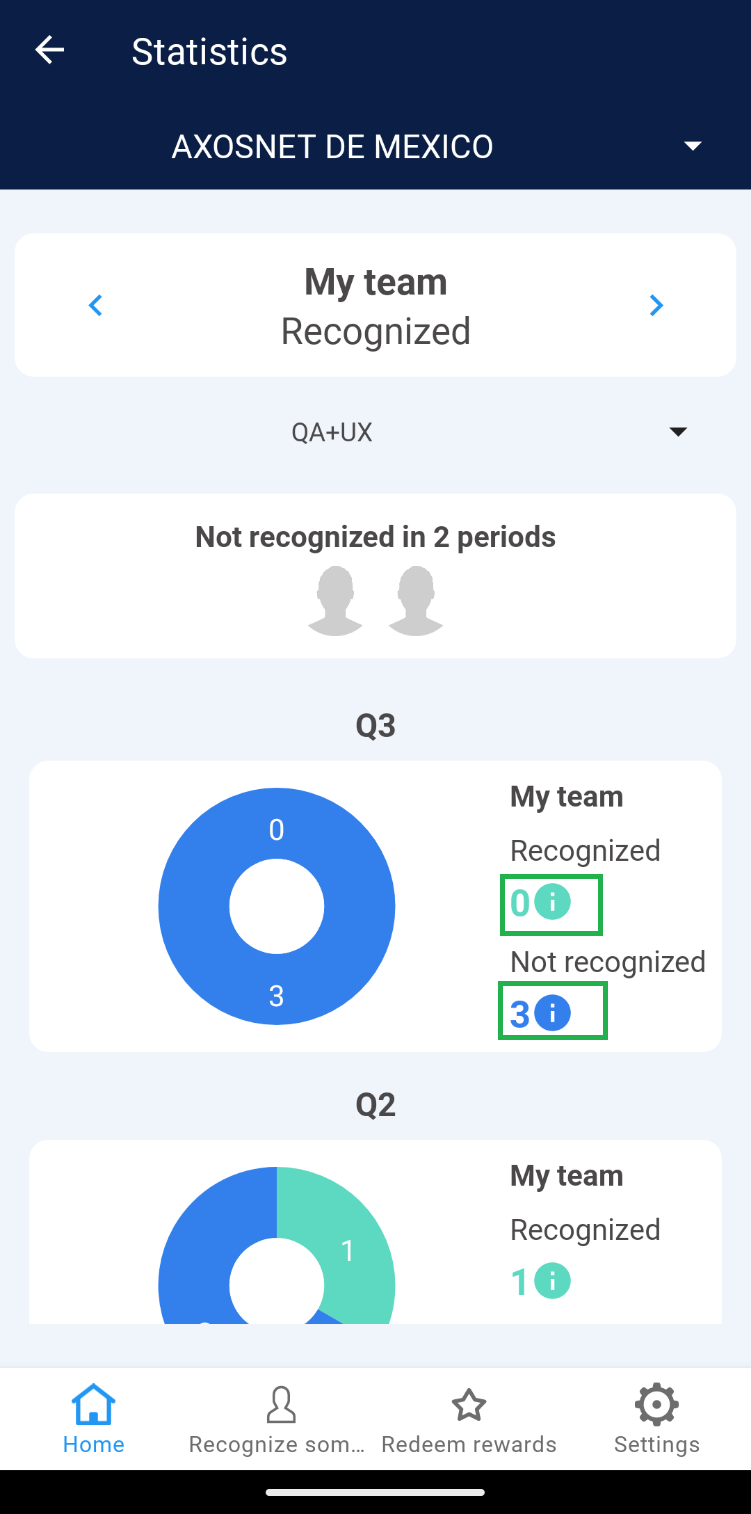
a) My Team – Recognitions
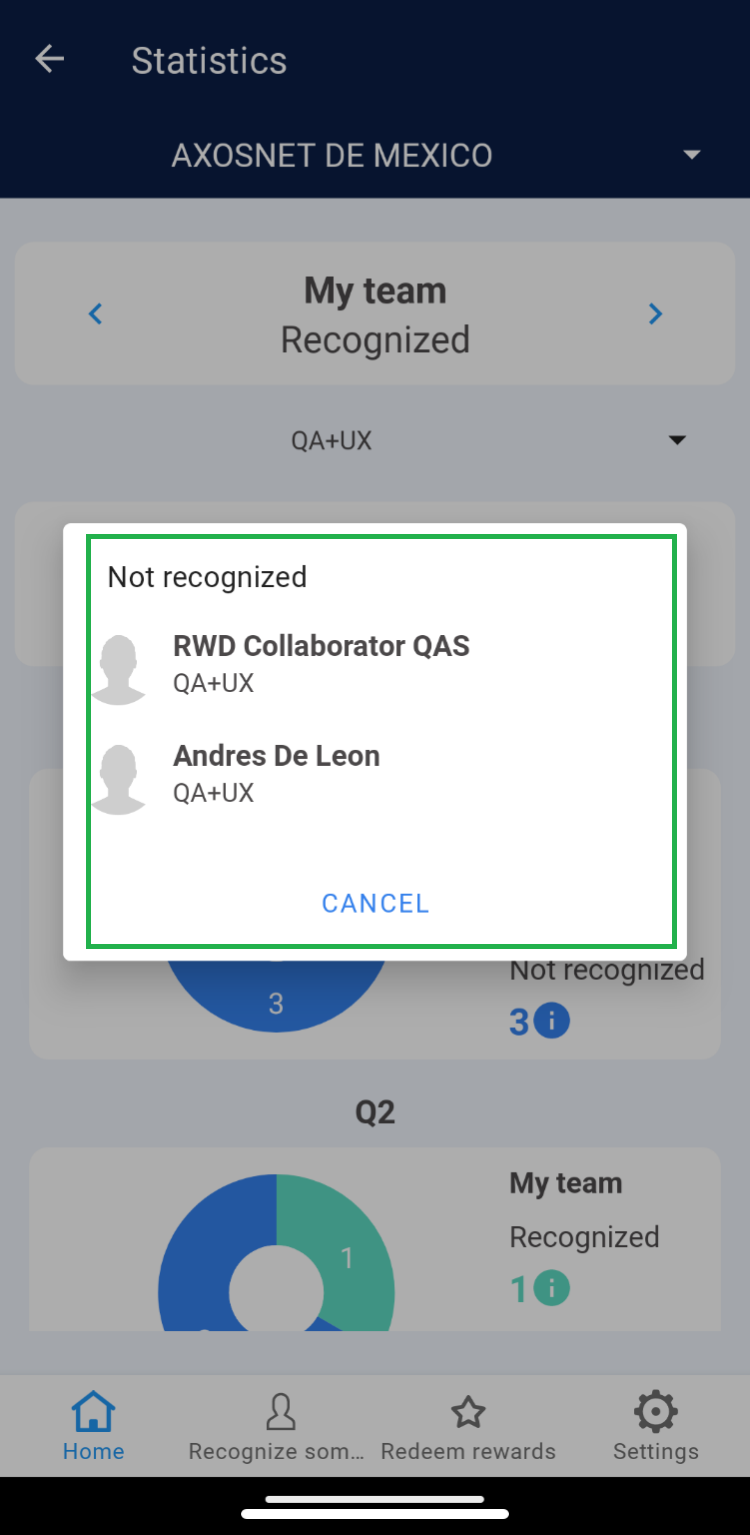
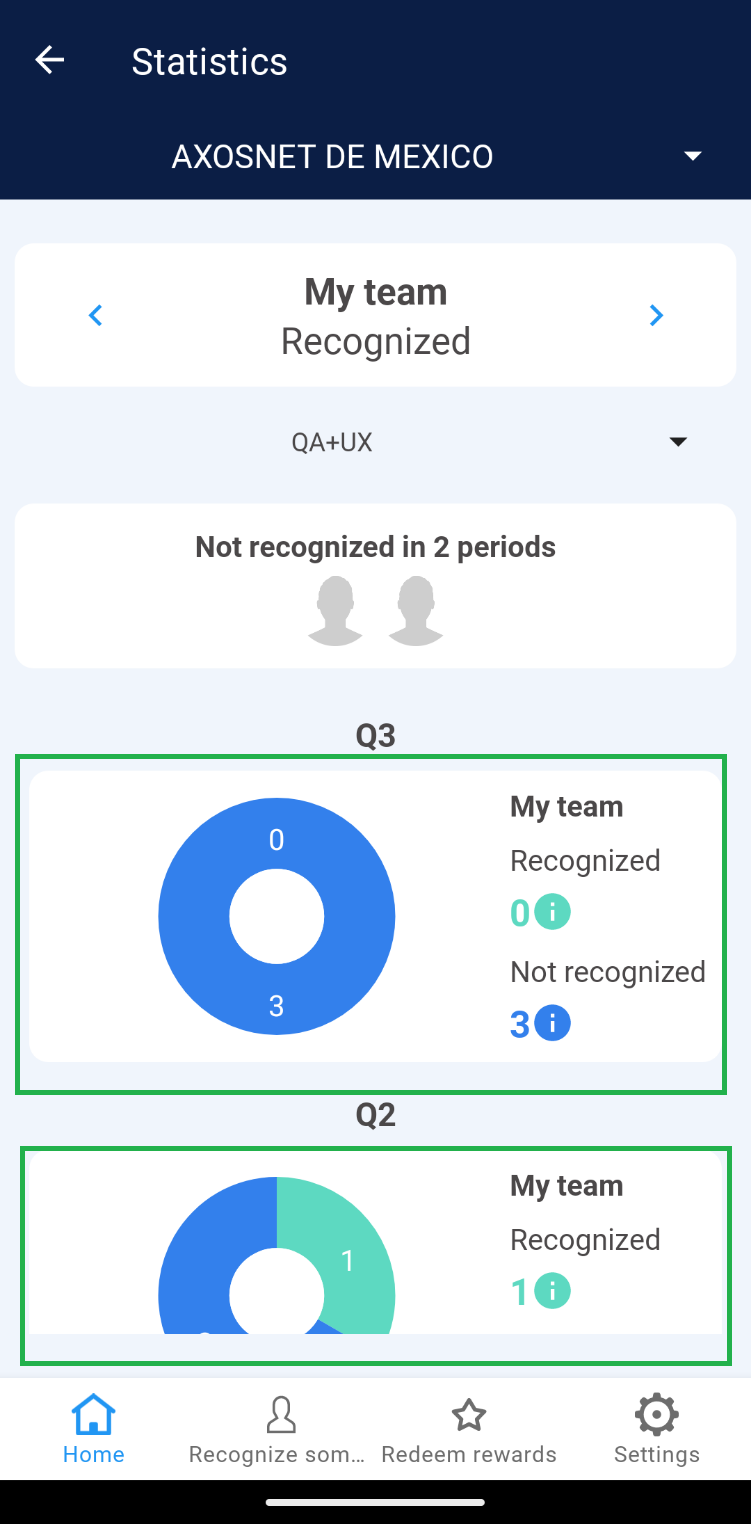
This section displays the number of recognitions received by team members from users of other teams within the same company over the last 2 periods. 1. You can identify the number of team members who have not received recognition in the last 2 periods.
2. Select any user’s avatar to view detailed information for each.
3. You can visualize team members who have been recognized compared to those who have not, represented graphically and categorized by periods.
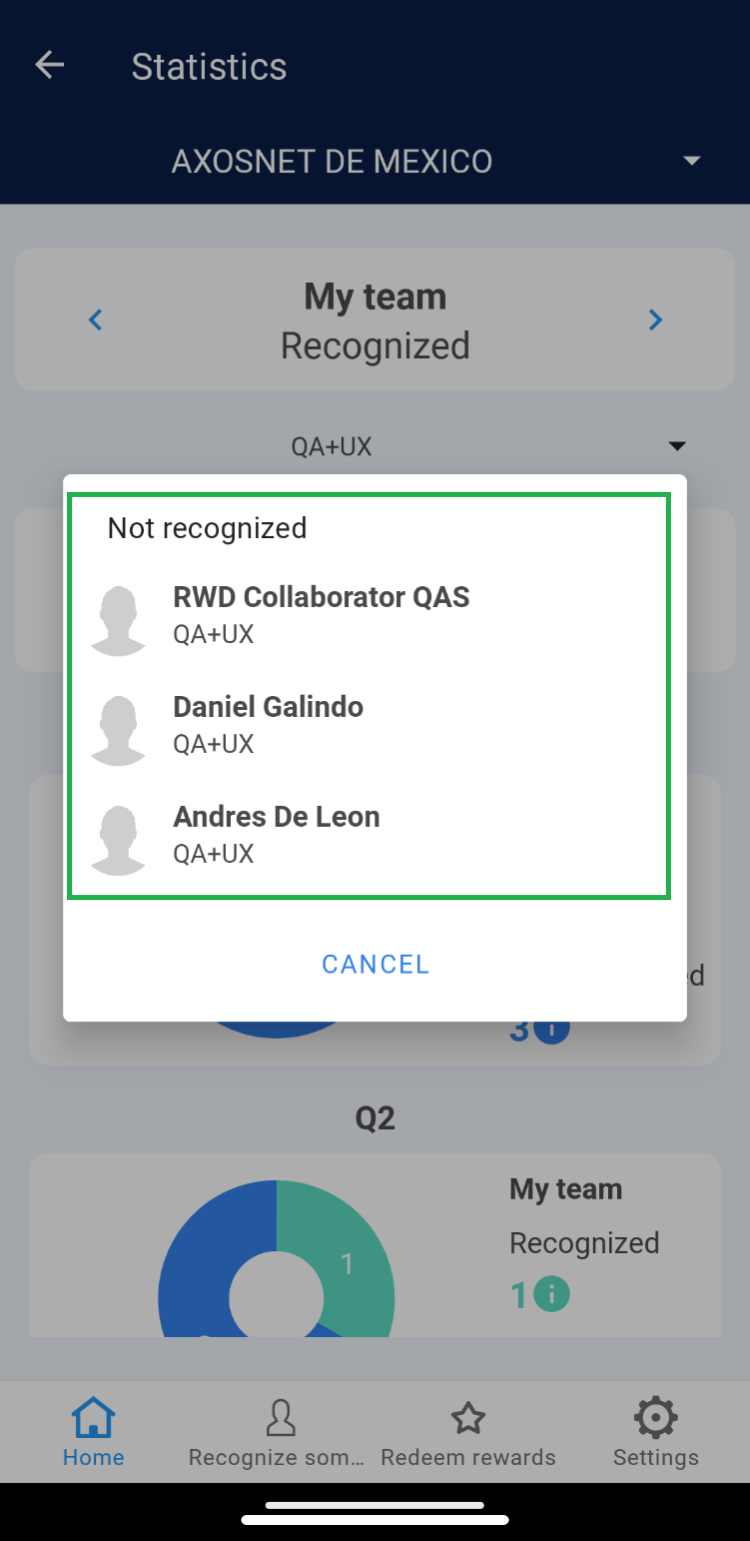
4. Click on the number of “Recognized” or “Not Recognized” to view team members who meet that criterion within the specified period.
|
|
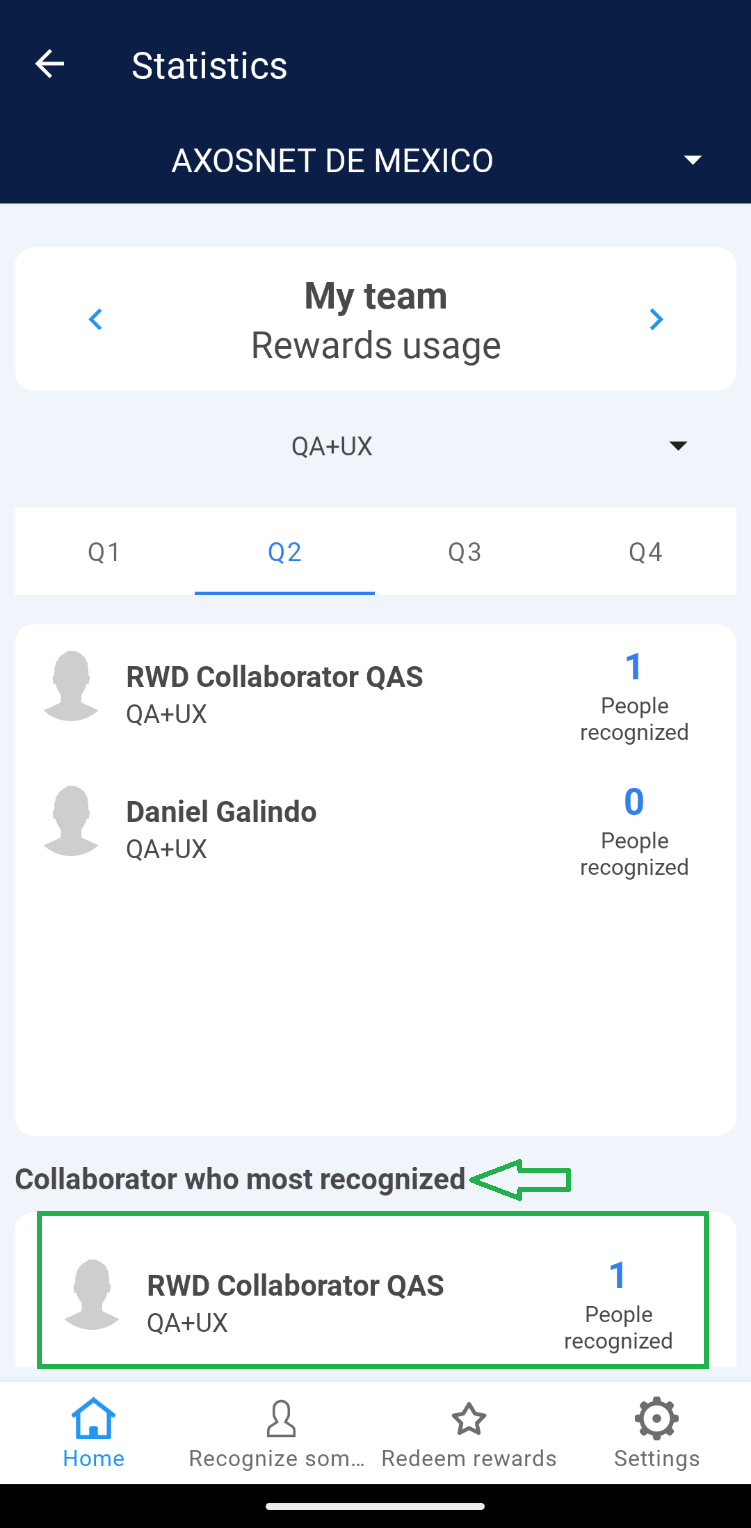
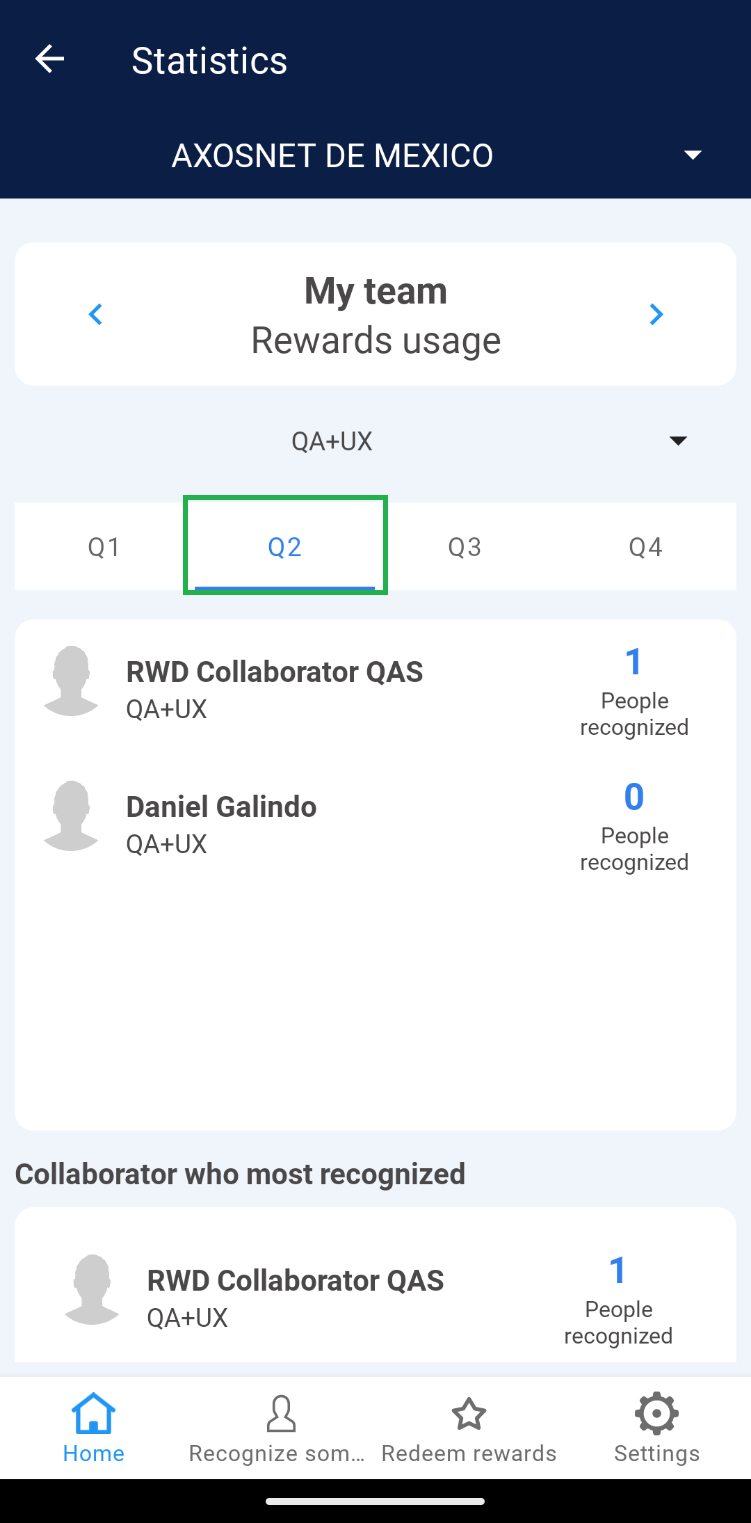
b) My Team – Rewards Usage
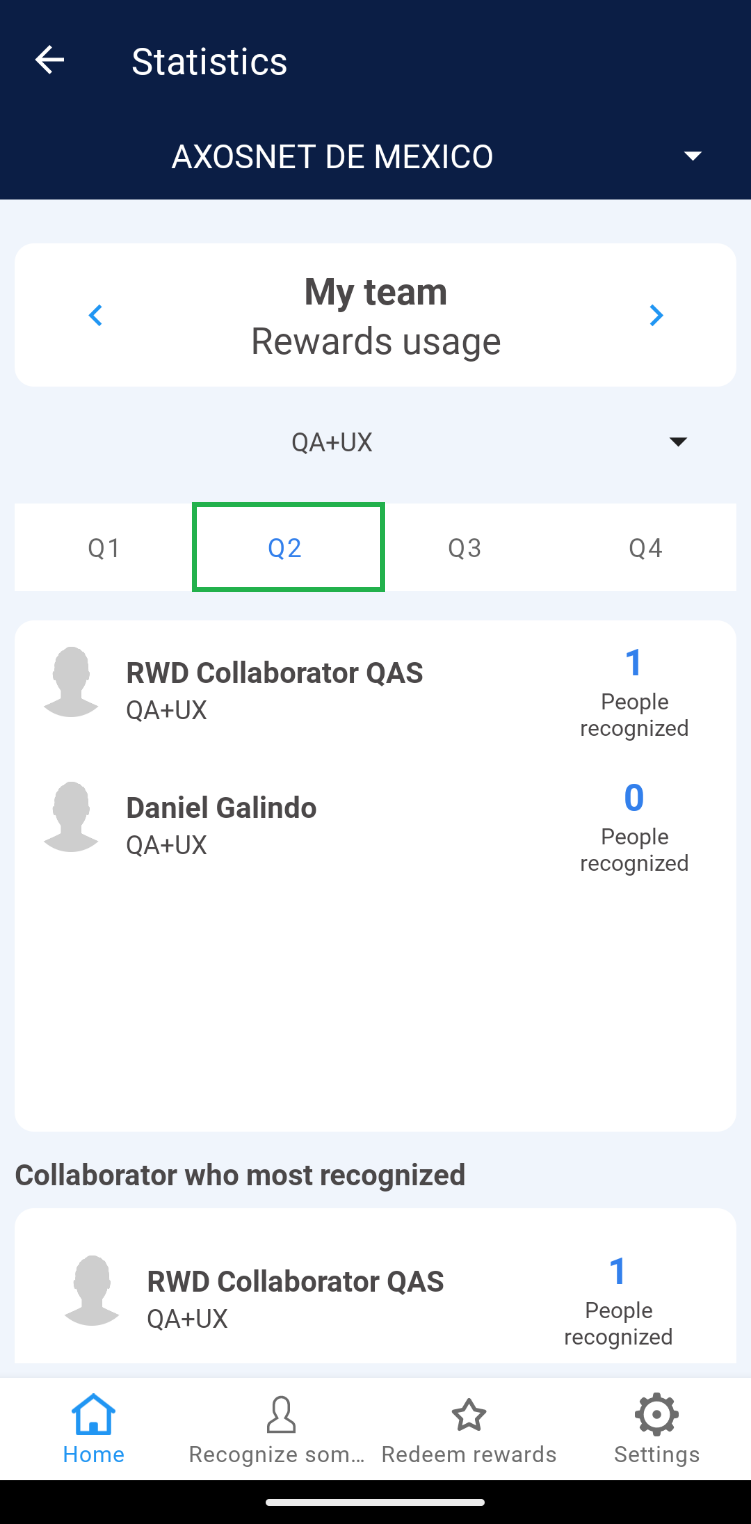
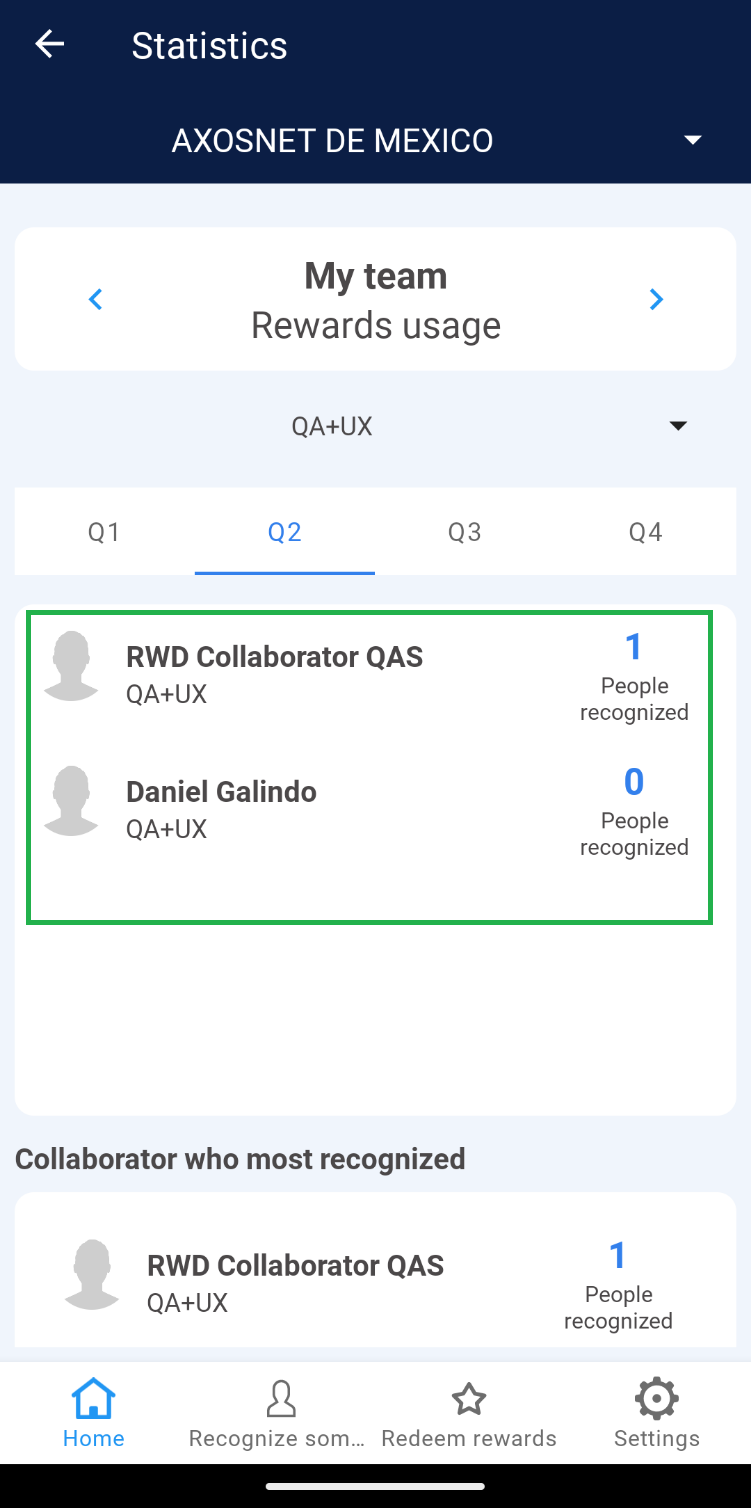
This option highlights team members who have given Recognitions to users from other teams within the same company. This information is categorized into 4 periods, and you can locate actions recorded within each time frame. 1. Select the period for which you wish to view the recognition statistics.
2. You will identify the names of the top-performing team members who have given recognitions.
3. The application displays the name of the team member who “Recognized the Most” and the one who “Recognized the Least” during the selected period.
4. Click on the number of “Recognized Individuals” to see details of the users.

|

|
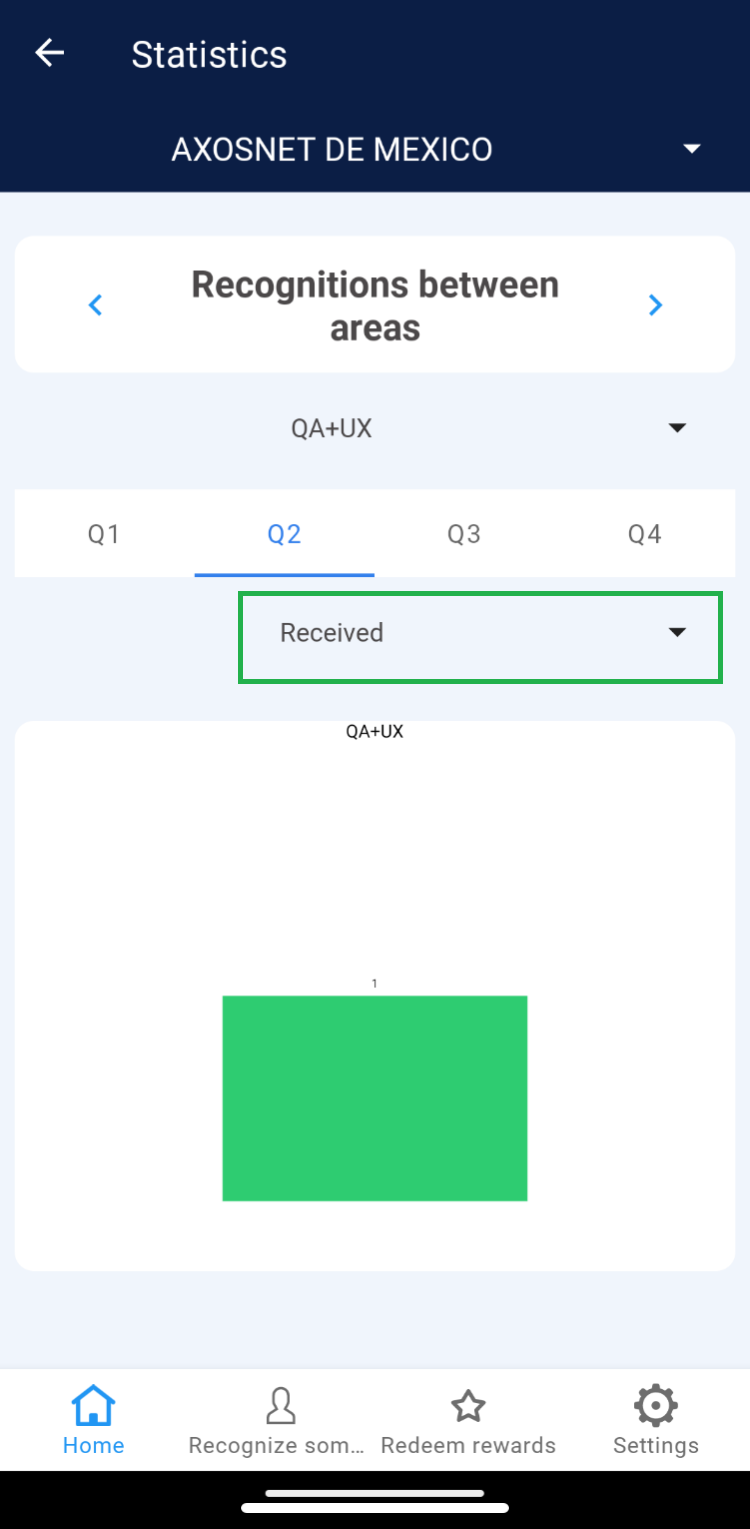
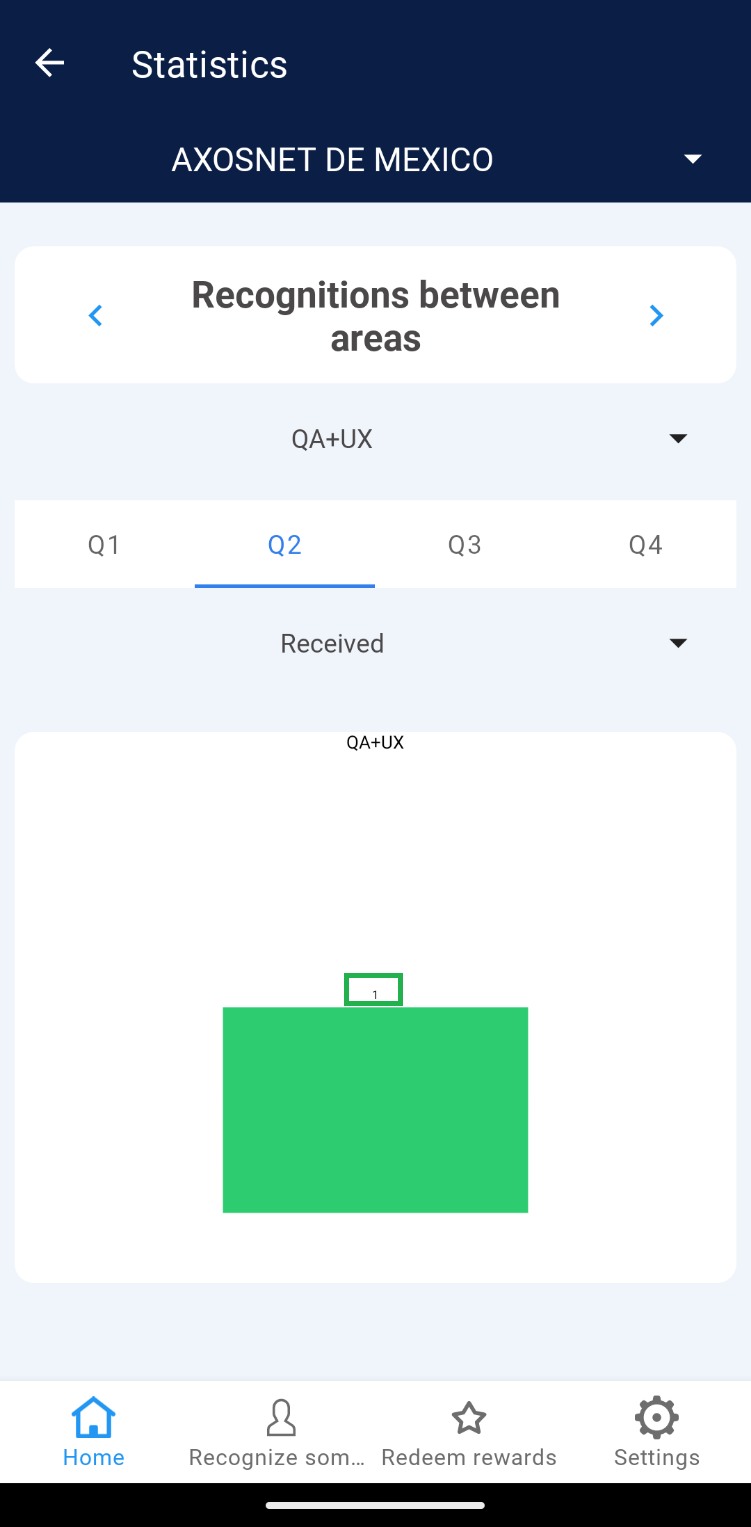
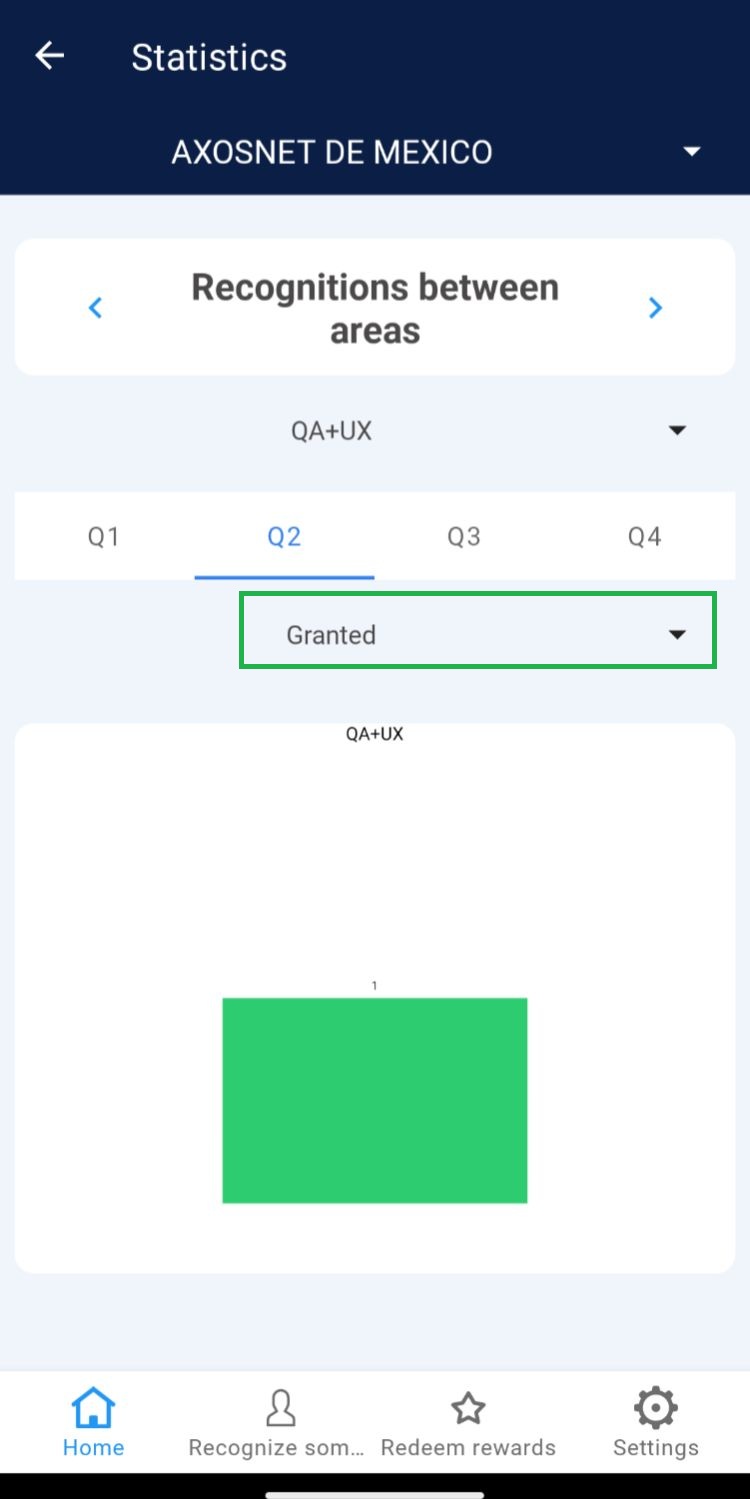
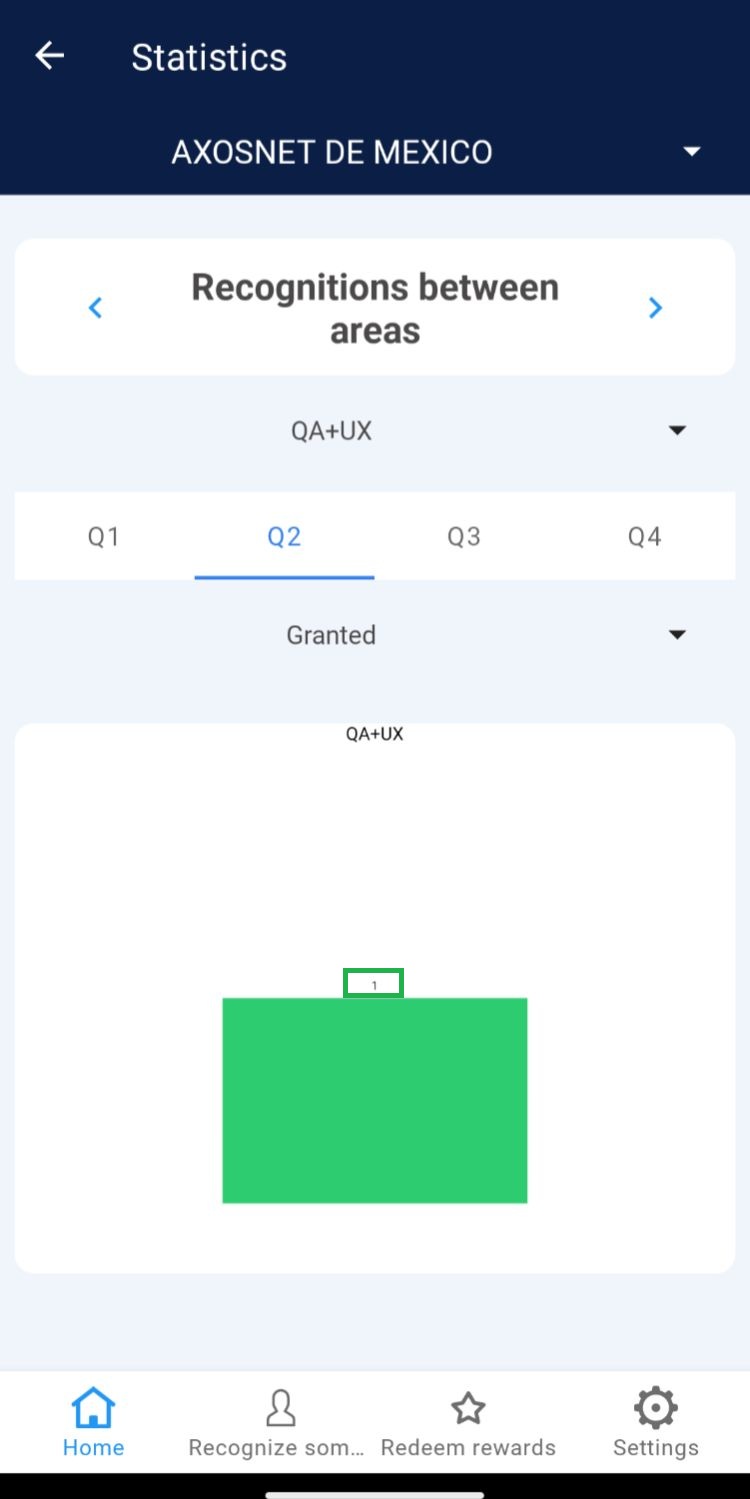
c) Recognition Across Departments
In this section, the Super Administrator will graphically identify the number of Recognitions Received and Given at the TEAM level, classified by period. 1. Select the period you wish to view the information for.
2. Click on the “Received Recognitions” tab.
3. You can identify the teams that have given recognition to the displayed team in the list.
4. Select the “Given Recognitions” tab.
5. It shows the number of recognitions given to other teams. These are represented graphically.
d) RWD WEB Activity Management
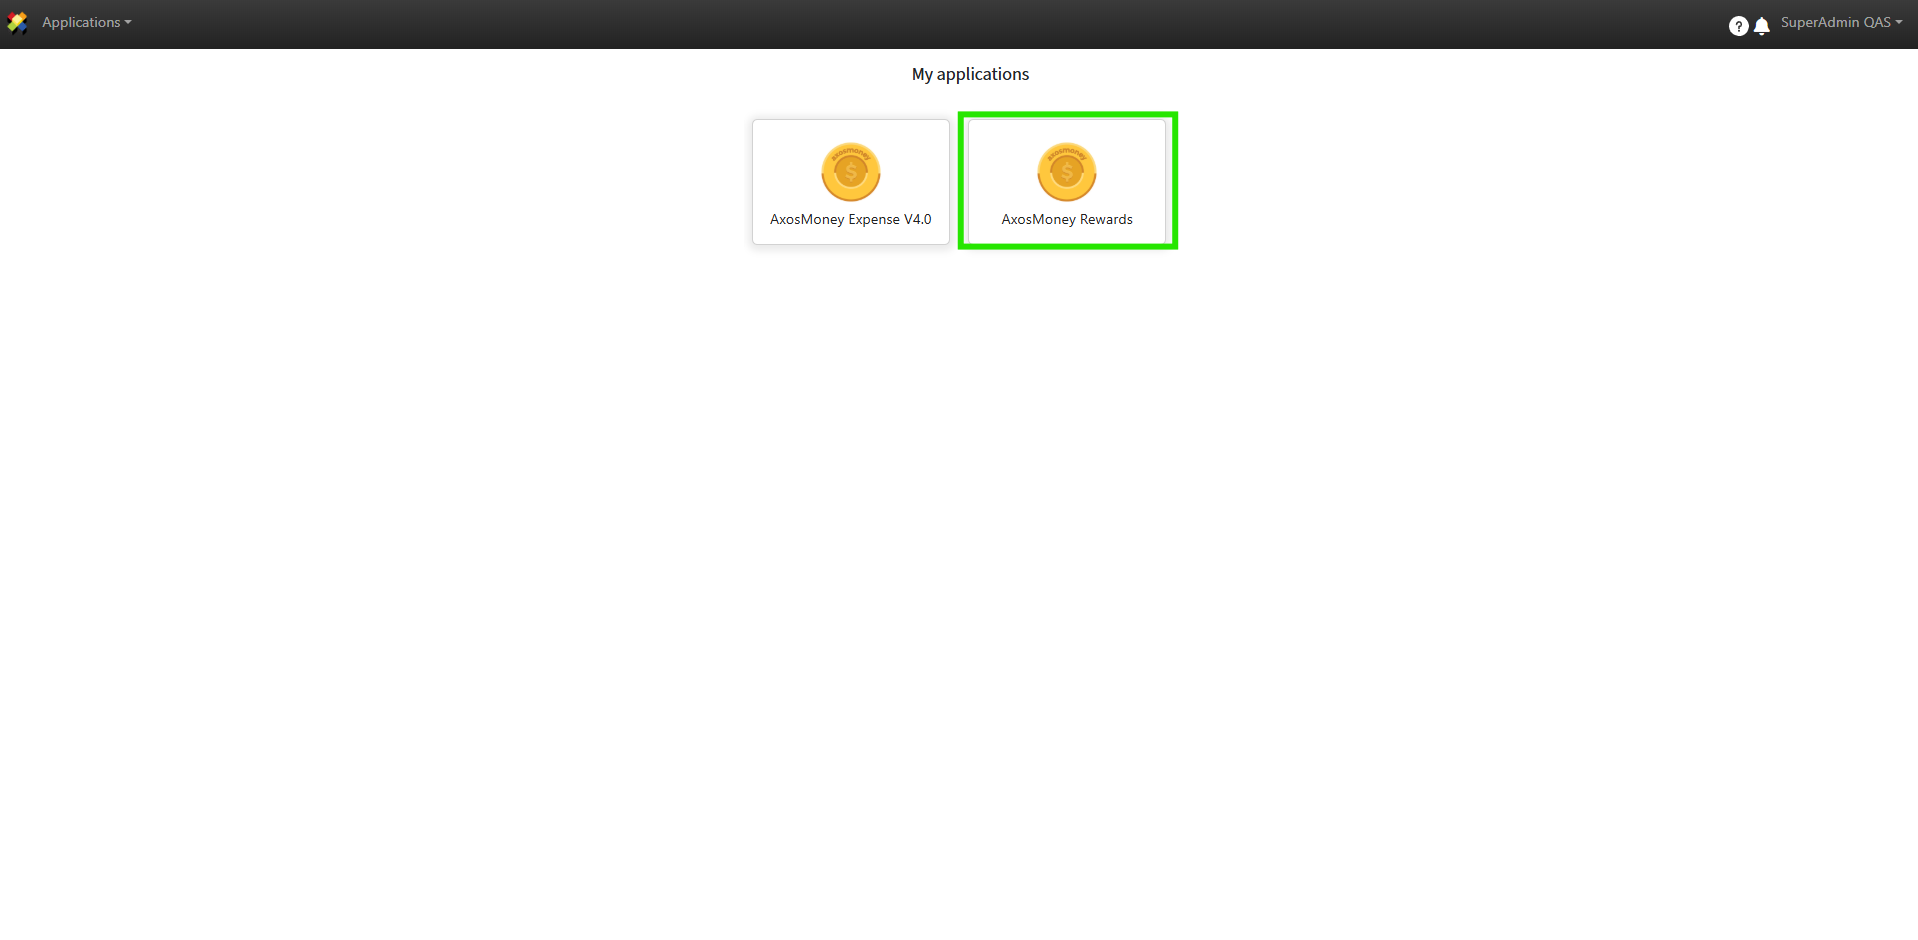
The Super Administrator can consult the points balance report of a department and the activities performed by a team through the ACS page using the AxosMoney Rewards application. 1. Access ACS and click on AxosMoney Rewards.
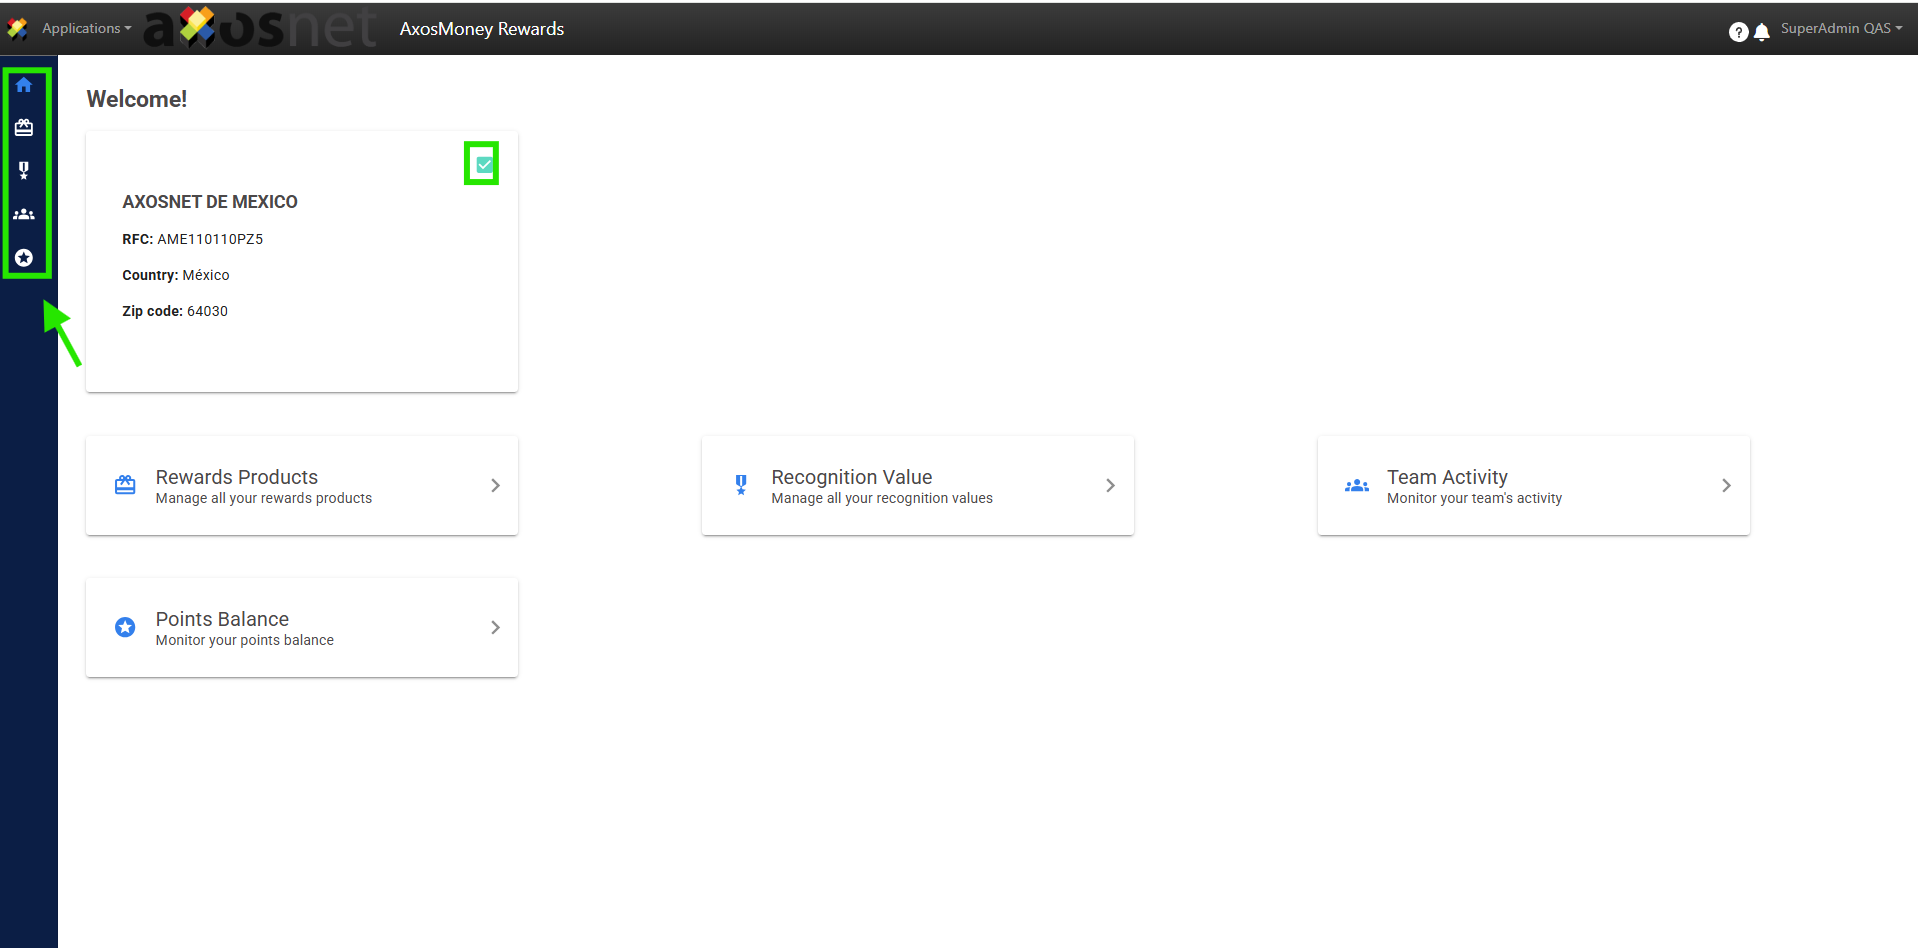
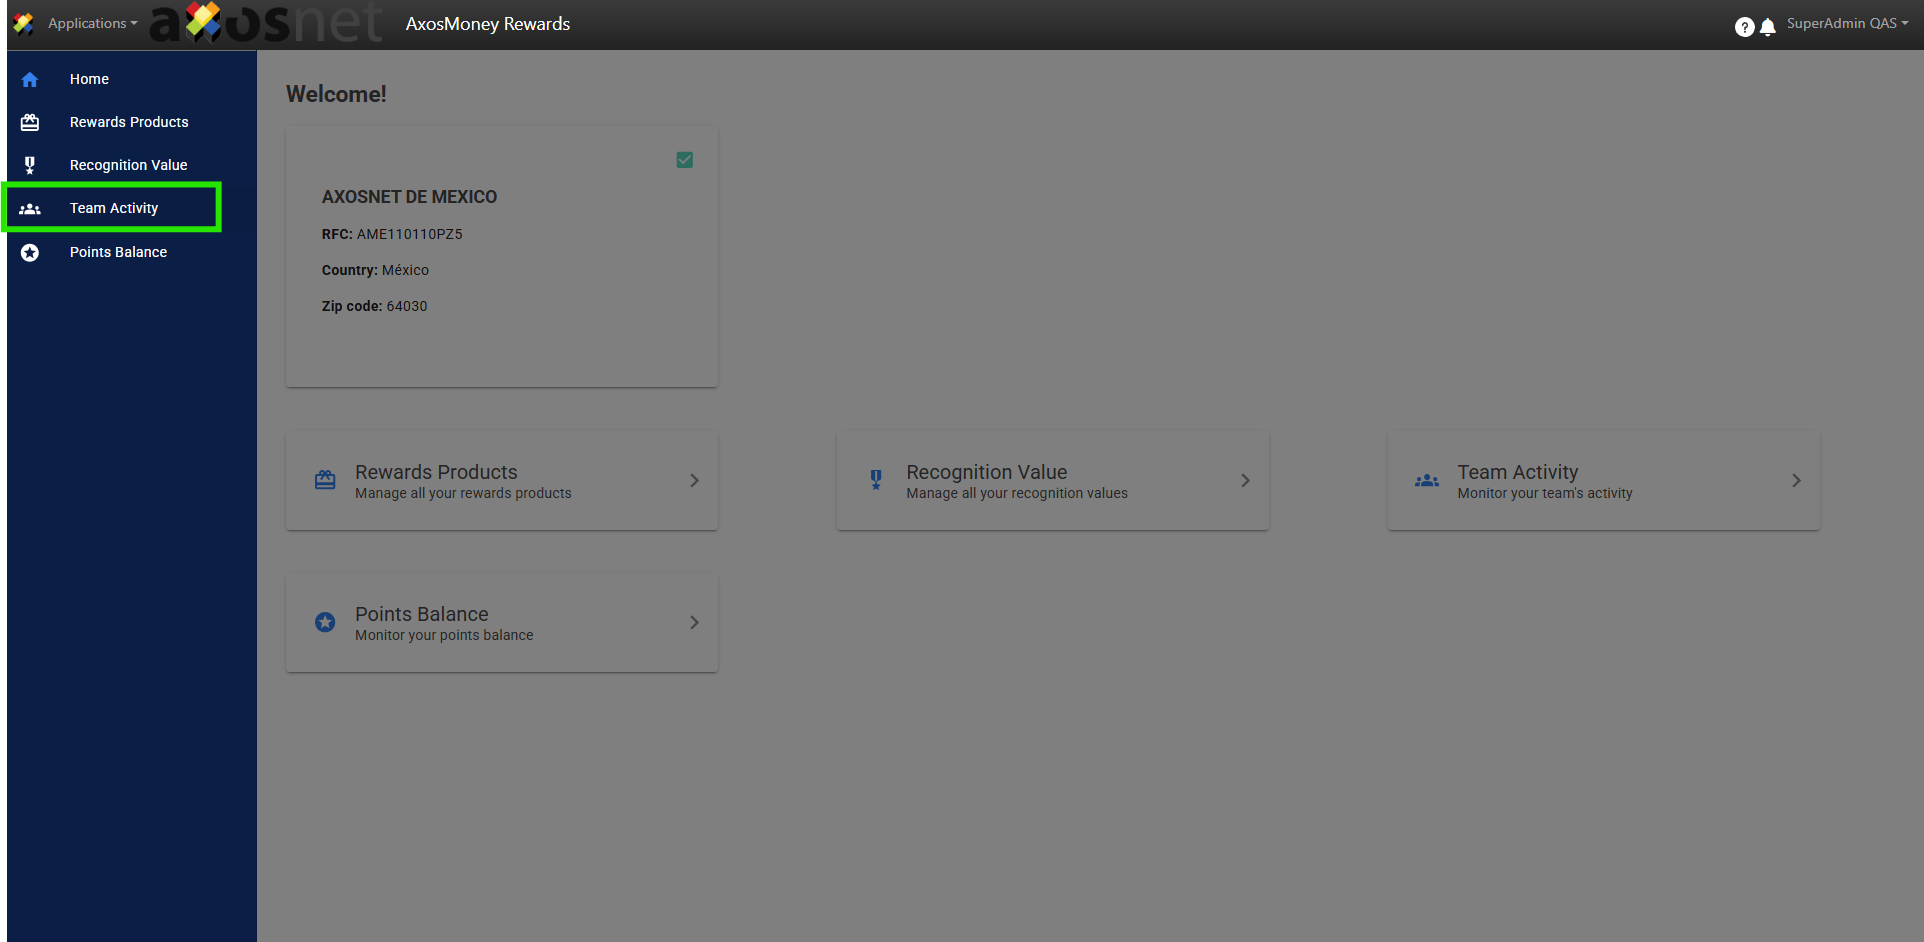
2. Select the company to enable the horizontal menu on the screen.
3. Team Activity
In this section, the Super Admin can view tasks performed and approval statuses for either all teams or a specific team.
3.1 Select “Team Activity” from the menu.
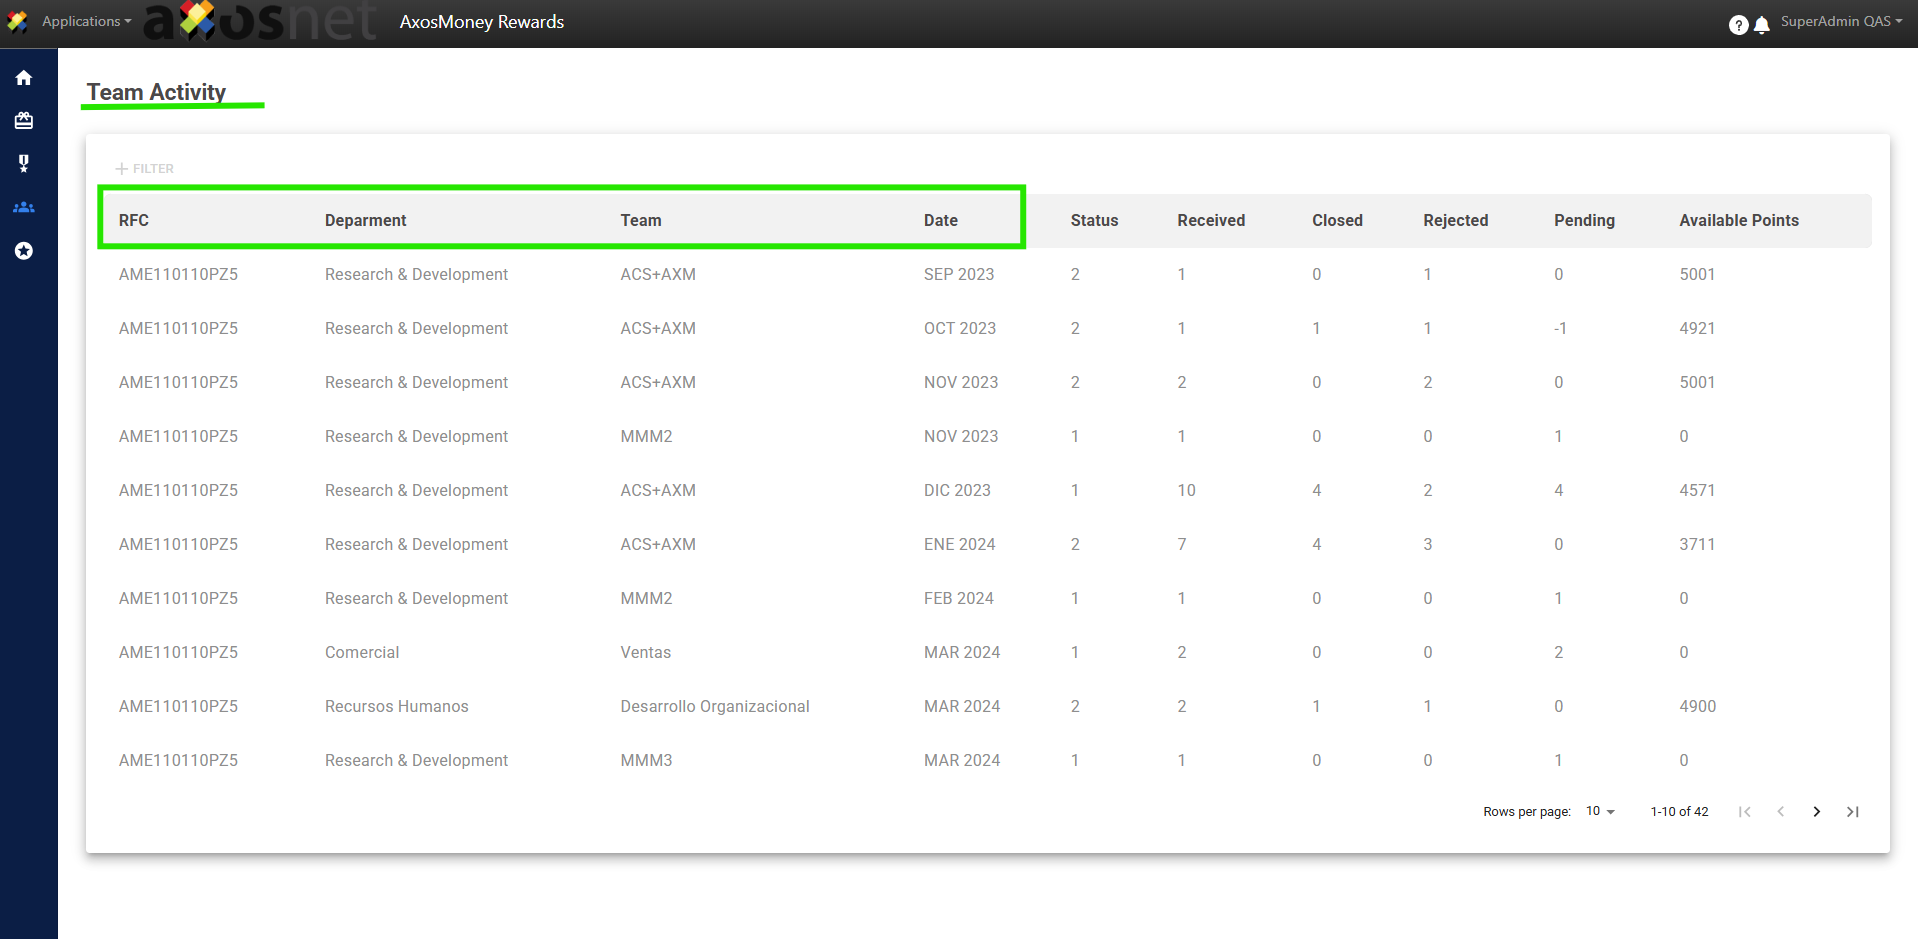
3.2 You can identify team information including: RFC, DEPARTMENT, TEAM, and DATE.
3.3 At the database level, the following is displayed:
- Status: The status for that month, whether closed (2) or still open (1).
- Open: Refers to the number of recognitions for that month.
- Close: Number of recognitions already approved.
- Rejected: Number of recognitions that were not approved.
- Pending: Pending approvals within the registered date.
- Available Points: Points assigned to each team.
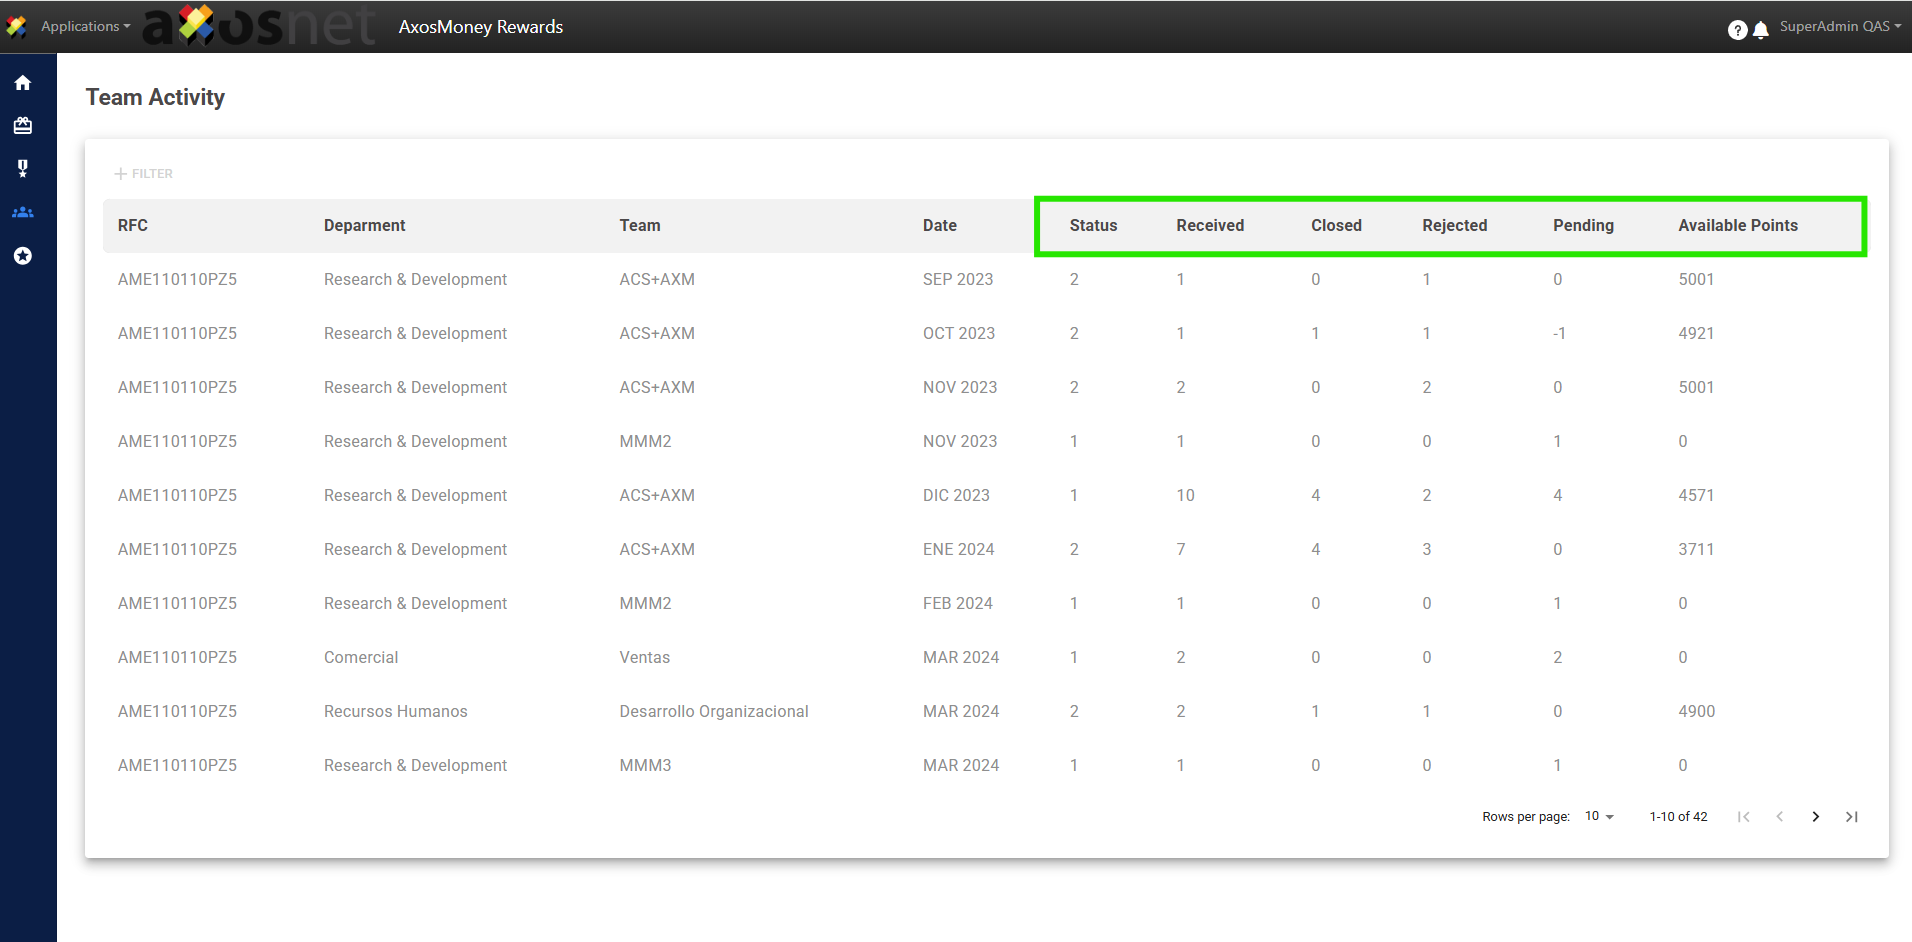
3.4 Click on “Filter” and select the option you need.
3.5 Click on the chosen filter option and specify by selecting the desired result. For example, if you choose the “Date” filter, click on that option and enter the date you wish to specify.
Note: If necessary, select multiple filters for a more specific and quicker search.
4. Balance Points
This option allows the Super Administrator to view the points initially allocated to a team and the remaining balance at the end of the monthly period. If needed, you can download the Points Balance report in an Excel file.
4.1 Click on the “Balance Points” option from the menu.
4.2 View the list of information categorized by Department, Team, and User.
4.3 You can identify the Initial and Final points balance once the corresponding month has ended.
4.4 At the database level, it displays the Company Identifier, Record Type, Reference ID, and Description.
4.5 Click on “Filter” and select the option you need.
4.6 Click on the chosen filter option and specify by selecting the desired result. For example, if you choose the “Date” filter, click on that option and enter the date you wish to specify.
Note: If necessary, select multiple filters for a more specific and quicker search.
4.7 Select the “Download Excel” option to obtain the Points Balance report in a .xlsx document.