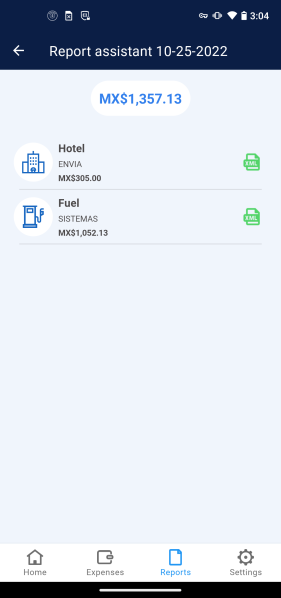
The Report Assistant is a tool that works automatically, helping the user create reports by scheduling them as required. Follow the instructions shown below for implementation.
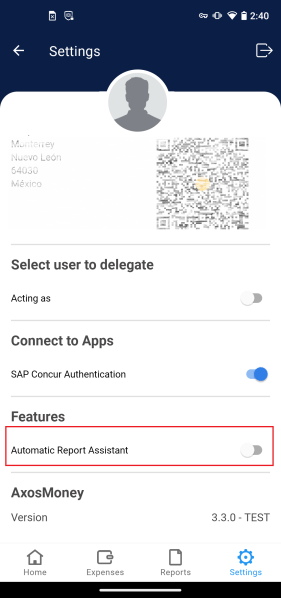
1. In the “Settings” screen, activate the “Automatic Report Assistant.”
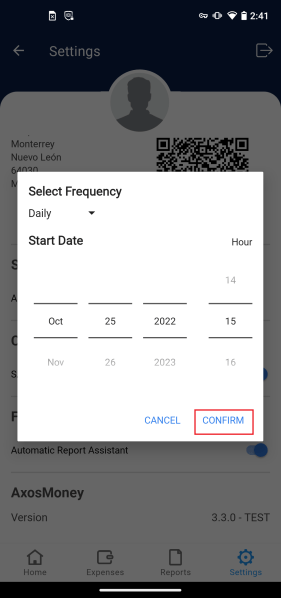
2. A prompt will appear. Select the Frequency, Date, and Hour for the Assistant to make a Report. Then tap CONFIRM.
Note: keep in mind that the report will contain only the expenses that are marked as Valid and have a classification.
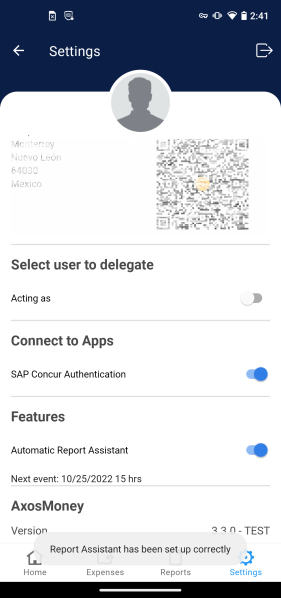
3. Below the Automatic Report Assistant, you will be able to see the Date and Hour of the next event.
4. Once the scheduled time has elapsed, you will receive a notification from the app informing you that the Automatic Reports Assistant has finished creating a report.
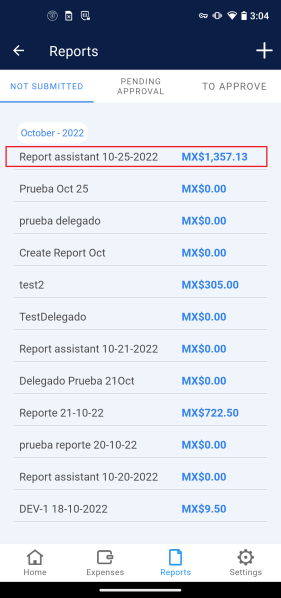
5. Enter your app and go to the “Reports” screen. You will see how a report with the name “Report assistant mm/dd/yy” was created, when you open it, this report will contain the expenses that you previously had in your account in the “Expenses” screen before the scheduled date of execution of the Report Assistant.
6. When you open the entry, the report will contain the expenses that you previously had in your account before the scheduled date of execution of the Report Assistant.

