What is a Warning?
A WARNING is a message from a predefined catalog that indicates an event that requires attention. Its purpose is to warn about situations that occur in the invoice flow, for example, invoice rejection, exceptions, etc.
In this section you can configure the warnings predetermined by the system, these can be activated or deactivated and can be sent by web message (portal bell 🔔), app message or email (some options may not be available).
Below you will find step-by-step instructions for doing the following:
- How to Configure a Warning?
- How to Change the Warning Status?
- How to Reset Values?
- How to Save Changes?
- Using Filters and Columns
How to Configure a Warning?
To configure a warning you can follow the following steps:
1. Enter ACS Management and select the ACP option.
2. In the left side menu select the Communication subsection in the Configuration section.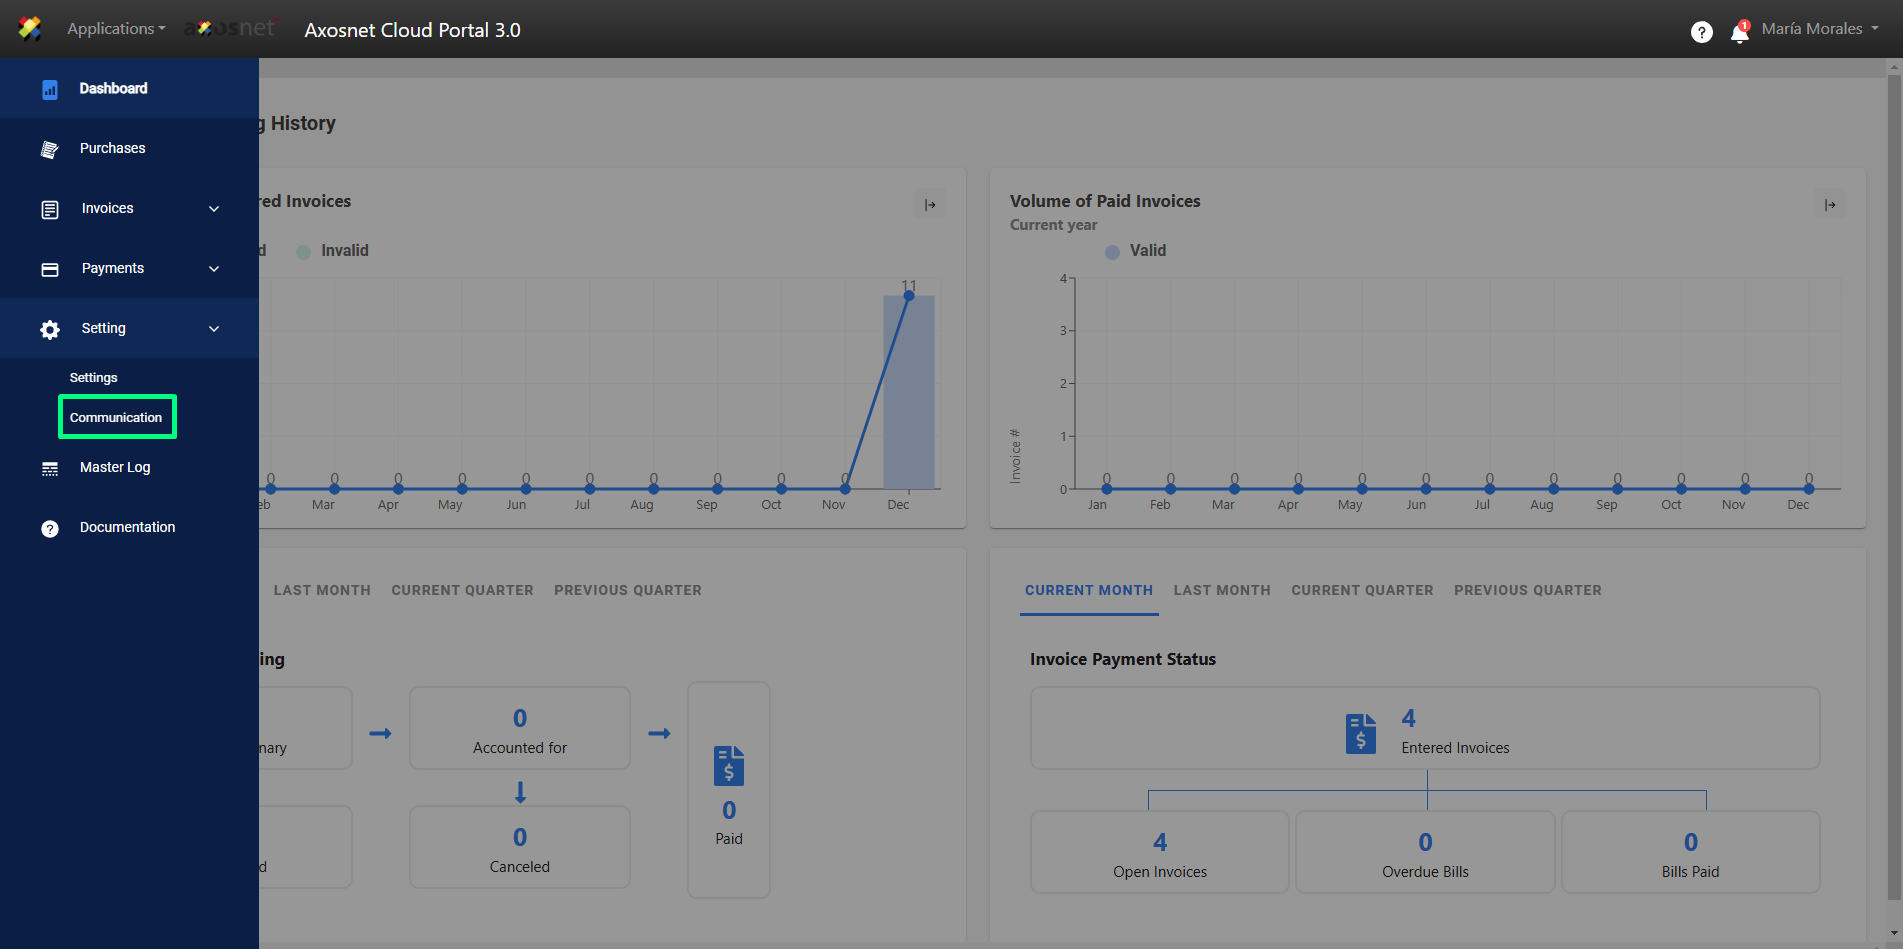
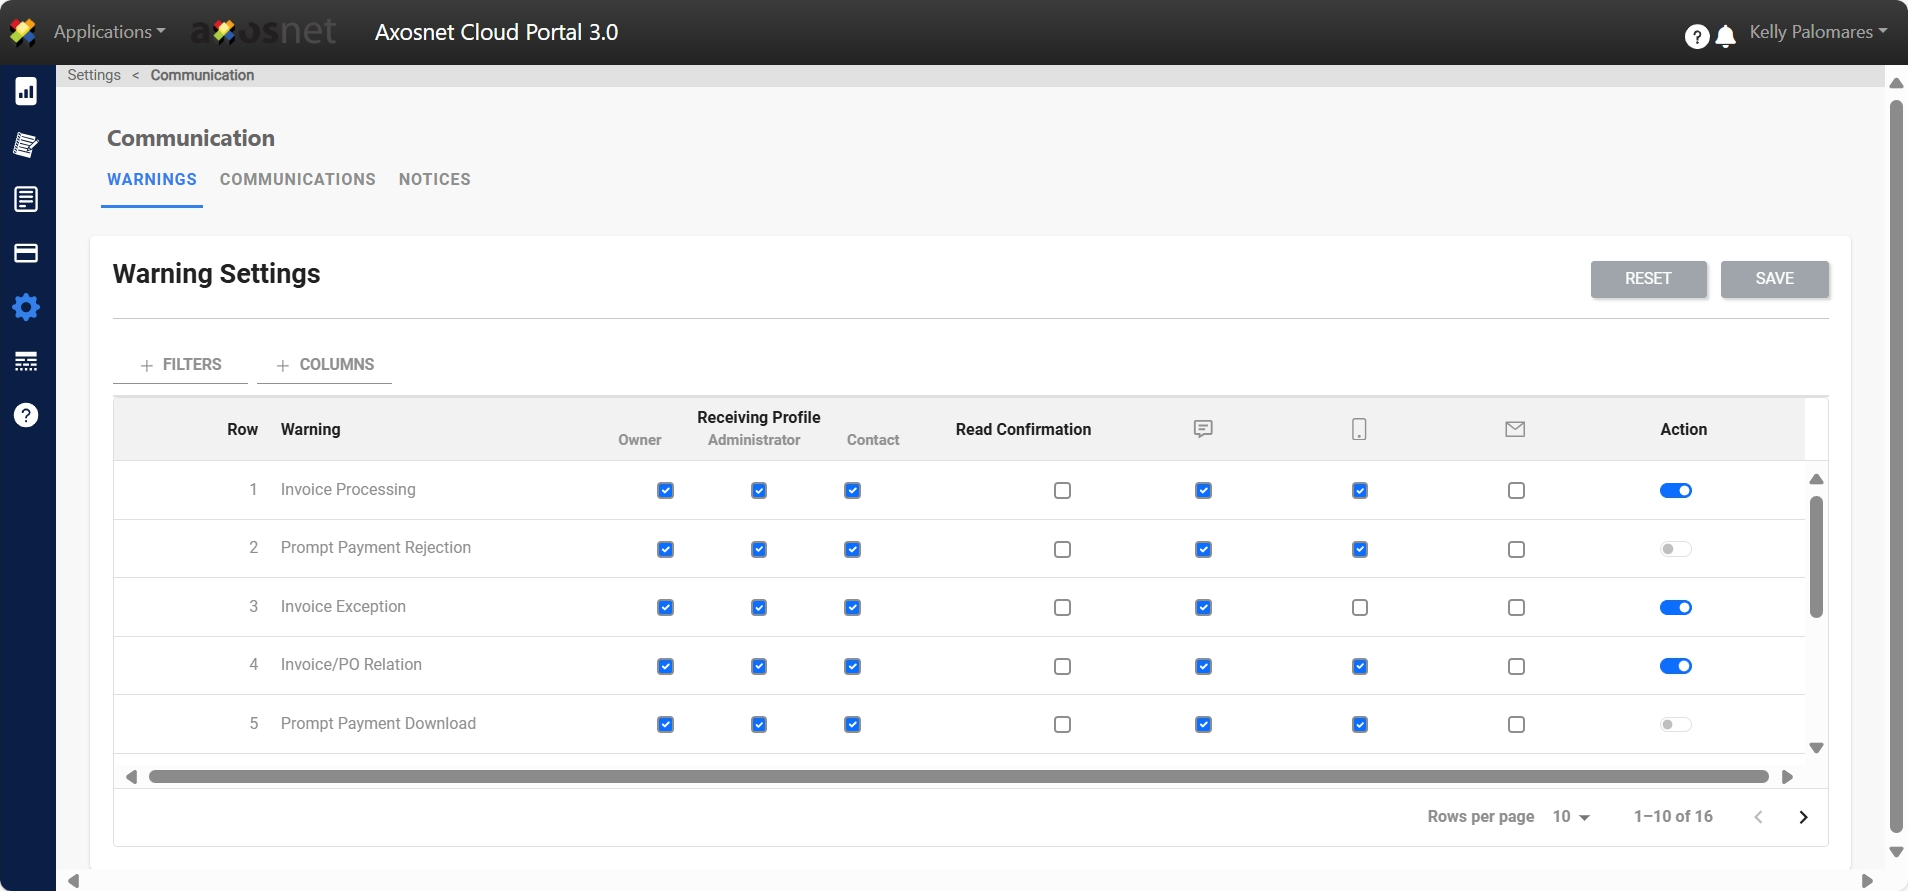
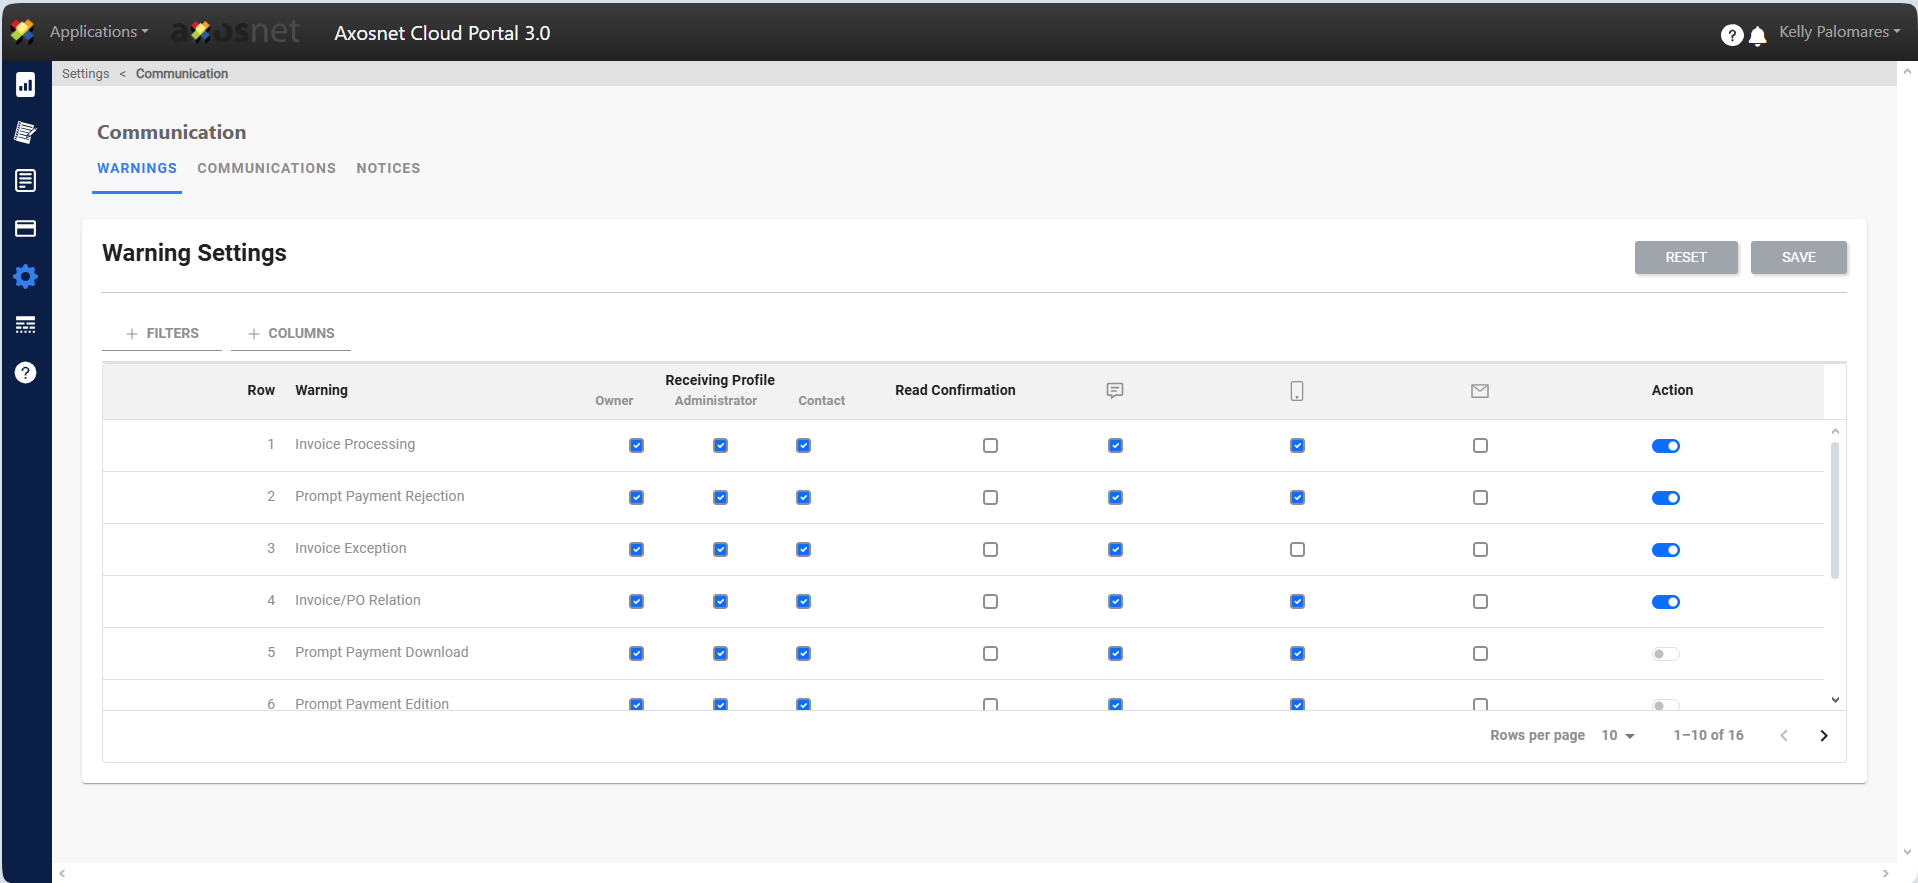
3. When you enter, the Warnings tab will be displayed.
In this section we can select which warnings will be activated and we can choose the means by which they reach the end user. Once you have selected the options that you want to activate or deactivate, click SAVE.
For example, to configure the supplier to receive a notification (warning) when the customer returns an invoice with an exception, follow these steps:
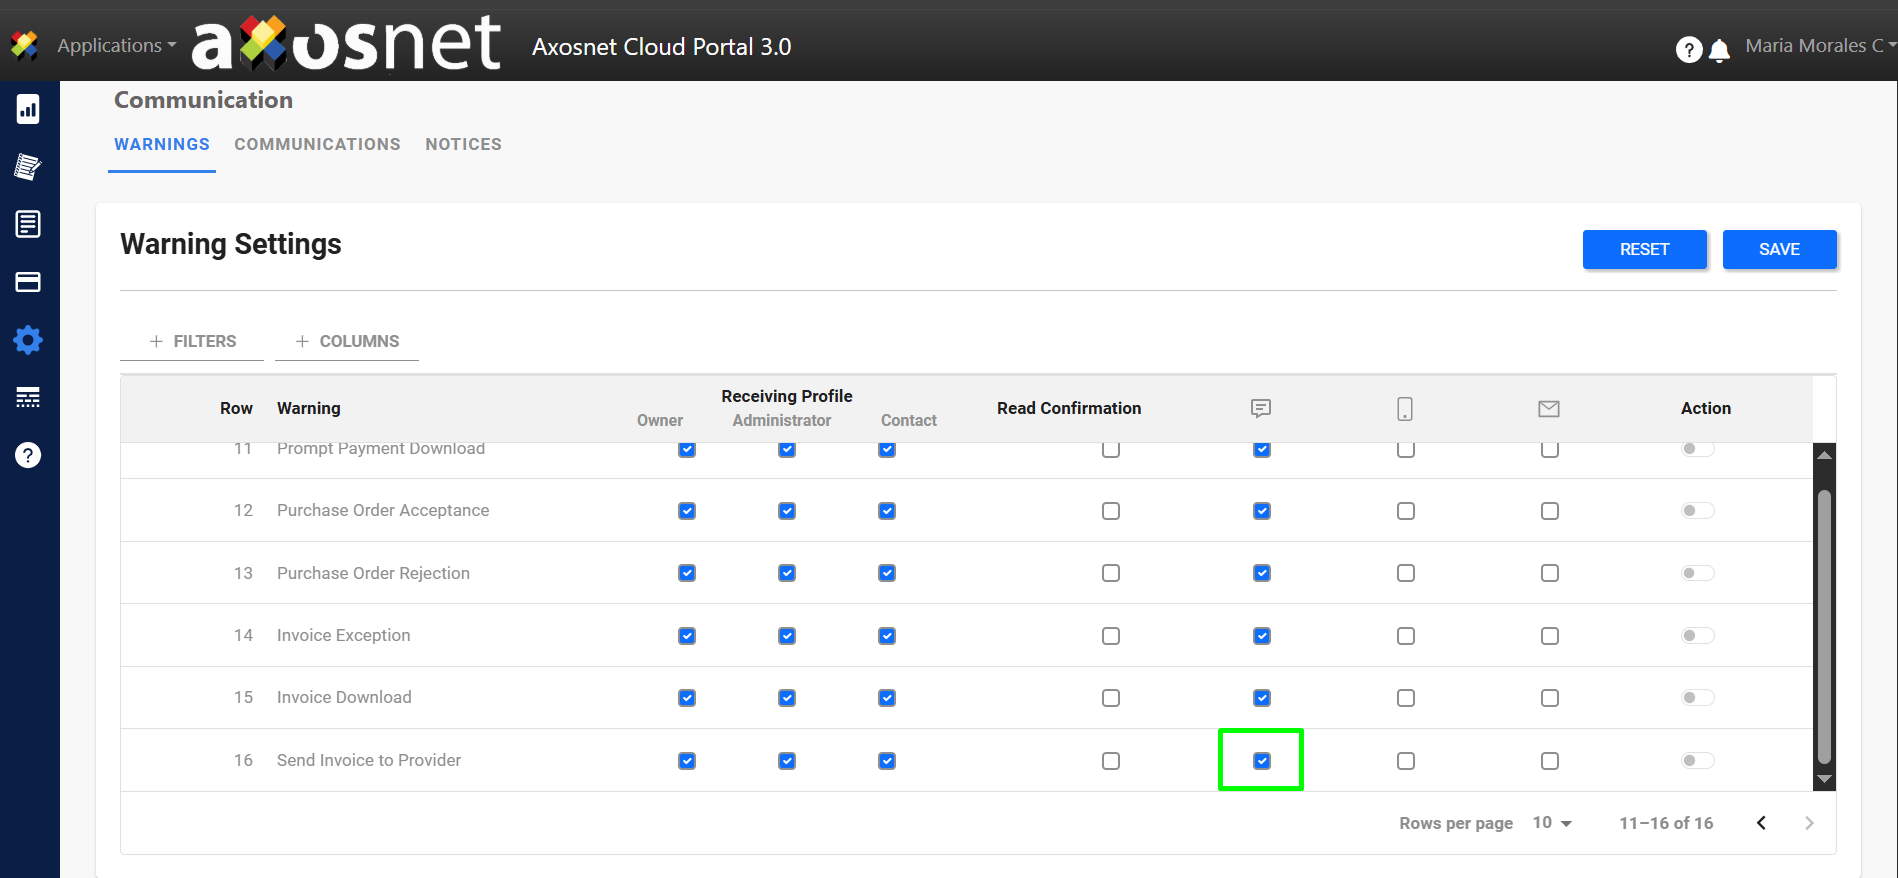
1. Select the “Send Invoice to Supplier” option and select the profile or profiles that will receive the notification (in this example, all three profiles).
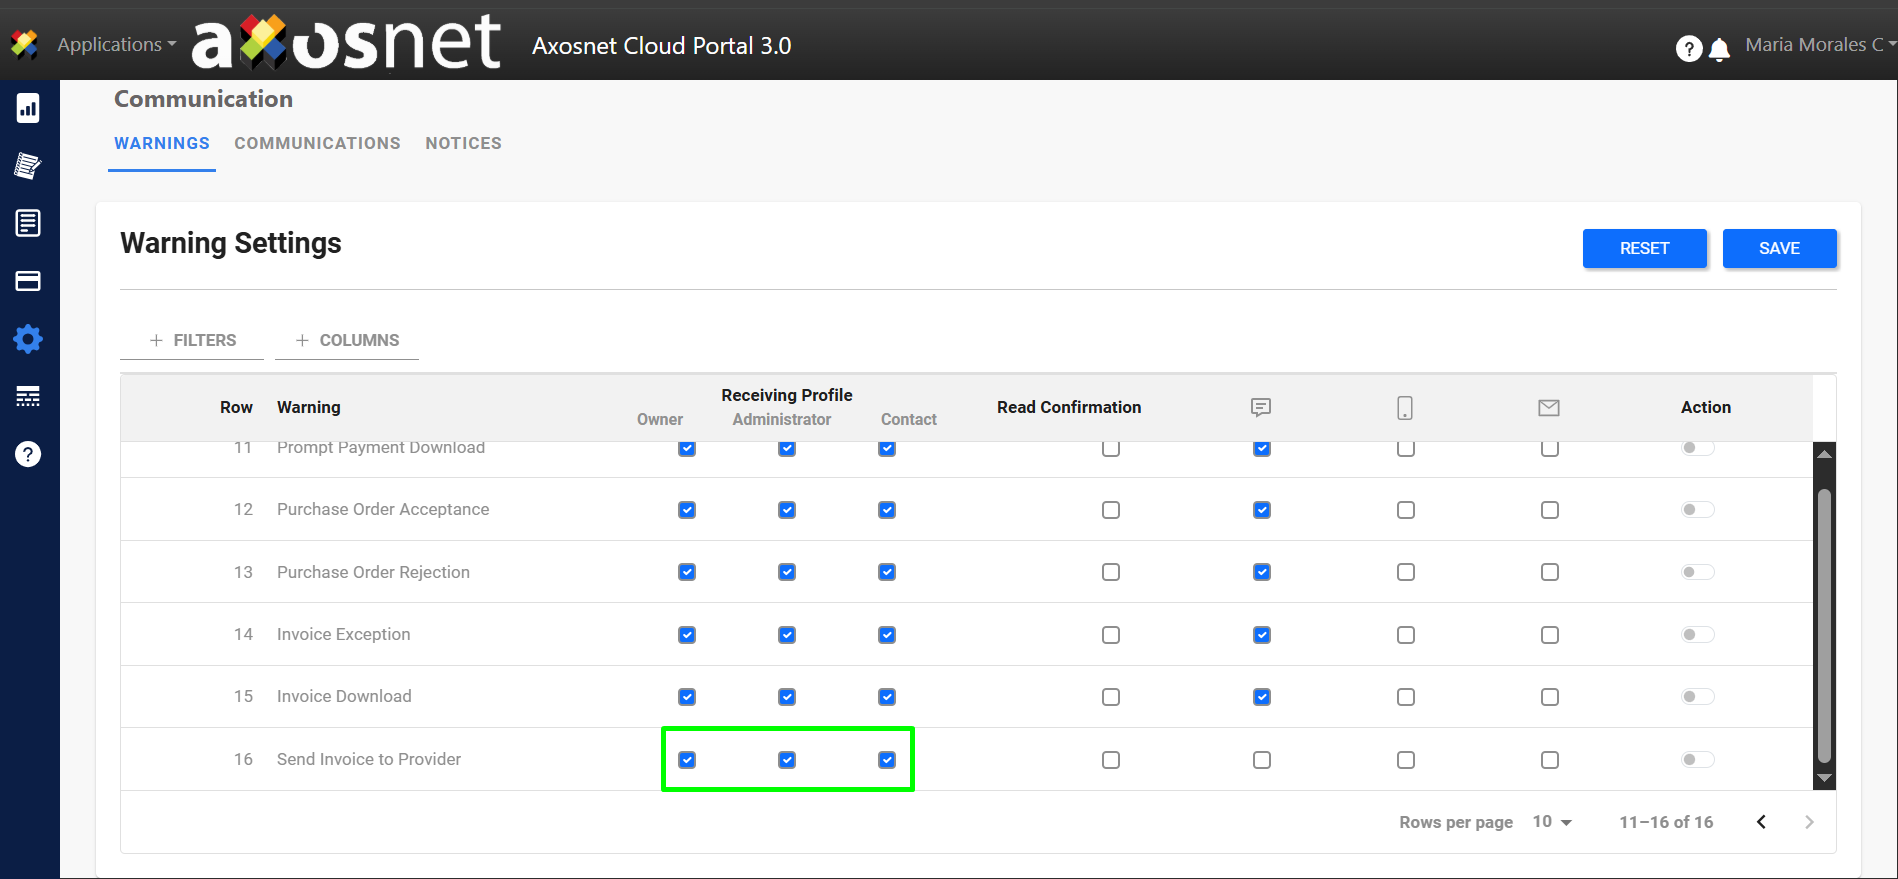
2. Select the means by which the notification will be sent (in this example, the portal bell).
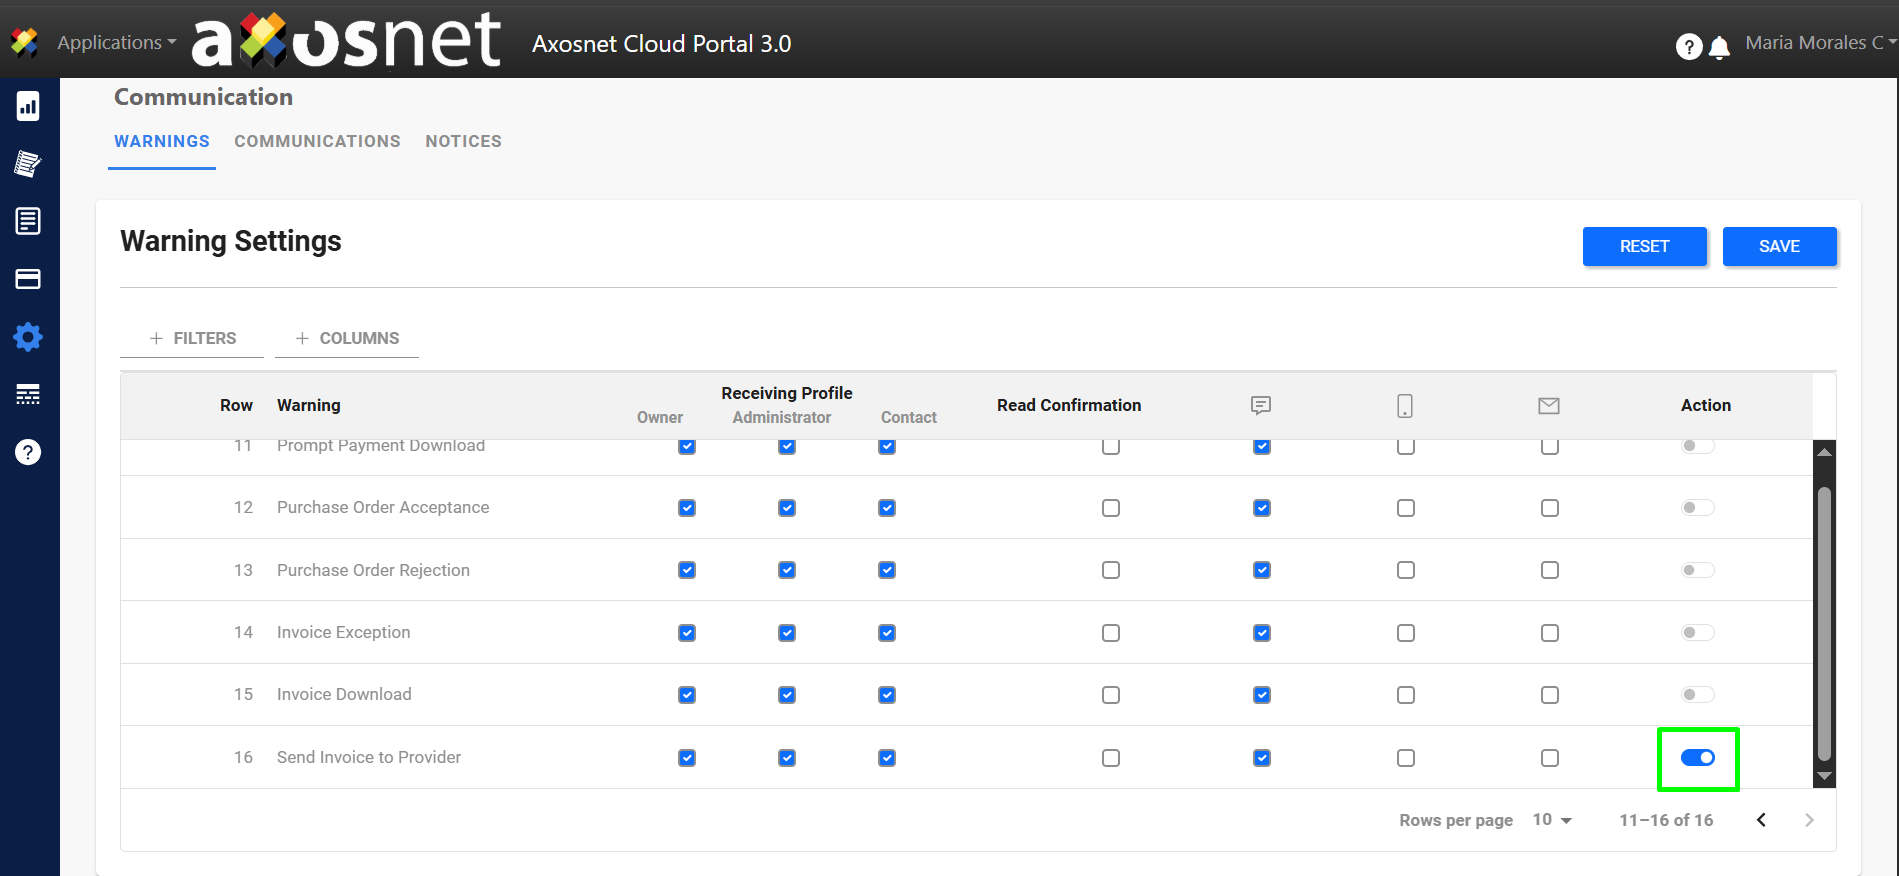
3. Activate the switch to enable notifications.
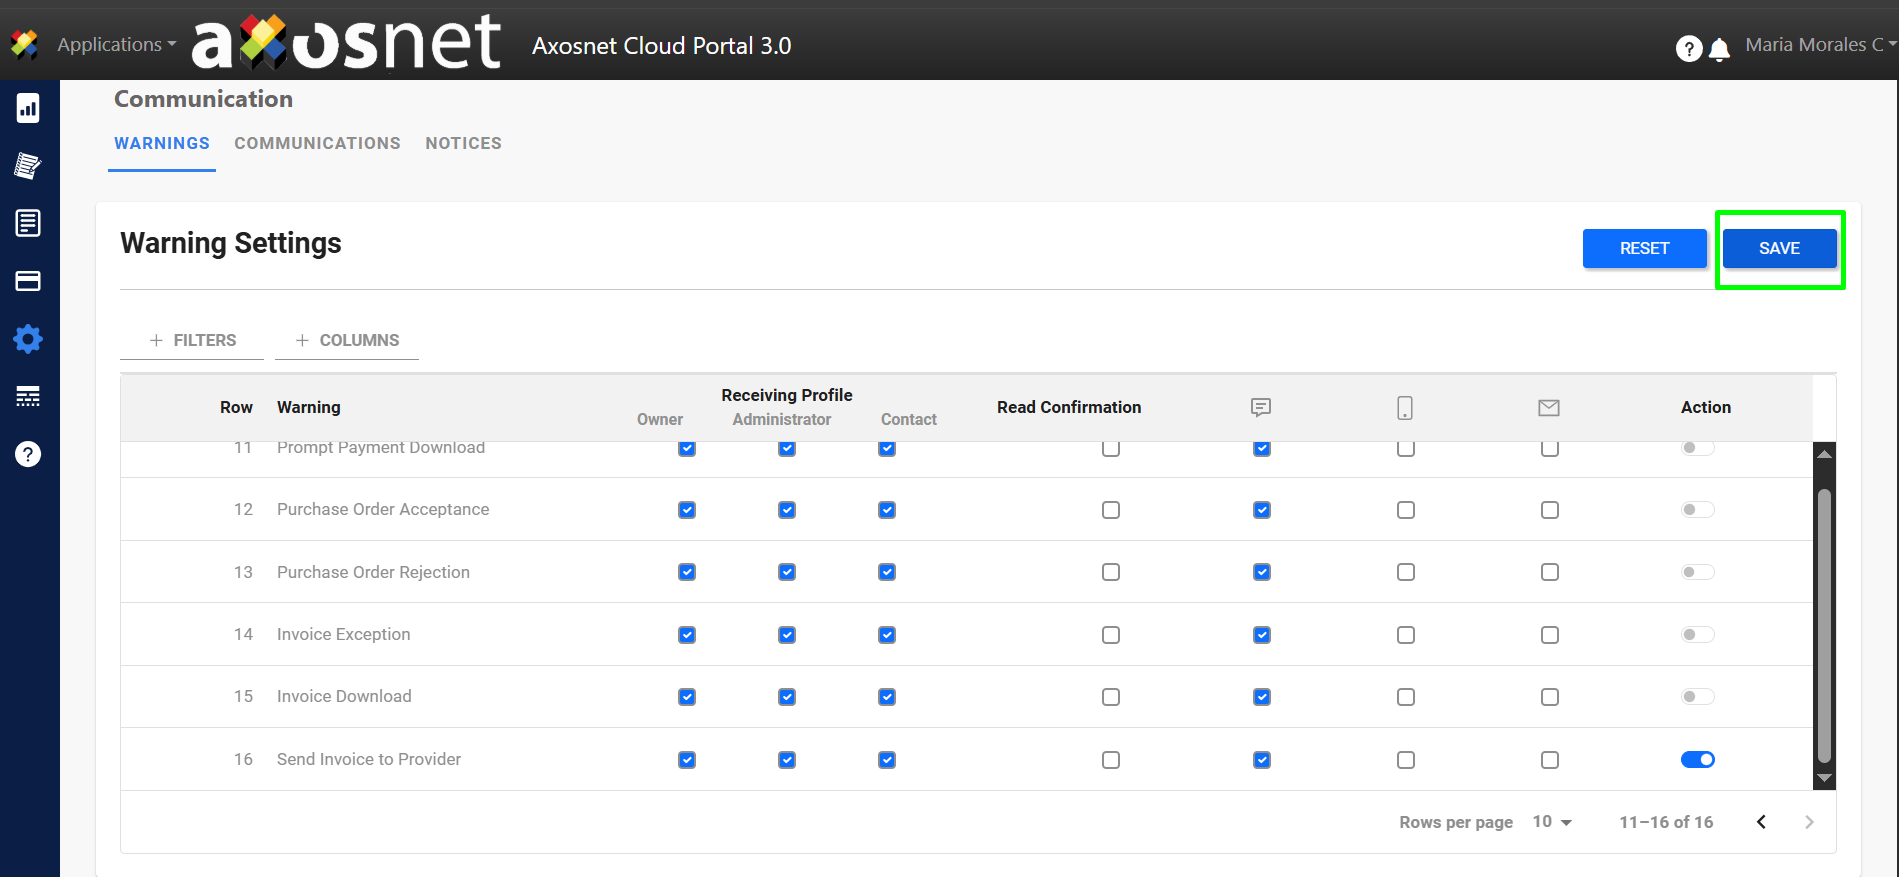
4. Click “SAVE”.
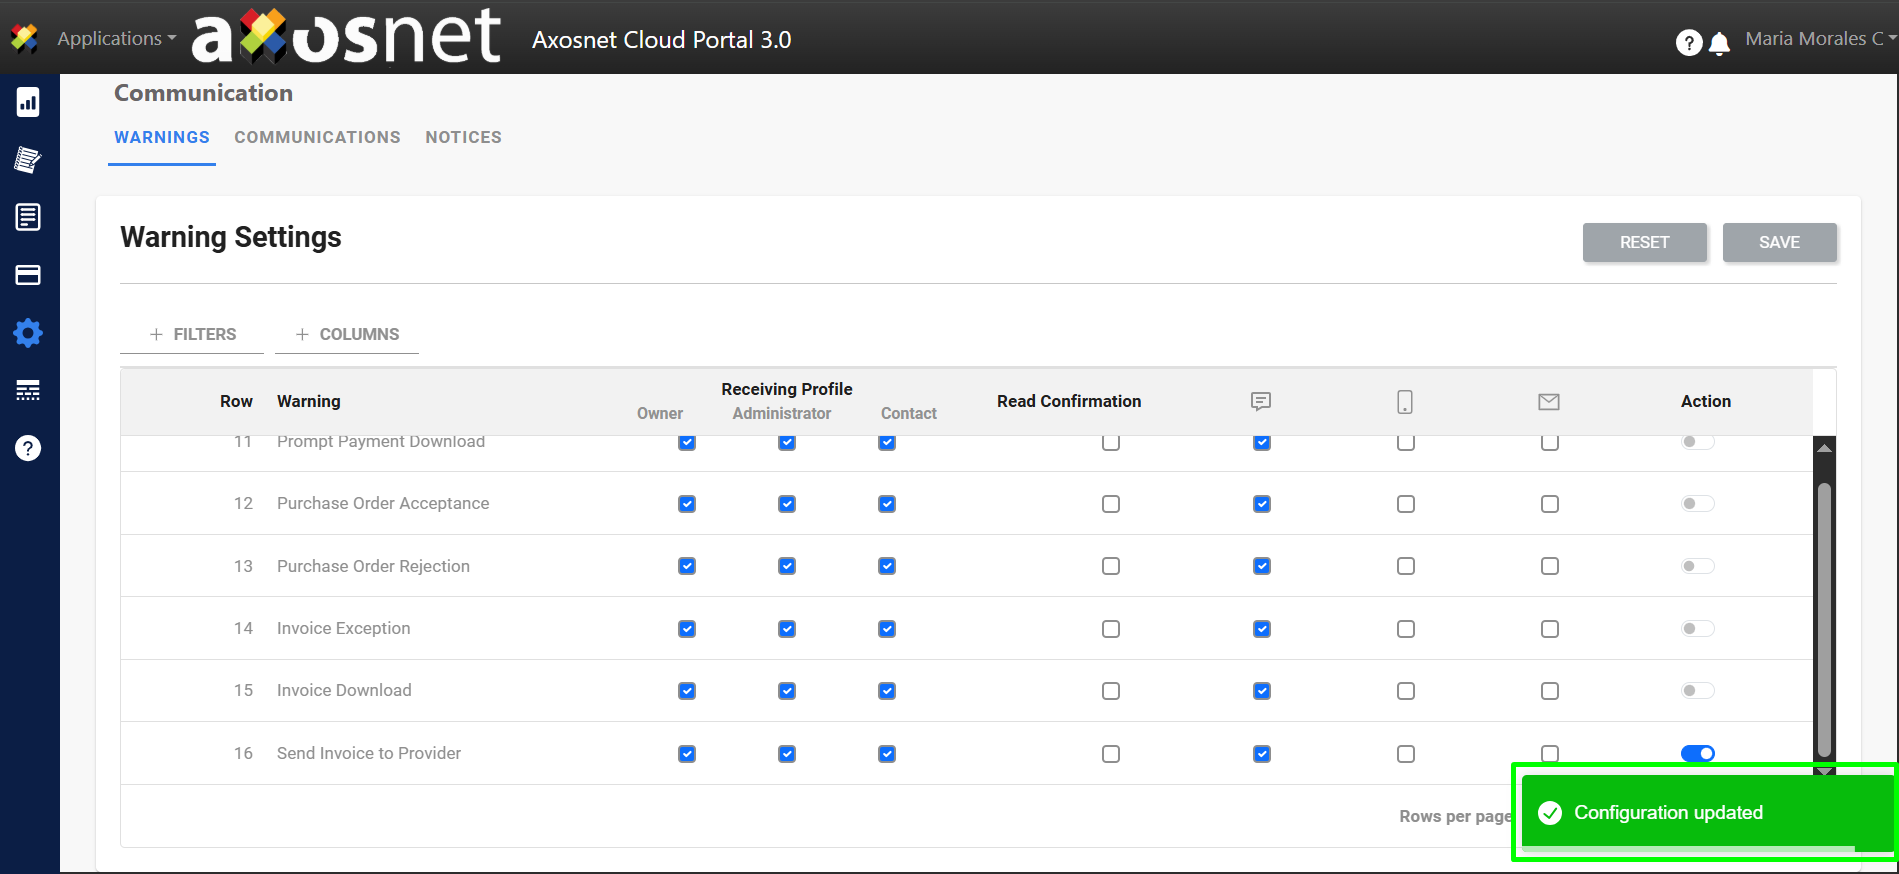
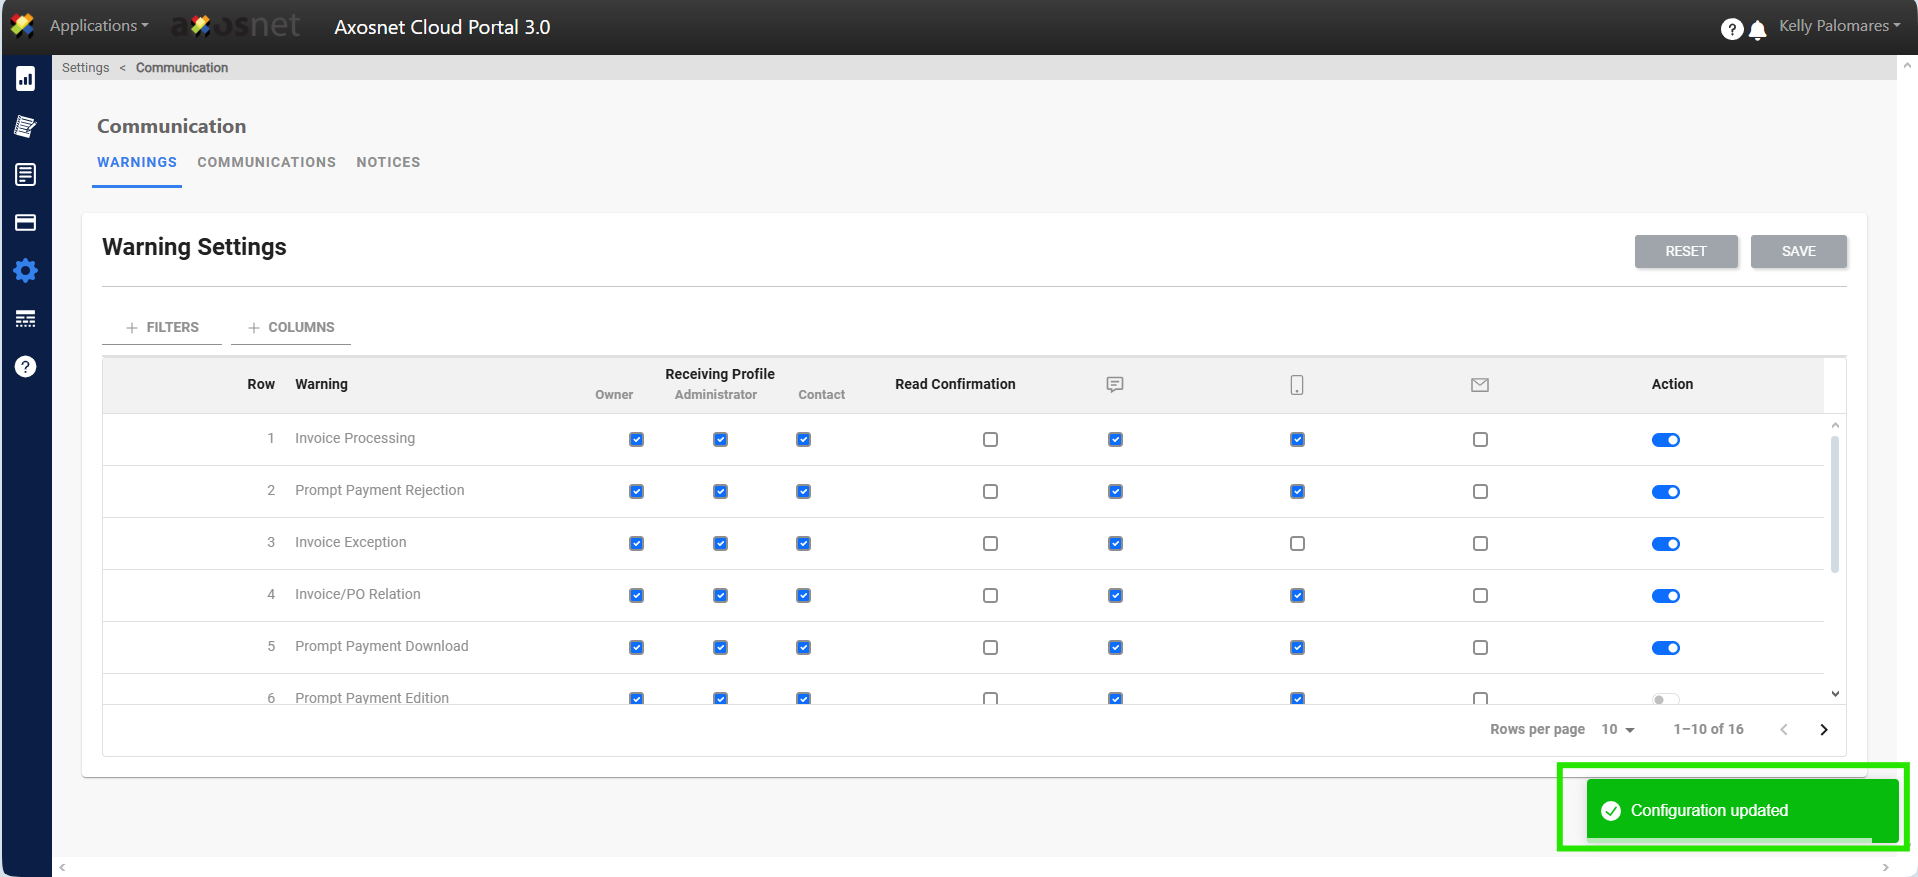
5. View the successful confirmation message.
How to Change the Warning Status?
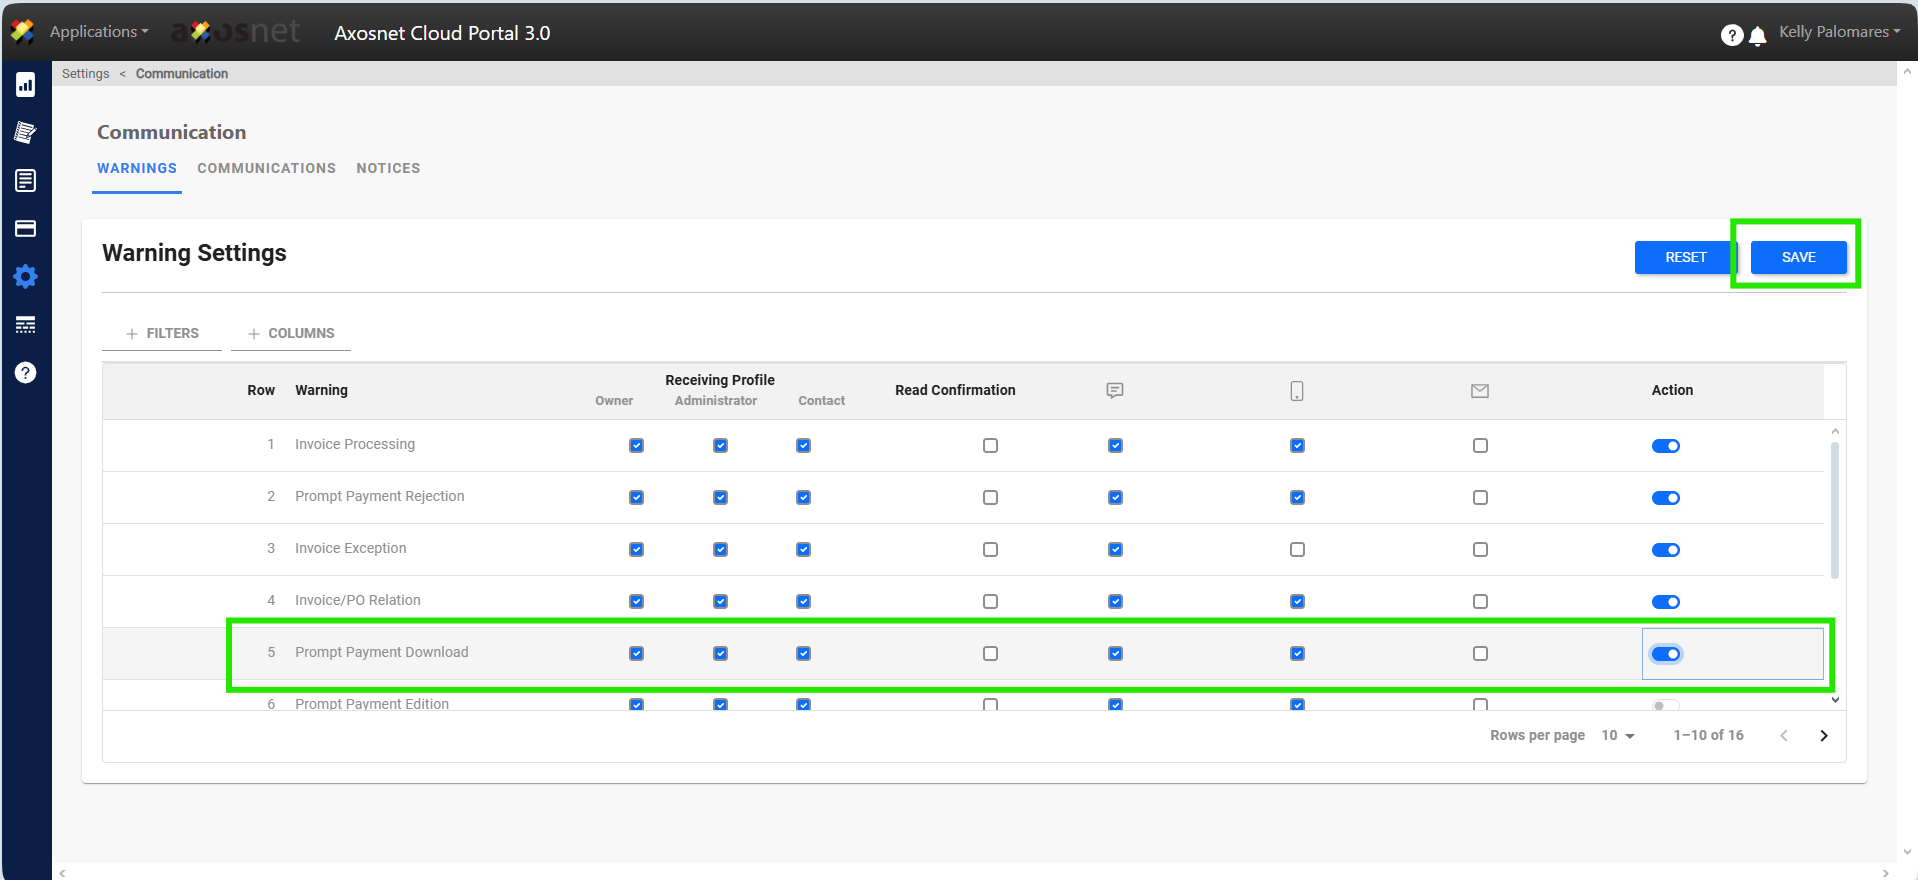
To change the status of a warning follow these steps:
1. Click on the switch shown in the image.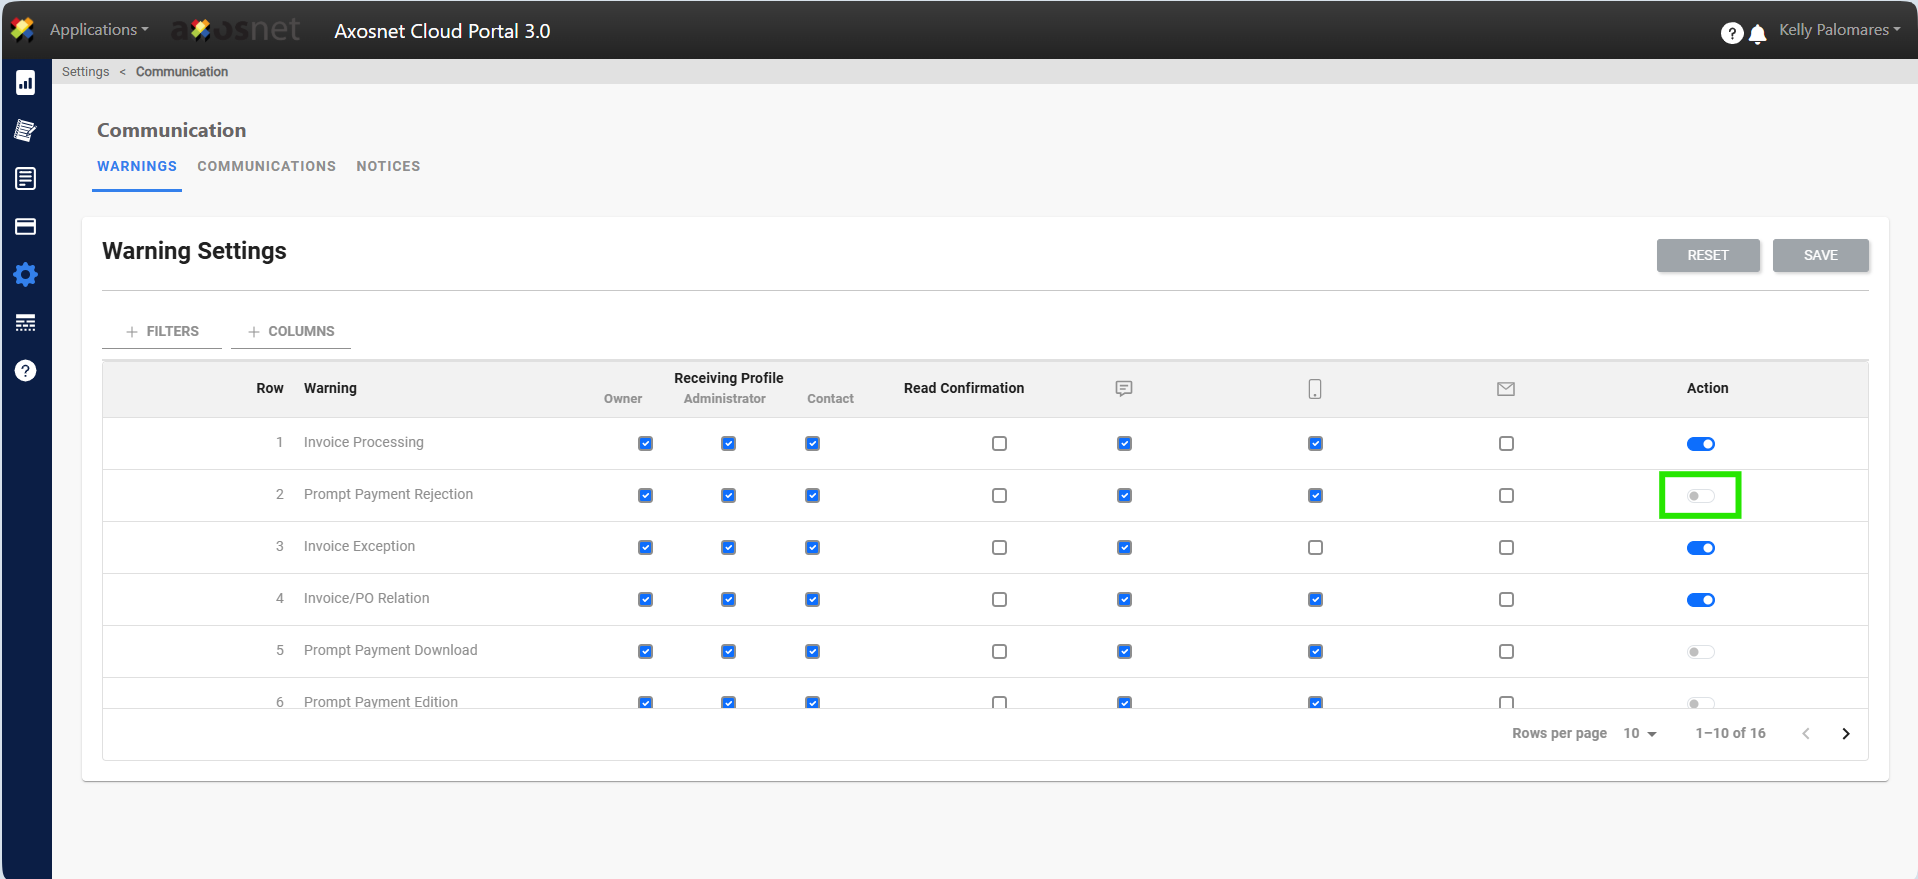
2. When you make the change, the SAVE option will be enabled, click on that option.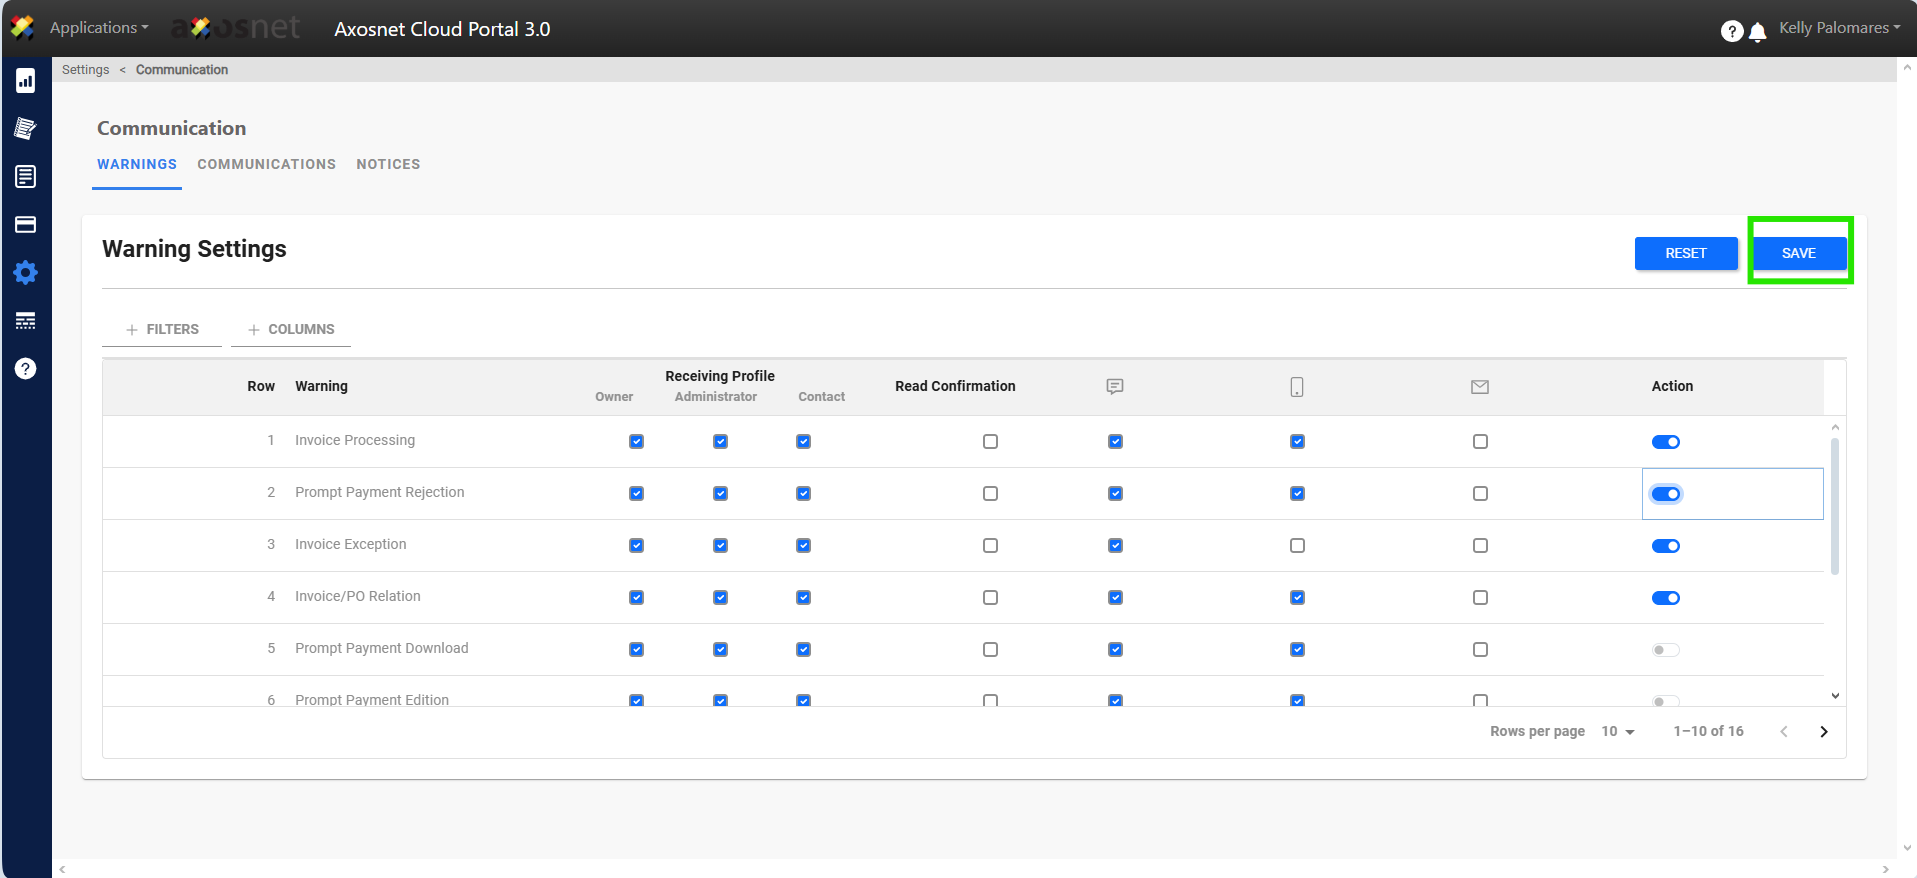
3. A message will appear to confirm that the changes have been made correctly.
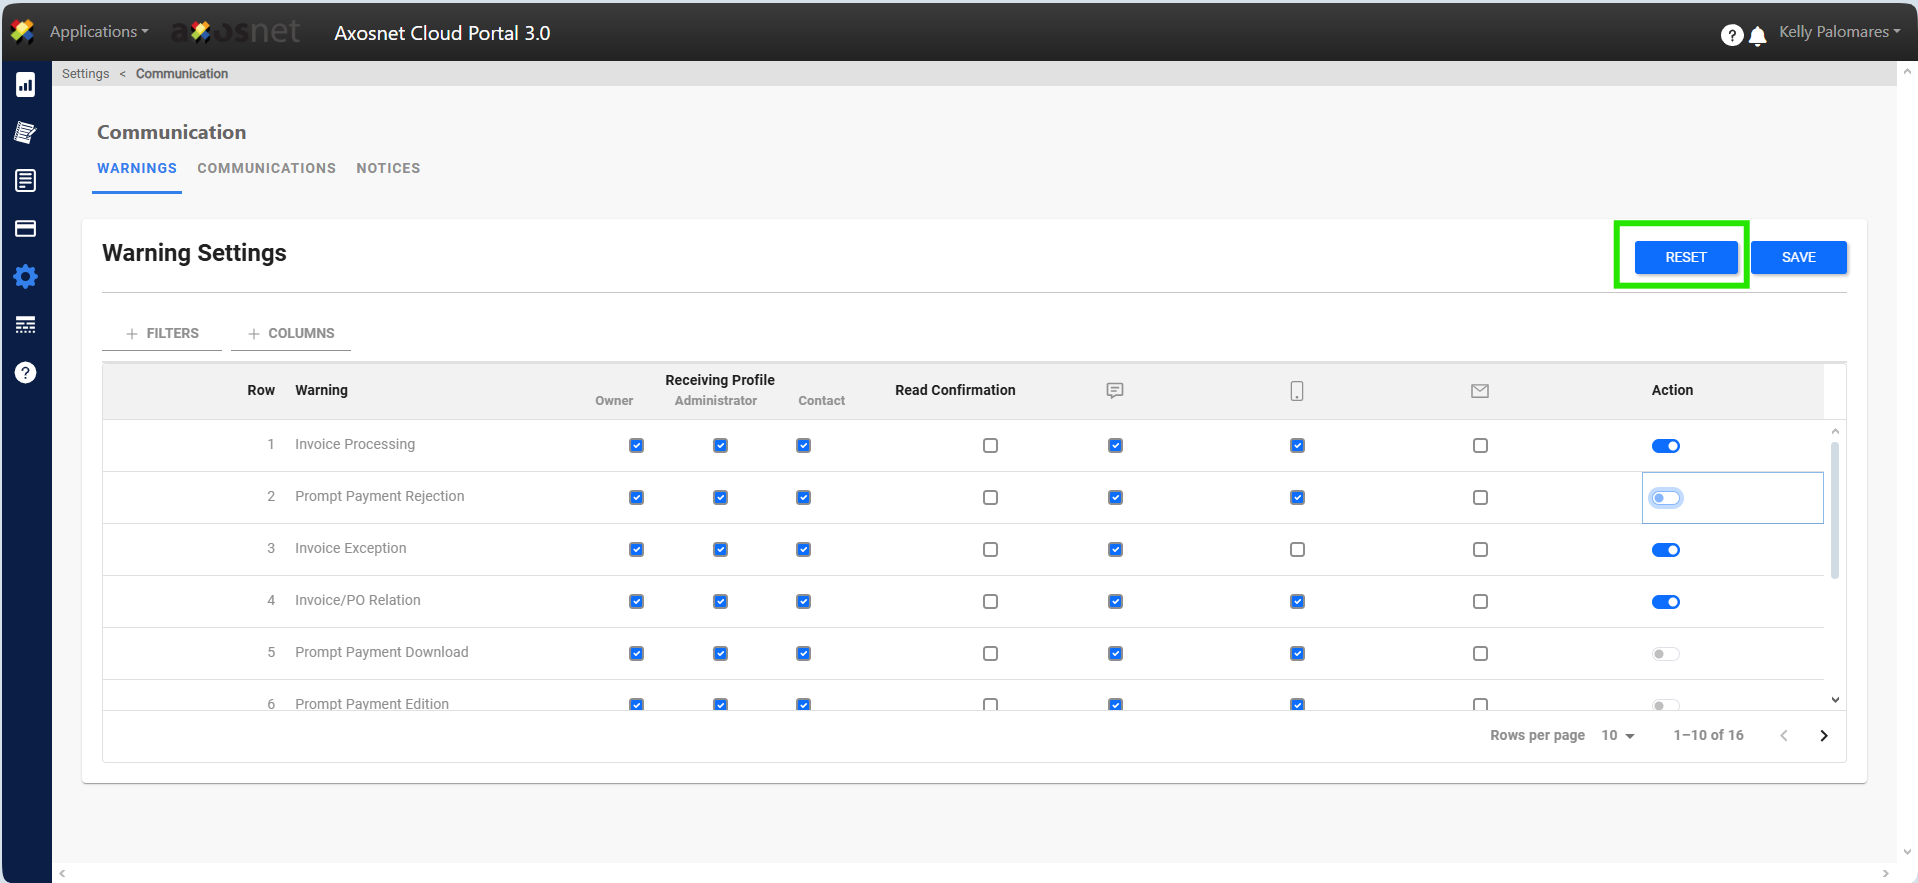
How to Reset Values?
In the Warnings section we will have the option to reset the changes we made before clicking SAVE.
We can select who the message will be sent to, the read confirmation or the means by which it arrives. If we click RESET, all the selections we have made will be deleted and we will see the screen with the last saved changes again.
How to Save Changes?
To save the changes in the Warnings section we only have to select the profile that receives, the read confirmation and the means by which the warning will arrive. Click SAVE and this will be the new warning configuration.
Using Filters and Columns
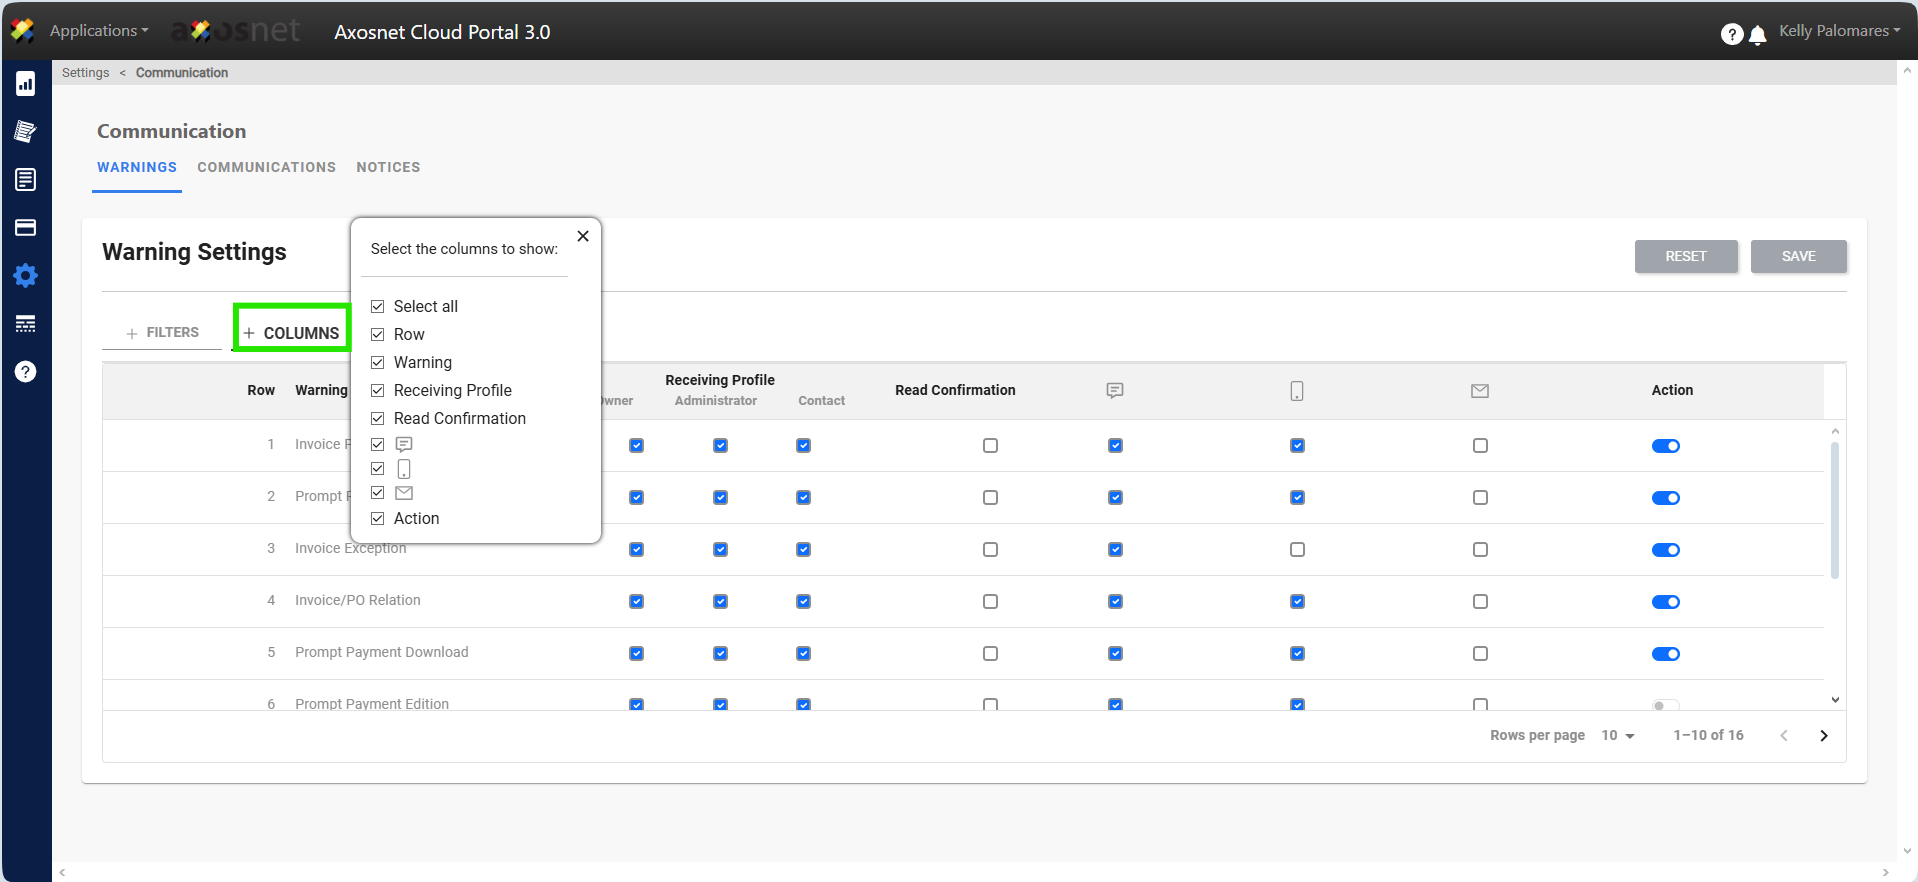
In the Warnings section we will have the option to search using filters or hide/show the necessary columns.
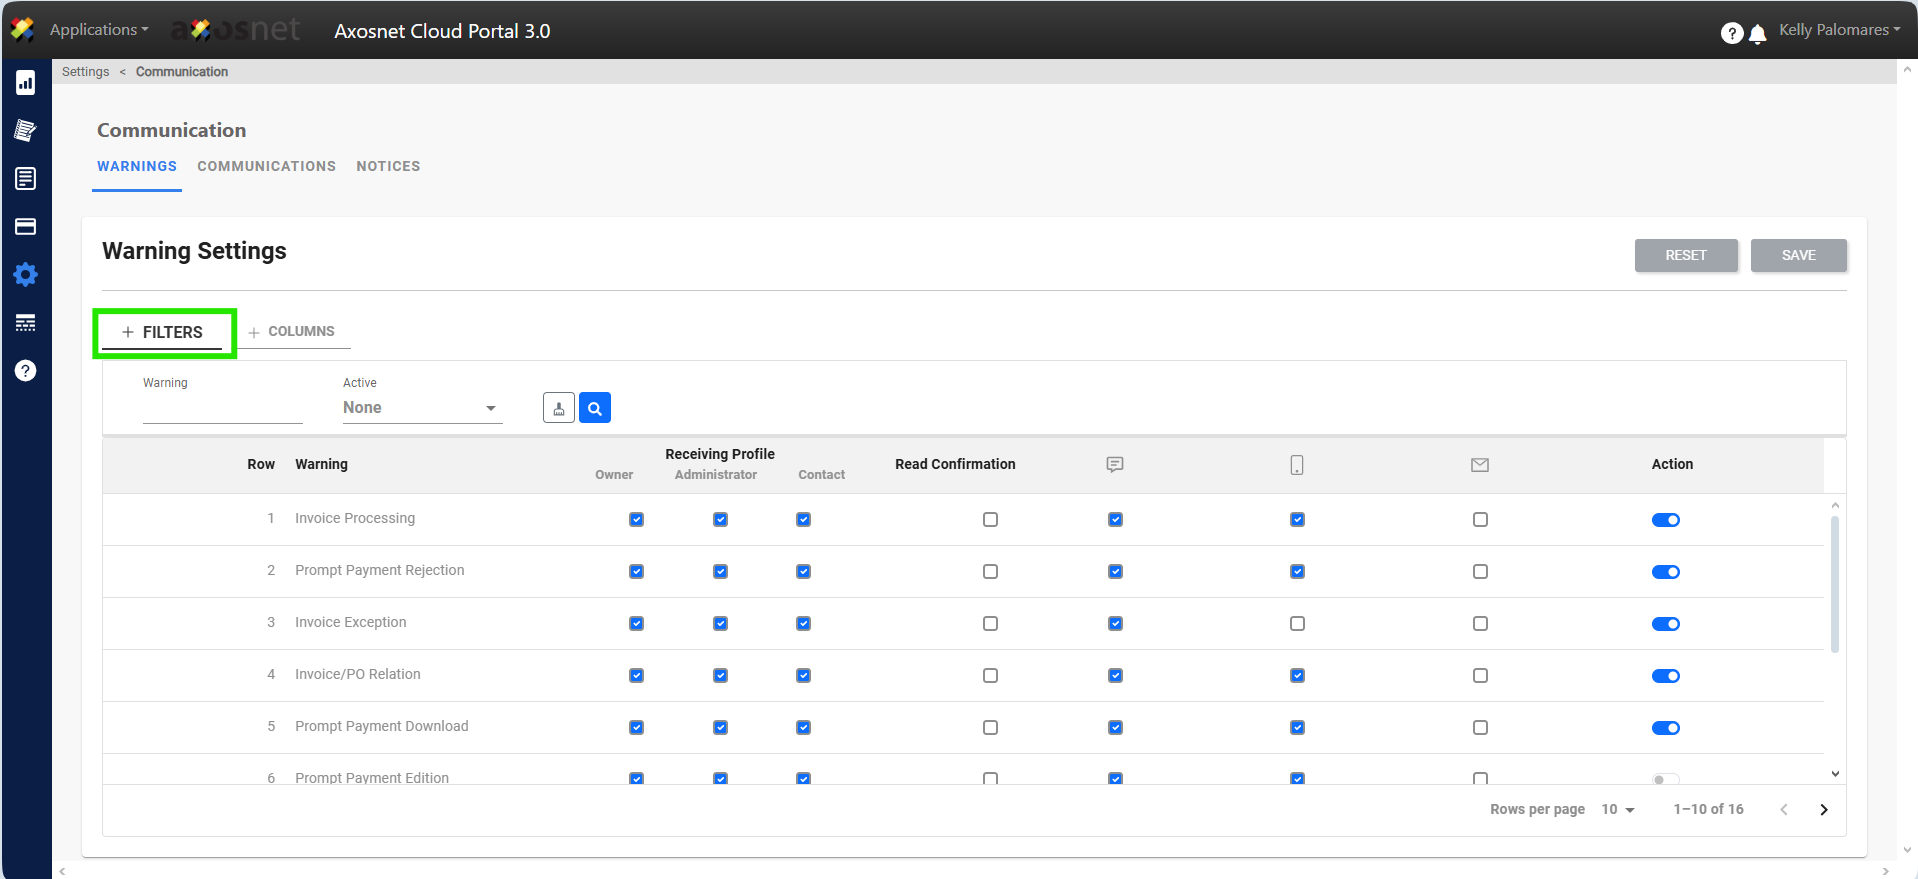
Using the Columns option, use the column selector to adjust as required.